Icon Tutorial #11 - Torn paper, Mixing Colored Images with Black and White
This was a request from oishiionigiri for this icon. I never saved the .psd, so this was as close as I could get it :)
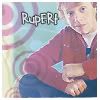
From
to
Step One
I cropped this image. Sharpened it, Auto Contrast, Auto Levels, Auto Color, then resized it down to 100x63. It doesn't have to be exactly that, but that's how mine turned out.
Step Two
Created a New Image 100x100 pixels. Paste the base onto the background. Dragged the image to the top of the new image like so:

Black border there to show the white.
Step Three
Duplicate the image twice. Set the first duplicate layer to Screen Opacity 50% The second to Soft Light Opacity 100%

Again black border there to show white background.
Step Four
Paste your base under the first base layers and drag it to the bottom of the icon. Go to Edit>Transform>Flip Horizontal. This next part should be step five, but I could go all the way back to save it before I desaturated so it's here. Go to Image>Adjustments>Desaturate (Ctrl+Shift+U) You can auto contrast it if you want. I did because I felt it needed it.

Step Five
Duplicate your black and white base twice again. This time set the first duplicated layer to Screen Opacity 100% and the second to Soft Light Opacity 100%

Step Six
Now you can merge your layers. Layer>Merge Visible (Shift+Ctrl+E) and then I used grrliz_icons' tutoral for torn paper. IMPORTANT! Instead of using the Eraser in the 17 natural brush shown, I used the same brush tip only with the Brush tool in #FFFFFF size 11. Then I made the border to cover that horrible line between the images.

Step Seven
Then I added my tiny text. Georgia Size 5 pt Tracking 1000 in #000000. I wrote jibberish really adding a space here and there.

Step Eight Big step kinda.
Finally, Merge all your layers again. Then I took the coloring from this tutorial. She/He starts from the bottom up. I skipped the first step and added only one screen layer at 80%. I deleted the coloring and the screen from the white torn paper part down to the black and white image because I didn't like it. I also set the multiplied orange layer's opacity to 20% instead of 50%. Then I moved the pink blob around so that it fit the icon; this layer was also at Screen 80% instead of 100 :).

Step Nine
Merge all you layers again. Then Duplicate it go to Filter>Blur>Gaussian Blur 3 pixels. Then I set a Soft eraser on 100% and erased the gaussian layer for the Black and white part. Merga all again then save! :D

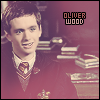
Original:
Tutorial:
I know it's different, but I made the original a really long time ago. I don't really use those techniques anymore, but I kinda do like the tutorial one better :) You can probably make it softer by not using the screen layers and not sharpening it since the image was soft anyway.
If you have any questions, feel free to ask :)
Other Tutorials
Icons not shown actual size :)

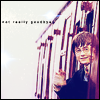


From
to
Step One
I cropped this image. Sharpened it, Auto Contrast, Auto Levels, Auto Color, then resized it down to 100x63. It doesn't have to be exactly that, but that's how mine turned out.
Step Two
Created a New Image 100x100 pixels. Paste the base onto the background. Dragged the image to the top of the new image like so:
Black border there to show the white.
Step Three
Duplicate the image twice. Set the first duplicate layer to Screen Opacity 50% The second to Soft Light Opacity 100%
Again black border there to show white background.
Step Four
Paste your base under the first base layers and drag it to the bottom of the icon. Go to Edit>Transform>Flip Horizontal. This next part should be step five, but I could go all the way back to save it before I desaturated so it's here. Go to Image>Adjustments>Desaturate (Ctrl+Shift+U) You can auto contrast it if you want. I did because I felt it needed it.
Step Five
Duplicate your black and white base twice again. This time set the first duplicated layer to Screen Opacity 100% and the second to Soft Light Opacity 100%
Step Six
Now you can merge your layers. Layer>Merge Visible (Shift+Ctrl+E) and then I used grrliz_icons' tutoral for torn paper. IMPORTANT! Instead of using the Eraser in the 17 natural brush shown, I used the same brush tip only with the Brush tool in #FFFFFF size 11. Then I made the border to cover that horrible line between the images.
Step Seven
Then I added my tiny text. Georgia Size 5 pt Tracking 1000 in #000000. I wrote jibberish really adding a space here and there.
Step Eight Big step kinda.
Finally, Merge all your layers again. Then I took the coloring from this tutorial. She/He starts from the bottom up. I skipped the first step and added only one screen layer at 80%. I deleted the coloring and the screen from the white torn paper part down to the black and white image because I didn't like it. I also set the multiplied orange layer's opacity to 20% instead of 50%. Then I moved the pink blob around so that it fit the icon; this layer was also at Screen 80% instead of 100 :).
Step Nine
Merge all you layers again. Then Duplicate it go to Filter>Blur>Gaussian Blur 3 pixels. Then I set a Soft eraser on 100% and erased the gaussian layer for the Black and white part. Merga all again then save! :D
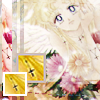
Original:
Tutorial:
I know it's different, but I made the original a really long time ago. I don't really use those techniques anymore, but I kinda do like the tutorial one better :) You can probably make it softer by not using the screen layers and not sharpening it since the image was soft anyway.
If you have any questions, feel free to ask :)
Other Tutorials
Icons not shown actual size :)