Icon Tutorial # 10 - Blending with Layer Masks
This is another tutorial requested by therapy. It is from this batch of icons. :)
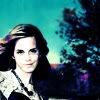
From
to
Photoshop CS2
Layer Masks
The best tip I can give anyone for blending images is High Resolution images! It's really worth the disk space.
Step One
Just for the record I sharpened the main image Three Times. Two Sharpens and One Sharpen Edges before I sized each base down to their 100x size :) DO NOT ADJUST YOUR COLORING!
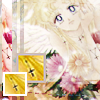
First I cropped this image to:

Then I undid all my cropping and recropped it again to:

Step Two
Create a new image paste your two bases into this new image and move them to where you want your subjects to be.
Here's where I moved the first. Black border just to show where the white is :)

The second:

With both layers visible:
Step Three
Now this is the part where I honestly had a lot of trouble coming up with the way to explain what I do. In your layers palette make sure your second layer (or layer you want to blend in with the other.) is highlighted then click this button. You don't have to add this step, but this is just an easier way of erasing the background without having to delete the image. Basically you can delete the mask and start over with a new one if you mess up :)
This is where your eye comes in. I had my eraser brush set on white (#FFFFFF) (keep foreground and background colors on white and black (#000000). Instead of deleting the layer mask to start over, you can erase in black to fix it.) and I deleted the background of the second image base so that it looked like she was pressed back against it. I think what makes it blend so well is the fact that I kept the shadowing of her legs there and I got really close to her body. I used a soft 13 pixel round brush in case you're wondering. Leave the right side alone! This is what I got.

:)
As you can see, the placement of the second base matches with the first base's background. It's about placement and erasing. The flower on top of mandy in the second place followed the line in the wallpaper of the second.
Example:

So yeah, that's my secret I guess. I honestly just get lucky and when I go back to analyze I realize those things. :)
Step Four
Next make a New Layer. Hit Ctrl+Shift+E This puts both bases into one layer. Filter>Blur>Gaussian Blur @ 3 pixels.

Step Five
Text! I used Carnevalee Freakshow in #F61257 Spelled out laughter. Held Ctrl+Left Mouse Button to rotate it. Under it's blending options i kept the opacity normal and gave it a 1pixel stroke in white. I also added a Drop Shadow with the settings like so:
Angle 115 degrees
Distance: 1
Size: 3

Step Six
Added this
brush (by gender) on a new layer and Ctrl+T to rotate it so that it fit under laughter. If you want to know how to make images into brushes this link helps. I gave it the same Blending Options as in Step Five. :)

Step Seven
Finally, Layer>Flatten Image Now you can adjust your coloring :) I did it in this order: Auto Contrast, Auto Color, Auto Levels. Then I duplicated the base and set it to screen opacity 40%. Layer>Flatten Image again. Now you save your image! I save in .png to preserve coloring and what not.
Tutorial:
Original:
Again some differences, but not much.
If you're not sure on anything, please feel free to ask. I couldn't upload the .psd this time because my server won't allow me exceed 200kb :( I don't mind questions though ^_^
Other Tutorials
Icons not shown actual size :)


From
to
Photoshop CS2
Layer Masks
The best tip I can give anyone for blending images is High Resolution images! It's really worth the disk space.
Step One
Just for the record I sharpened the main image Three Times. Two Sharpens and One Sharpen Edges before I sized each base down to their 100x size :) DO NOT ADJUST YOUR COLORING!
First I cropped this image to:
Then I undid all my cropping and recropped it again to:
Step Two
Create a new image paste your two bases into this new image and move them to where you want your subjects to be.
Here's where I moved the first. Black border just to show where the white is :)
The second:
With both layers visible:
Step Three
Now this is the part where I honestly had a lot of trouble coming up with the way to explain what I do. In your layers palette make sure your second layer (or layer you want to blend in with the other.) is highlighted then click this button. You don't have to add this step, but this is just an easier way of erasing the background without having to delete the image. Basically you can delete the mask and start over with a new one if you mess up :)
This is where your eye comes in. I had my eraser brush set on white (#FFFFFF) (keep foreground and background colors on white and black (#000000). Instead of deleting the layer mask to start over, you can erase in black to fix it.) and I deleted the background of the second image base so that it looked like she was pressed back against it. I think what makes it blend so well is the fact that I kept the shadowing of her legs there and I got really close to her body. I used a soft 13 pixel round brush in case you're wondering. Leave the right side alone! This is what I got.
:)
As you can see, the placement of the second base matches with the first base's background. It's about placement and erasing. The flower on top of mandy in the second place followed the line in the wallpaper of the second.
Example:
So yeah, that's my secret I guess. I honestly just get lucky and when I go back to analyze I realize those things. :)
Step Four
Next make a New Layer. Hit Ctrl+Shift+E This puts both bases into one layer. Filter>Blur>Gaussian Blur @ 3 pixels.
Step Five
Text! I used Carnevalee Freakshow in #F61257 Spelled out laughter. Held Ctrl+Left Mouse Button to rotate it. Under it's blending options i kept the opacity normal and gave it a 1pixel stroke in white. I also added a Drop Shadow with the settings like so:
Angle 115 degrees
Distance: 1
Size: 3
Step Six
Added this
brush (by gender) on a new layer and Ctrl+T to rotate it so that it fit under laughter. If you want to know how to make images into brushes this link helps. I gave it the same Blending Options as in Step Five. :)
Step Seven
Finally, Layer>Flatten Image Now you can adjust your coloring :) I did it in this order: Auto Contrast, Auto Color, Auto Levels. Then I duplicated the base and set it to screen opacity 40%. Layer>Flatten Image again. Now you save your image! I save in .png to preserve coloring and what not.
Tutorial:
Original:
Again some differences, but not much.
If you're not sure on anything, please feel free to ask. I couldn't upload the .psd this time because my server won't allow me exceed 200kb :( I don't mind questions though ^_^
Other Tutorials
Icons not shown actual size :)