Icon Tutorial # 12 - Black and White Images Tone Effect
This was a request from oishiionigiri for this icon. I never saved the .psd, so this was as close as I could get it :)
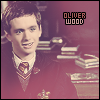
From
to
Step One
Take your black and white image and crop it down to 100x100. Create a New Image and paste your base into that image.

Step Two
Now, go back to your original base image. Go to Image>Mode>Indexed Color. My settings were like this. Then I went back to Image>Mode>RGB Color.
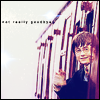
Your base should look something like this:

I copied and pasted it over at the new icon over the first base. Set it to Screen Opacity 80%.

Step Three
Duplicate your unpatterned base and bring it to the very top. Set it to Multiply Opacity 70%.

Step Four
Merge all your layers. Shift+Ctrl+E. Duplicate the new base twice. Set the first layer closest to your base to Screen Opacity 60% Then set the second duplicate layer to Soft Light Opacity 100%

Step Five
Merge all your layers and add a nice 1 pixel border in #000000. :)

Merge all again and save!
Step Six (optional)
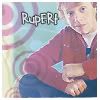
Text! For this one I used Jane Austen Size 18 pt. in #000000. Merge all layers again and Save! :D

And you're done! :D
Original:
Tutorial:
There is a difference, but it really all depeneds on the images you use :)
Feel free to ask questions :)
Other Tutorials
Icons not shown actual size :)

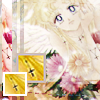


From
to
Step One
Take your black and white image and crop it down to 100x100. Create a New Image and paste your base into that image.
Step Two
Now, go back to your original base image. Go to Image>Mode>Indexed Color. My settings were like this. Then I went back to Image>Mode>RGB Color.
Your base should look something like this:
I copied and pasted it over at the new icon over the first base. Set it to Screen Opacity 80%.
Step Three
Duplicate your unpatterned base and bring it to the very top. Set it to Multiply Opacity 70%.
Step Four
Merge all your layers. Shift+Ctrl+E. Duplicate the new base twice. Set the first layer closest to your base to Screen Opacity 60% Then set the second duplicate layer to Soft Light Opacity 100%
Step Five
Merge all your layers and add a nice 1 pixel border in #000000. :)
Merge all again and save!
Step Six (optional)
Text! For this one I used Jane Austen Size 18 pt. in #000000. Merge all layers again and Save! :D
And you're done! :D
Original:
Tutorial:
There is a difference, but it really all depeneds on the images you use :)
Feel free to ask questions :)
Other Tutorials
Icons not shown actual size :)