Project: Lace-fronting a wig and wig-interactive millinery, Final Installment!
Part One of this series addressed hairline tracing, wig ventilation, and mocking up a coal-scuttle bonnet.
Part Two dealt with setting the wig and covering the buckram base of the bonnet.
Here's how the whole thing turned out, trimming and styling!
First, let's look at our period research to remind you of the shapes and style of the hair and bonnet:

Here's the final styled wig, which Jaime took out of its curlers and styled using a wire support inside the Apollo Knot:
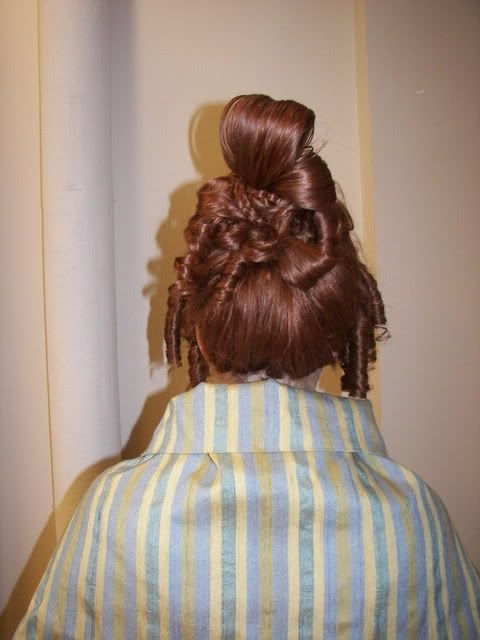
back view
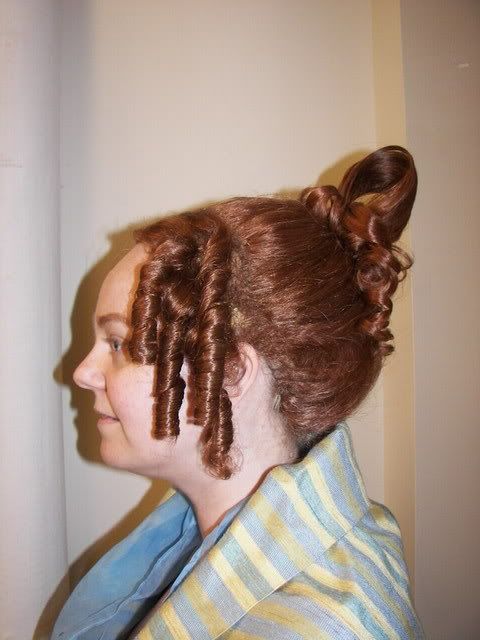
side view
Pretty cool, yes?
I then had to trim out the bonnet. I used organza ribbon in 7/8" and 1.5" widths. Here are some highlights of the process:
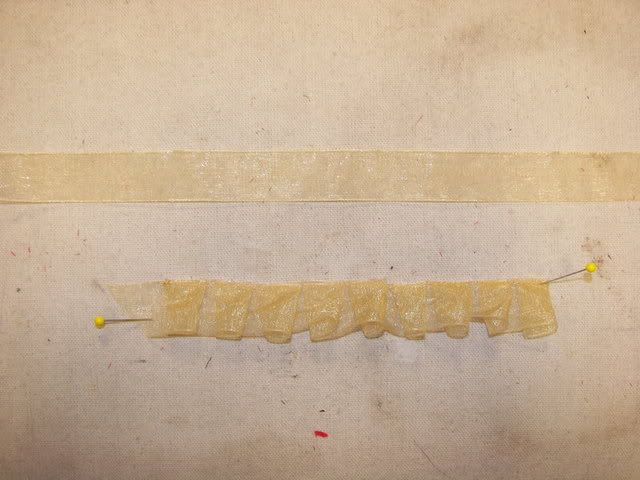
pleating the ribbon
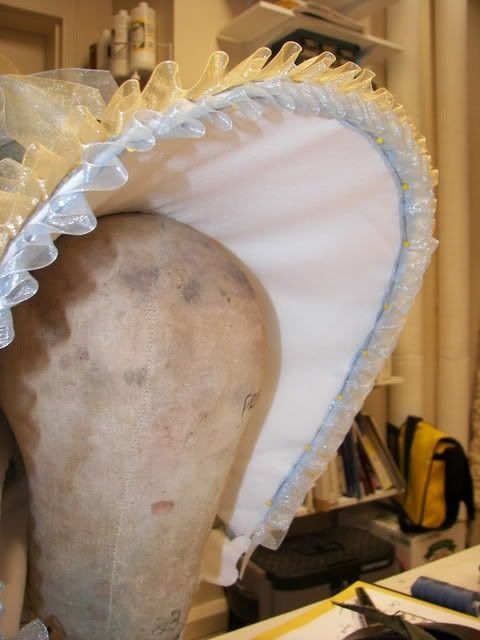
placed around the brim edge
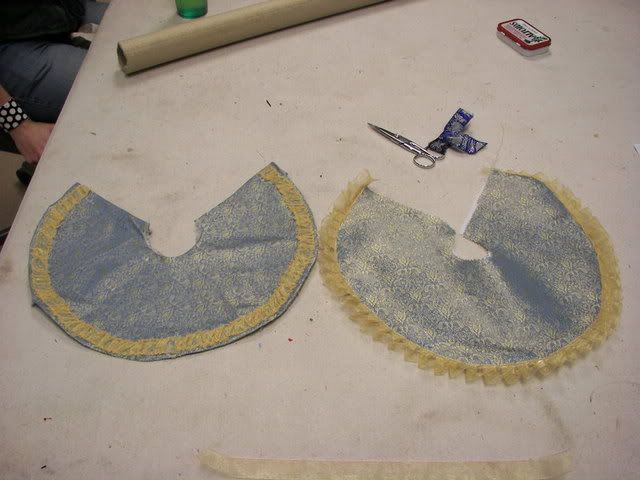
I first made the neck drape on the left, but the ruching made the organza look like too dark of a gold to match the rest of the hat, so i made a second one with more of the pleated trim at the hem
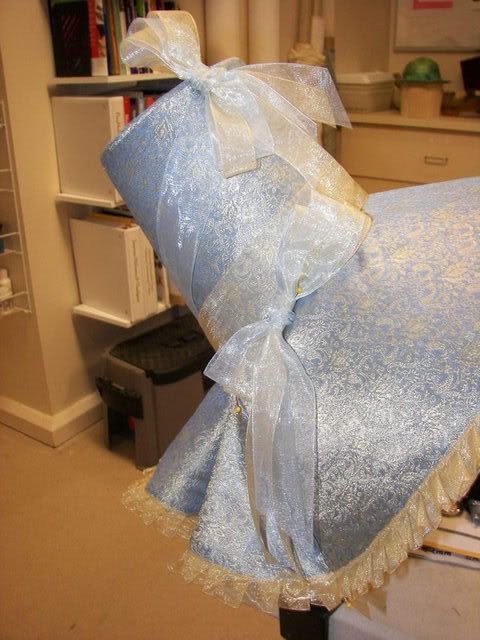
bows on the crown and neck drape attached
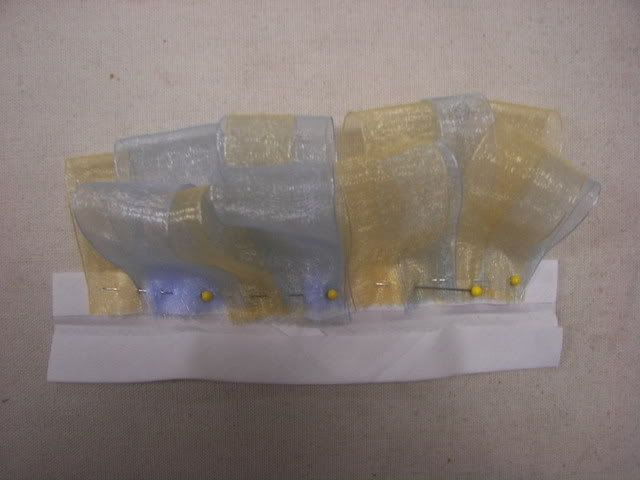
setup of trim that goes inside the brim framing the face (note you can see a few loops of it on the research image)
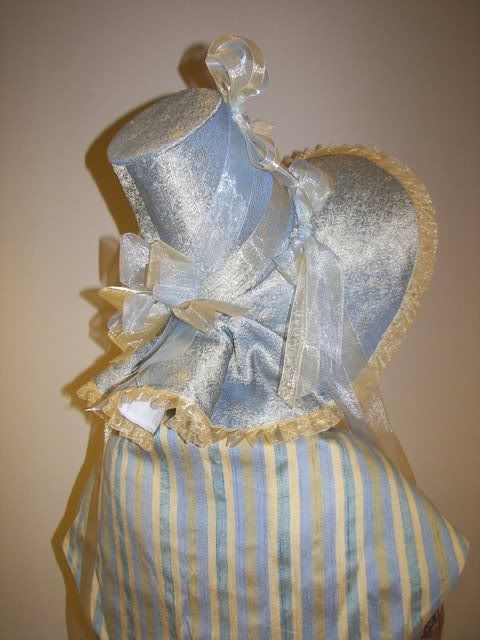
finished back view
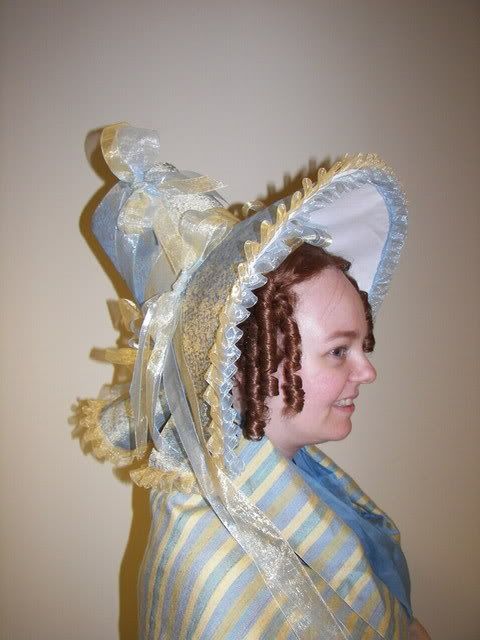
finished side view
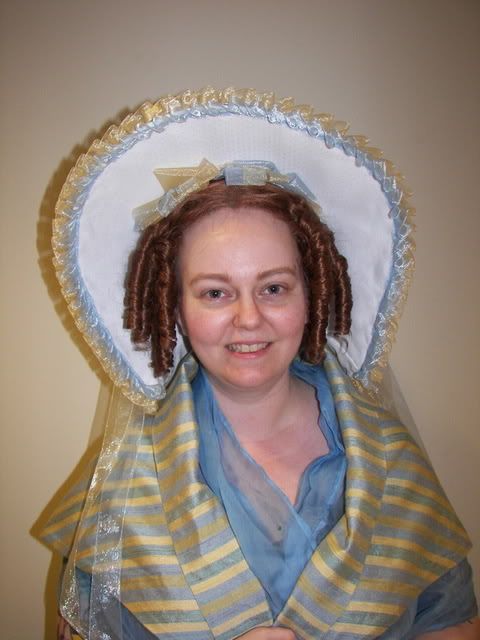
finished front view
(i am wearing a couple shawls just so my modern clothes wouldn't be distracting.)
Boy, am i glad i didn't live back then. I am not of fan of myself in this style hair/bonnet! I look like someone's busybody maiden aunt with the vapors. (My students and I took to calling this bonnet "Aunt Pittypat" for exactly that reason, as in, "I really need to stitch the trim onto Aunt Pittypat this afternoon," and so forth.) But, there you have it, the complete process from start to finish of creating a lace-front hand-tied wig and bonnet in a period style. Hope you enjoyed reading about it! I'm quite proud of how it turned out--a good reproduction of the research images on both my own and Jaime's behalves.
Part Two dealt with setting the wig and covering the buckram base of the bonnet.
Here's how the whole thing turned out, trimming and styling!
First, let's look at our period research to remind you of the shapes and style of the hair and bonnet:
Here's the final styled wig, which Jaime took out of its curlers and styled using a wire support inside the Apollo Knot:
back view
side view
Pretty cool, yes?
I then had to trim out the bonnet. I used organza ribbon in 7/8" and 1.5" widths. Here are some highlights of the process:
pleating the ribbon
placed around the brim edge
I first made the neck drape on the left, but the ruching made the organza look like too dark of a gold to match the rest of the hat, so i made a second one with more of the pleated trim at the hem
bows on the crown and neck drape attached
setup of trim that goes inside the brim framing the face (note you can see a few loops of it on the research image)
finished back view
finished side view
finished front view
(i am wearing a couple shawls just so my modern clothes wouldn't be distracting.)
Boy, am i glad i didn't live back then. I am not of fan of myself in this style hair/bonnet! I look like someone's busybody maiden aunt with the vapors. (My students and I took to calling this bonnet "Aunt Pittypat" for exactly that reason, as in, "I really need to stitch the trim onto Aunt Pittypat this afternoon," and so forth.) But, there you have it, the complete process from start to finish of creating a lace-front hand-tied wig and bonnet in a period style. Hope you enjoyed reading about it! I'm quite proud of how it turned out--a good reproduction of the research images on both my own and Jaime's behalves.