Project: Lace-fronting a wig + wig-interactive millinery! Part One
Another of my long-term projects has gotten to a point that it's worth posting a midstream overview: 1830's hats & hairdos!
I'm doing this project in tandem with our wig master, Jaime Blinn-Bagley. Jaime is giving a guest lecture on lace-backed facial hair and hand-ventilated lace-front wigs to my millinery class.
The students are almost finished with a unit on buckram hat foundations and the next unit is all about wigs, how hats interact with hair, and hairstyles that are really more like hats (i.e., huge 18th c. Madame de Pomadour wigs with buckram infrastructures). If you want to cruise through a cool photogallery that illustrates more on this topic, check out these photographs of the crowns made for Dior's fall 2004 collection, where the crowns have wire foundations for the hairdos built onto them.
Jaime and i decided to choose a period in which hairstyles and hat shapes influenced one another; Jaime would front a wig and style it in the period style, while i simultaneously built a hat designed to be worn with the wig/style. In this way, she would be able to show my class the process of fronting a wig, and i'd be able to document how a milliner takes hair and wigs into consideration during the construction of a hat. So what'd we choose?

Note how the crowns of these bonnets tilt and extend to accomodate these high loopy hairdos!
So, first order of the day was to choose the wig that Jaime would refront. We have a large stock of wigs, some of them better quality than others, and some of dubious usefulness. We decided that ideally, we wanted a red haired wig, one that currently wouldn't get much use but might if it were lace fronted. We chose this long red wig:

It had a lot of wefts of hair in the back that Jaime could pull from, in addition to matching a switch of hair we also already had. It also had a "wiglet" front:
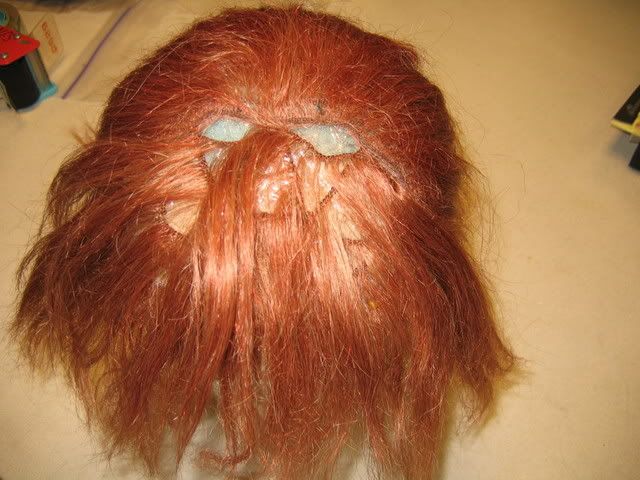
...the idea being, you could put it on someone with short red hair/bangs and pull their hair through the web structure of the front. This makes it not terribly versatile since it can only be worn effectively by a shorthaired actress whose color is close to that of the wig, whereas if it had a ventilated front on it, it'd be usable by actresses with any hair color and length.
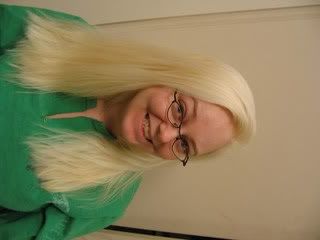
I agreed to be the guinea pig for the custom front. Here i am putting on my game face, for a Before picture. Note my hair color and length and such:
Jaime put my hair into pincurls first.
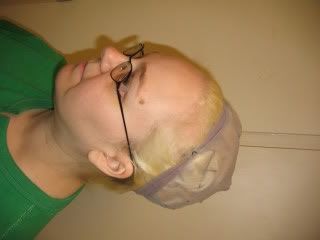
Then she put a tight wigcap over my hair.
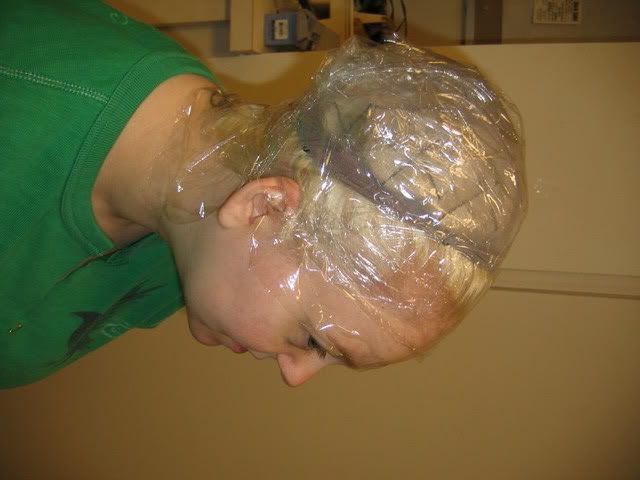
Having your head wrapped in clingfilm feels weird.
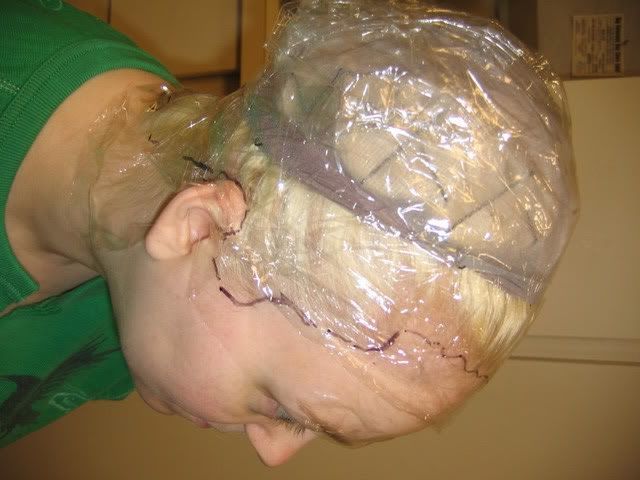
Jaime secured the whole thing with clear packing tape and traced my hairline onto it with a marker.
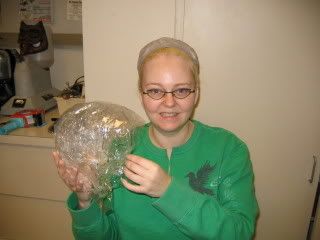
Here's my head!
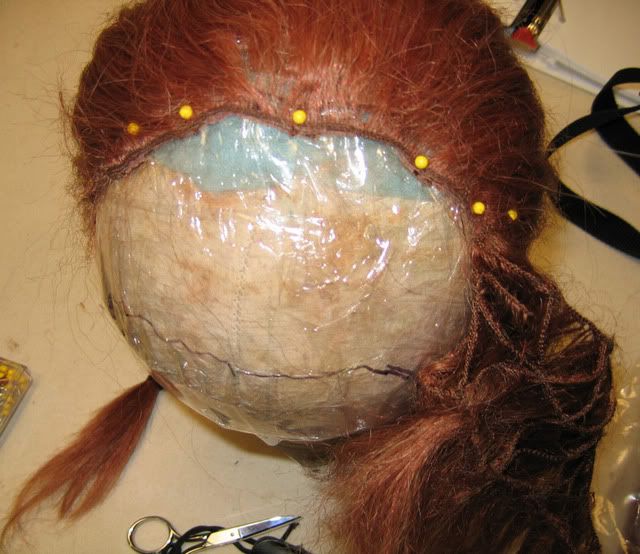
Jaime's next step was to use this hairline tracing to mark out my hairline on a head form so she could begin refronting the wig. She placed the clear tape-and-saran-wrap cap with my hairline tracing onto a 23" dolly head (my head measurement). Because the cap didn't fit tightly--my pincurls had been there between my head and the wrapping--Jaime stuffed tulle inside the gap until it was built up to fill the cap-gap. Then she cut away the wiglet-front web section and put the wig onto the head:
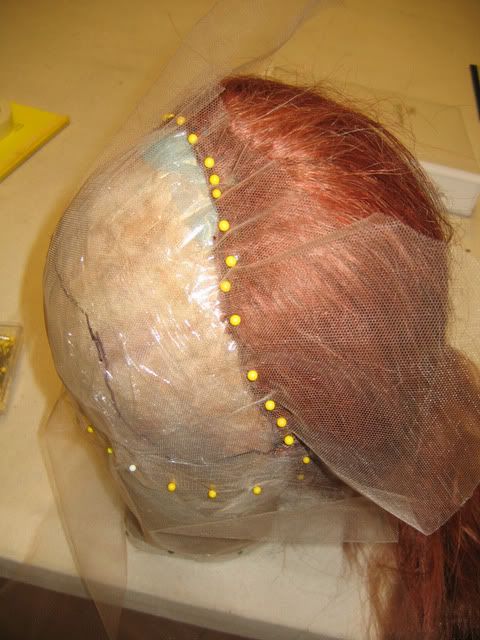
Here's the wig lace getting shaped to the front.
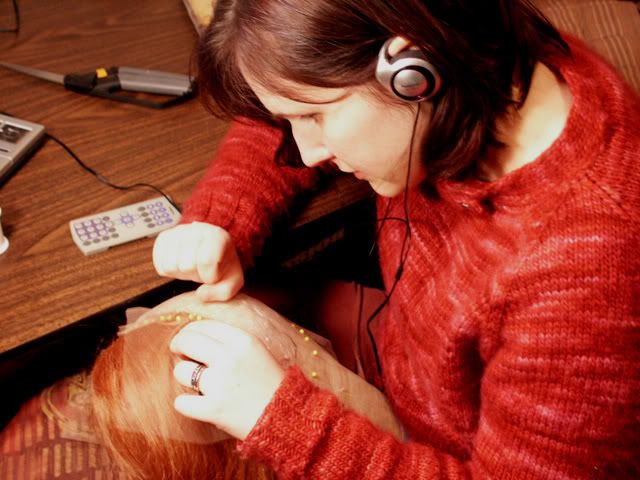
Jaime ventilates the wig lace to the wig with invisible thread.
She's almost ready to start tying hair...
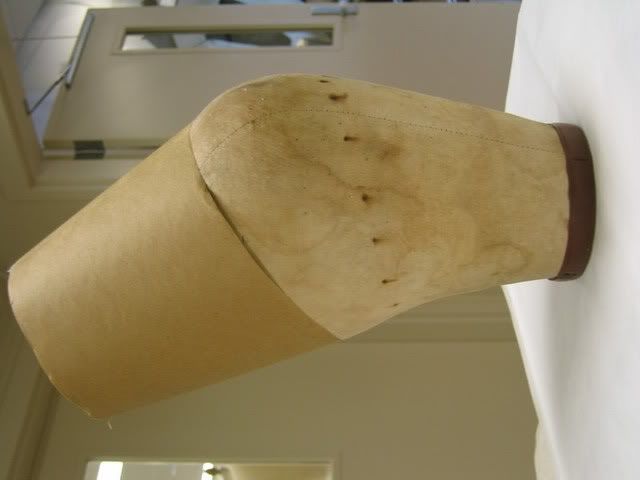
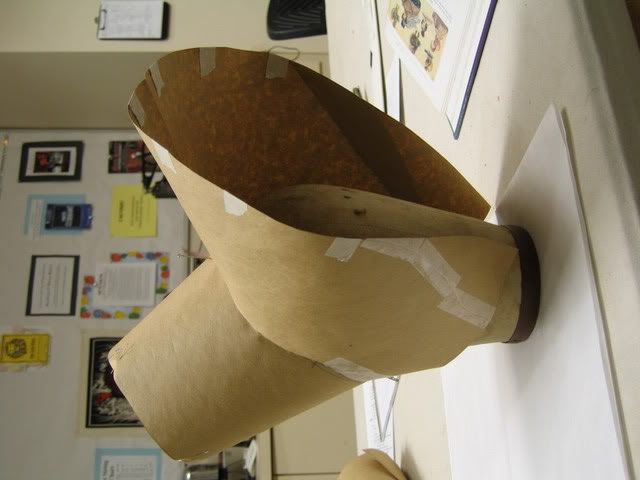
Meanwhile, i was getting busy with the coal-scuttle bonnet! The first step for me was to figure out the height of the crown. I consulted with Jaime about the height of the Apollo knot hairstyle she thought she would be able to create with the wig we had chosen. Together we figured out the dimensions and angle of the bonnet's crown. I made a paper mockup of it for visualization:
The next thing to do was determine the shape of the "coal scuttle." I made a generic largely-uniform bonnet brim:
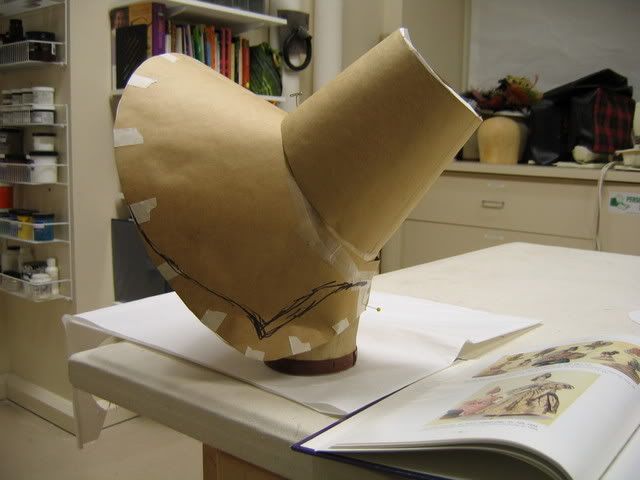
Note how i drew onto it what the actual desired shape would be.
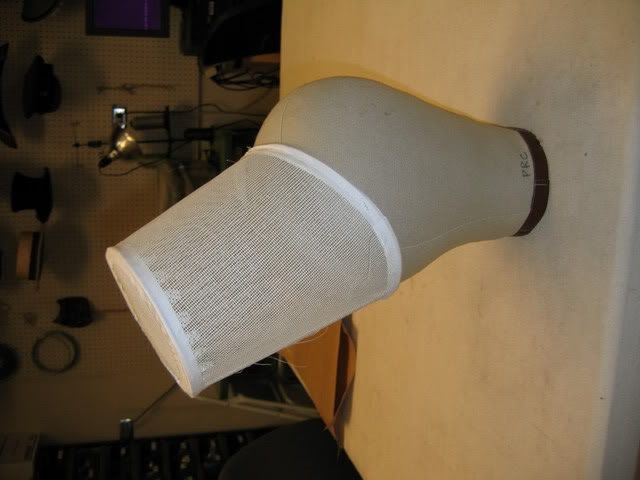
I referenced my research image, the one we are trying to replicate, and checked the bonnet's shape from all angles. I chopped some off, added some on, piddled and taped and snipped until i got the shape depicted in the bonnet design from the magazine illustration:
Once the shape was confirmed--both by Jaime and by comparison with the illustration--it was time for me to begin the real deal. The first thing was to get the crown done up in buckram:
Here it is, heavy buckram for sideband and tip, with both top and bottom edges of the sideband wired and mulled with bias tape.
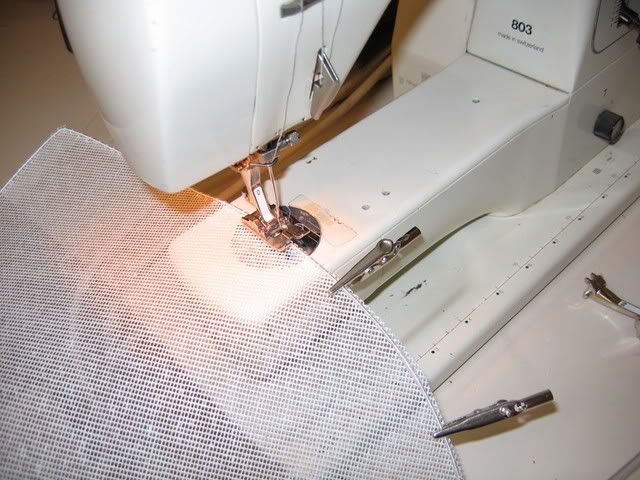
Traditional milliners would choke at this, but i wire my forms with a zigzag if at all gymnastically possible. It's just quicker for theatre. I use alligator clips (electrics section at the hardware store) to secure the wire to the buckram for easy manipulation, and i wear safety goggles whenever i have wire going through the machine. No matter how careful you are, you'll hit a wire eventually and you don't want a piece of metal flying into your eye.
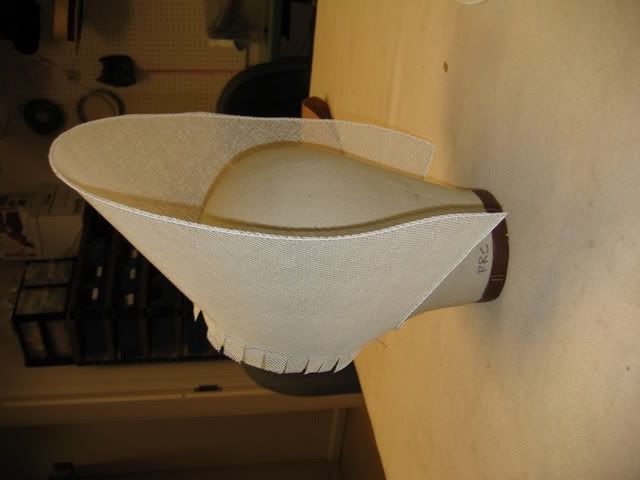
Checking the shape of the brim before proceeding further...
Look for the followup to this post, in which Jaime ventilates and styles the wig, and i cover and trim the bonnet!
I'm doing this project in tandem with our wig master, Jaime Blinn-Bagley. Jaime is giving a guest lecture on lace-backed facial hair and hand-ventilated lace-front wigs to my millinery class.
The students are almost finished with a unit on buckram hat foundations and the next unit is all about wigs, how hats interact with hair, and hairstyles that are really more like hats (i.e., huge 18th c. Madame de Pomadour wigs with buckram infrastructures). If you want to cruise through a cool photogallery that illustrates more on this topic, check out these photographs of the crowns made for Dior's fall 2004 collection, where the crowns have wire foundations for the hairdos built onto them.
Jaime and i decided to choose a period in which hairstyles and hat shapes influenced one another; Jaime would front a wig and style it in the period style, while i simultaneously built a hat designed to be worn with the wig/style. In this way, she would be able to show my class the process of fronting a wig, and i'd be able to document how a milliner takes hair and wigs into consideration during the construction of a hat. So what'd we choose?
Note how the crowns of these bonnets tilt and extend to accomodate these high loopy hairdos!
So, first order of the day was to choose the wig that Jaime would refront. We have a large stock of wigs, some of them better quality than others, and some of dubious usefulness. We decided that ideally, we wanted a red haired wig, one that currently wouldn't get much use but might if it were lace fronted. We chose this long red wig:
It had a lot of wefts of hair in the back that Jaime could pull from, in addition to matching a switch of hair we also already had. It also had a "wiglet" front:
...the idea being, you could put it on someone with short red hair/bangs and pull their hair through the web structure of the front. This makes it not terribly versatile since it can only be worn effectively by a shorthaired actress whose color is close to that of the wig, whereas if it had a ventilated front on it, it'd be usable by actresses with any hair color and length.
I agreed to be the guinea pig for the custom front. Here i am putting on my game face, for a Before picture. Note my hair color and length and such:
Jaime put my hair into pincurls first.
Then she put a tight wigcap over my hair.
Having your head wrapped in clingfilm feels weird.
Jaime secured the whole thing with clear packing tape and traced my hairline onto it with a marker.
Here's my head!
Jaime's next step was to use this hairline tracing to mark out my hairline on a head form so she could begin refronting the wig. She placed the clear tape-and-saran-wrap cap with my hairline tracing onto a 23" dolly head (my head measurement). Because the cap didn't fit tightly--my pincurls had been there between my head and the wrapping--Jaime stuffed tulle inside the gap until it was built up to fill the cap-gap. Then she cut away the wiglet-front web section and put the wig onto the head:
Here's the wig lace getting shaped to the front.
Jaime ventilates the wig lace to the wig with invisible thread.
She's almost ready to start tying hair...
Meanwhile, i was getting busy with the coal-scuttle bonnet! The first step for me was to figure out the height of the crown. I consulted with Jaime about the height of the Apollo knot hairstyle she thought she would be able to create with the wig we had chosen. Together we figured out the dimensions and angle of the bonnet's crown. I made a paper mockup of it for visualization:
The next thing to do was determine the shape of the "coal scuttle." I made a generic largely-uniform bonnet brim:
Note how i drew onto it what the actual desired shape would be.
I referenced my research image, the one we are trying to replicate, and checked the bonnet's shape from all angles. I chopped some off, added some on, piddled and taped and snipped until i got the shape depicted in the bonnet design from the magazine illustration:
Once the shape was confirmed--both by Jaime and by comparison with the illustration--it was time for me to begin the real deal. The first thing was to get the crown done up in buckram:
Here it is, heavy buckram for sideband and tip, with both top and bottom edges of the sideband wired and mulled with bias tape.
Traditional milliners would choke at this, but i wire my forms with a zigzag if at all gymnastically possible. It's just quicker for theatre. I use alligator clips (electrics section at the hardware store) to secure the wire to the buckram for easy manipulation, and i wear safety goggles whenever i have wire going through the machine. No matter how careful you are, you'll hit a wire eventually and you don't want a piece of metal flying into your eye.
Checking the shape of the brim before proceeding further...
Look for the followup to this post, in which Jaime ventilates and styles the wig, and i cover and trim the bonnet!