Project: Lace-fronting a wig + wig-interactive millinery! Part Two
Recall my post of a couple weeks back on a joint project between myself and wig maker Jaime Blinn-Bagley on lace-front wig making and 1830s coal-scuttle bonnet construction. Looks like what i thought was going to be a two-part series is going to actually extend to three parts, so here's the long-awaited Part Two.
In case you missed the first post, we chose some historical research from the 1830s and are building in-tandem a wig to be styled in the Apollo knot hairstyle and a bonnet to be worn over the hairstyle. We left off with the wig production at the stage just before ventilation: the headwrap and hairline tracing had happened, the wig to be refronted had been prepared for lace-fronting, and the wig lace had been cut to shape and attached to the wig.
Bonnet construction had left off on the cliffhanger of buckram shape approval--a wired paper mockup had been created, fitted, and the pattern altered to reflect changes that came from the mockup fitting.
First, let's catch up on the wig progress:
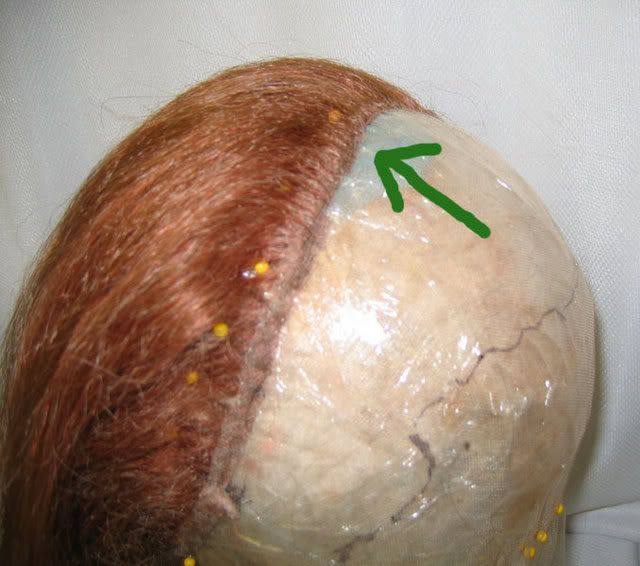
Arrow denotes where Jaime began tying her first few rows of hair.
Ventilating a wig is much like making a latch-hook rug, except on a miniscule scale. A ventilating needle is like a very very small crochet hook. There's no point in me trying to photograph it, because i don't think it would actually show you anything--imagining it with this description is going to have to suffice. Hairs are looped through the lace mesh of the wig front and knotted. It's a slow, painstaking process requiring sharp young eyes.
One thing that made this wig a good candidate for refronting was the thick wefting it had down the back of it--Jaime was able to remove 3-4 wefts of hair from the nape area to use for refronting it. We also had a switch of matching loose hair in our stock from which she also pulled hairs.
Jaime starts tying in the center and moves gradually forward and down both sides with filling out the hair of the wig.

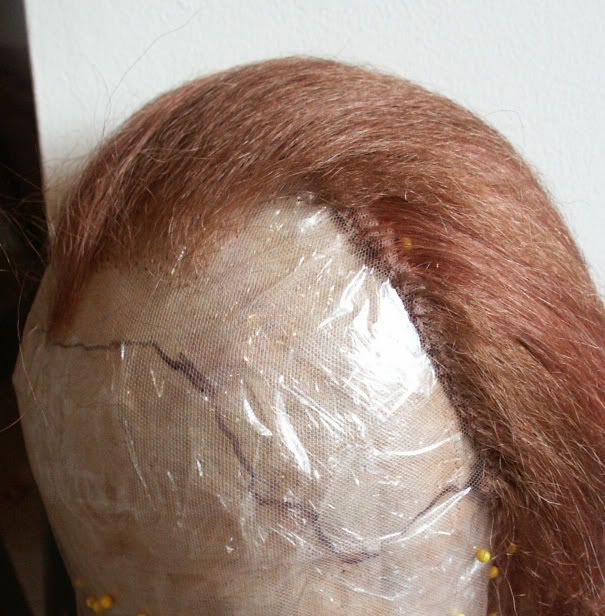
This shows how she approaches the front of the wig, following the hairline trace for a realistic replica of the wearer's hairline. If you wanted to change the hairline of the wearer (say, add a more dramatic widow's peak, for example), you might draw the desired hairline in a different color, making certain that it conformed to or extended beyond the hairline of the wearer.
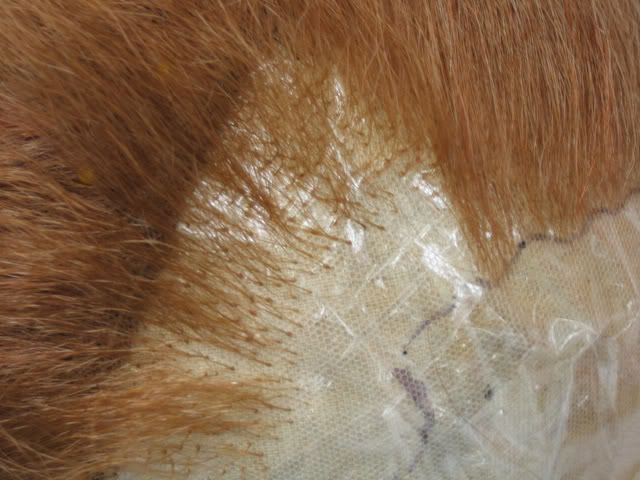
Here's a closeup of the knots. Notice that further back into the "scalp," Jaime has tied bundles of 3 or so hairs, but close to the hairline edge, she has tied single-hair knots. This gives the illusion of actual natural rooted hair.
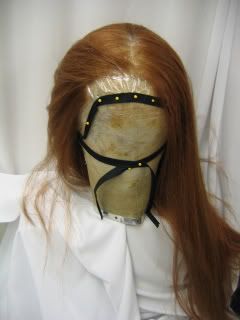
Whew! Many hours later, the wig is refronted! This was an exceptionally large hand-tied front section, due to the removal of the pull-through wiglet front. Ordinarily the hand-tied section might be half this width.

In preparation for creating the Apollo knot hairstyle, Jaime puts the wig into rollers and prepares to set the curls.
...To Be Continued!
So, i'll leave off the wig progress there, and bring you up-to-date on the bonnet! The crown and brim had been constructed in buckram and the edges wired, but before they get put together as one, i needed to mull them with icewool. Here's a photo depicting the mulling on the sideband of the bonnet's crown:
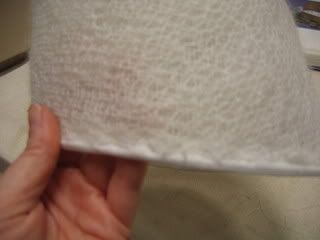
Note that it's whipstitched on, but not pulled round to the inside.
The goal is to minimize bulk in the join between the crown and brim.
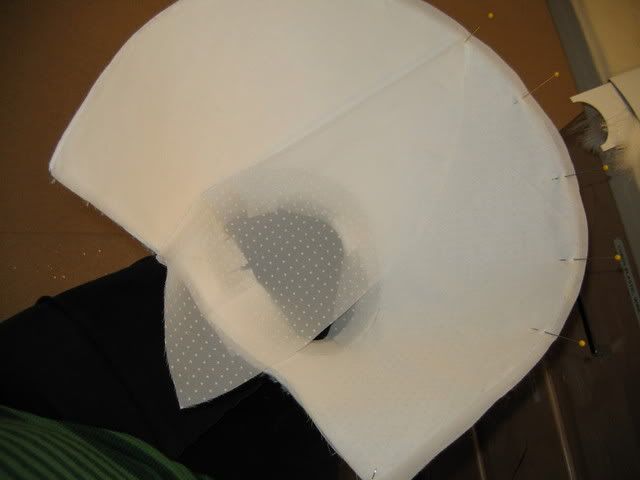
This depicts covering the inner brim.
When mulling and covering the inside brim, i used spray adhesive to lay the fabric into the conical curve--i don't want it pulling away like a baggy car headliner. Ideally, in traditional millinery, you'd anchor it with a combination of glue and pick-stitching, but sometimes you cut handwork corners in theatrical construction, so adhesive alone will have to suffice. The source image shows a white inner brim, and rather than use just a solid plain white broadcloth or similar, I decided to cover it with a double layer of fashion fabric--a white broadcloth with an overlay of dotted organza. This is just a little more visually and texturally interesting than a plain weave. Each layer needed its own application of adhesive though, so the fabric choice did make a bit more work for me.

Trimming all layers along the perimeter of the brim. Because each layer is successively slightly smaller dimensions than the initial buckram, the edges need to be evened out after the outer and inner brim covers are attached.
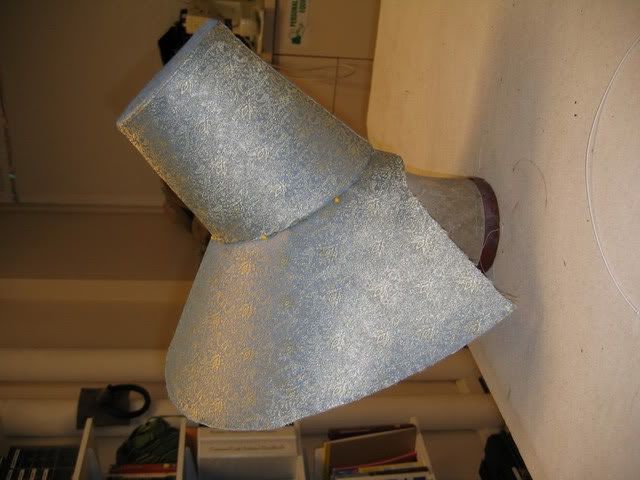
After both crown and brim are covered, they are pinned together.
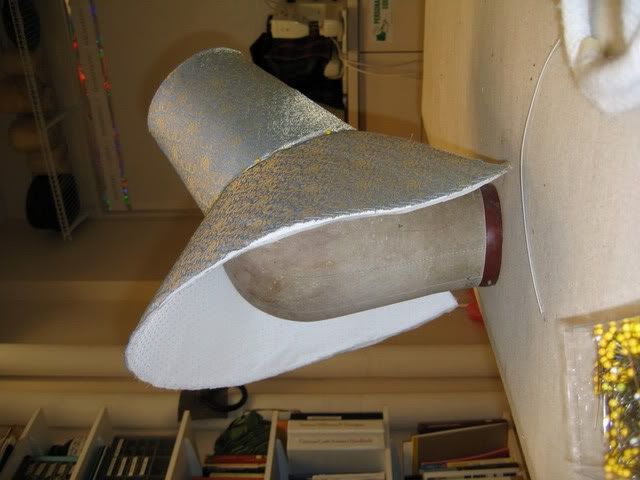
Oblique front view.
The next step is to stitch the crown to the brim, bind that outer brim edge, apply the gobs and gobs of trim, line the crown, and integrate it with Jaime's styled wig. That's coming up in the next and final installment of this series. Hope you are enjoying reading about these pieces as much as we are enjoying constructing them!
In case you missed the first post, we chose some historical research from the 1830s and are building in-tandem a wig to be styled in the Apollo knot hairstyle and a bonnet to be worn over the hairstyle. We left off with the wig production at the stage just before ventilation: the headwrap and hairline tracing had happened, the wig to be refronted had been prepared for lace-fronting, and the wig lace had been cut to shape and attached to the wig.
Bonnet construction had left off on the cliffhanger of buckram shape approval--a wired paper mockup had been created, fitted, and the pattern altered to reflect changes that came from the mockup fitting.
First, let's catch up on the wig progress:
Arrow denotes where Jaime began tying her first few rows of hair.
Ventilating a wig is much like making a latch-hook rug, except on a miniscule scale. A ventilating needle is like a very very small crochet hook. There's no point in me trying to photograph it, because i don't think it would actually show you anything--imagining it with this description is going to have to suffice. Hairs are looped through the lace mesh of the wig front and knotted. It's a slow, painstaking process requiring sharp young eyes.
One thing that made this wig a good candidate for refronting was the thick wefting it had down the back of it--Jaime was able to remove 3-4 wefts of hair from the nape area to use for refronting it. We also had a switch of matching loose hair in our stock from which she also pulled hairs.
Jaime starts tying in the center and moves gradually forward and down both sides with filling out the hair of the wig.
This shows how she approaches the front of the wig, following the hairline trace for a realistic replica of the wearer's hairline. If you wanted to change the hairline of the wearer (say, add a more dramatic widow's peak, for example), you might draw the desired hairline in a different color, making certain that it conformed to or extended beyond the hairline of the wearer.
Here's a closeup of the knots. Notice that further back into the "scalp," Jaime has tied bundles of 3 or so hairs, but close to the hairline edge, she has tied single-hair knots. This gives the illusion of actual natural rooted hair.
Whew! Many hours later, the wig is refronted! This was an exceptionally large hand-tied front section, due to the removal of the pull-through wiglet front. Ordinarily the hand-tied section might be half this width.
In preparation for creating the Apollo knot hairstyle, Jaime puts the wig into rollers and prepares to set the curls.
...To Be Continued!
So, i'll leave off the wig progress there, and bring you up-to-date on the bonnet! The crown and brim had been constructed in buckram and the edges wired, but before they get put together as one, i needed to mull them with icewool. Here's a photo depicting the mulling on the sideband of the bonnet's crown:
Note that it's whipstitched on, but not pulled round to the inside.
The goal is to minimize bulk in the join between the crown and brim.
This depicts covering the inner brim.
When mulling and covering the inside brim, i used spray adhesive to lay the fabric into the conical curve--i don't want it pulling away like a baggy car headliner. Ideally, in traditional millinery, you'd anchor it with a combination of glue and pick-stitching, but sometimes you cut handwork corners in theatrical construction, so adhesive alone will have to suffice. The source image shows a white inner brim, and rather than use just a solid plain white broadcloth or similar, I decided to cover it with a double layer of fashion fabric--a white broadcloth with an overlay of dotted organza. This is just a little more visually and texturally interesting than a plain weave. Each layer needed its own application of adhesive though, so the fabric choice did make a bit more work for me.
Trimming all layers along the perimeter of the brim. Because each layer is successively slightly smaller dimensions than the initial buckram, the edges need to be evened out after the outer and inner brim covers are attached.
After both crown and brim are covered, they are pinned together.
Oblique front view.
The next step is to stitch the crown to the brim, bind that outer brim edge, apply the gobs and gobs of trim, line the crown, and integrate it with Jaime's styled wig. That's coming up in the next and final installment of this series. Hope you are enjoying reading about these pieces as much as we are enjoying constructing them!