Tutorial #2
Ohkk, the promised tut, now that my internet is back.
This tut shows how to make a complicated shape into a glowing button. It is slightly different than the first one.
I would suggest you go through the previous tut before you proceed to this one.(try that before this)
Here is what we want -
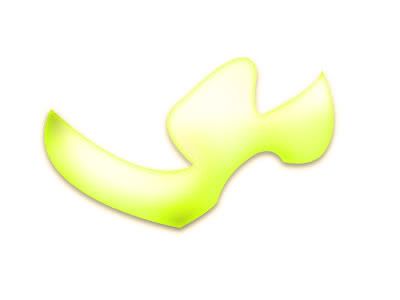
I know the shape is ugly, but I chose a shape which has sharp points as well as curves, both concave and convex for this tut.
1. So, you make your shape on a new layer in your desired color. You can do this by using the pen tool or the pencil or a brush. Whatever you feel like.

2. Now, create a new layer. Press ctrl+the first layer to select the shape. Go to select-modify-contract to contract the selection by 1px.
Right, now on the layer you just selected, paint a white line over the lower half of the shape. Take AIRBRUSH size about 13px.
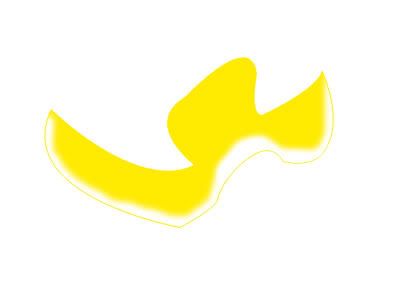
3. Put this layer on SOFTLIGHT. Now, the color of my shape was too bright so I did not need to gaussian blur the softlight layer. You might want to do this for darker colors.
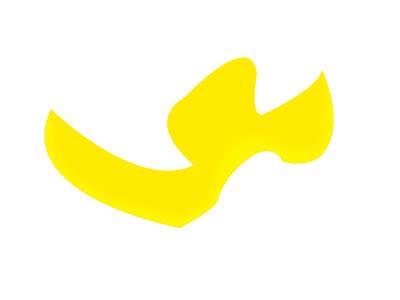
4. Alright, you should still have the dotted lines of selection. If you don't, select the original layer again and contract it by 1 px again.
Create a new layer. Take an AIRBRUSH, size about 20 px and opacity 25%, color -BLACK. Paint the shape as shown.
Remember -
- The points(sharp points) are always darker.
- Curves which bulge out have lesser black.
- Curves which go in have more of black.
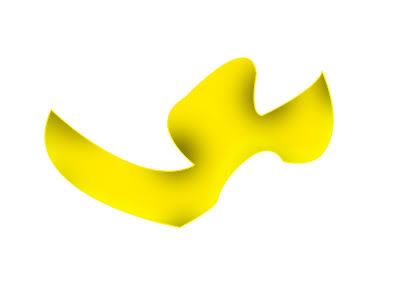
Only, this is difficult to explain and you might experience difficulties in deciding where the black goes(only for the first time though). I would be glad to help in that case. Just post your shape in the comments.
5. With the selection still on,we take the color white and size 25 px, opacity - 50% and paint on the shape. Remember, the rules of white are opposite to that of black. So, the corners will have almost no white.
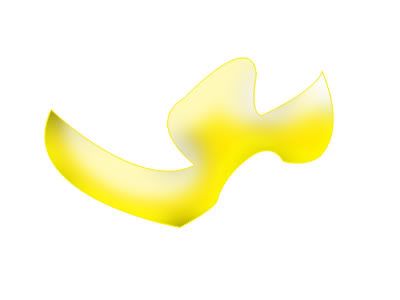
6. Make a new layer. Make sure your selection is on. Then increase the opacity of your brush to 100% and paint white.
This white is for your final highlight. This will come in places of bigger areas. And preferably, not touching any side.
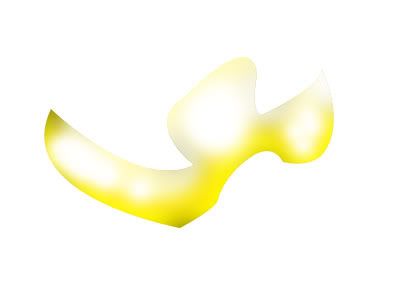
7. Now, gaussian blur the last layer till you get a blended effect.
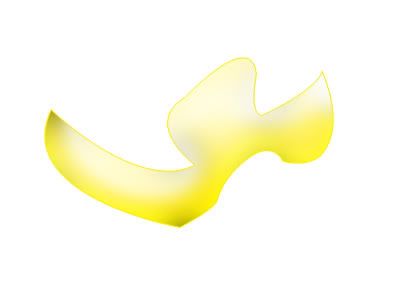
DONE.
8. We could have stopped here but the edges are too sharp for my liking. So, I went back to our FIRST layer and gaussian blurred it by some 3-5 px.

9. And now, ha! The shadow. I just used the drop shadow tool from the blending options thing and played with it till I got the desired effect.

As always, you can change the color now.
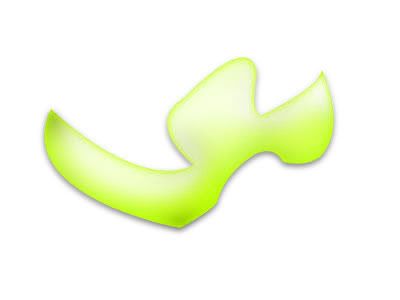
Another example of this technique-

Next tut, on making 3D grids.
- Comment if you found this useful.
- Have fun.
- Don't hesitate to ask if something is not clear.
This tut shows how to make a complicated shape into a glowing button. It is slightly different than the first one.
I would suggest you go through the previous tut before you proceed to this one.(try that before this)
Here is what we want -
I know the shape is ugly, but I chose a shape which has sharp points as well as curves, both concave and convex for this tut.
1. So, you make your shape on a new layer in your desired color. You can do this by using the pen tool or the pencil or a brush. Whatever you feel like.
2. Now, create a new layer. Press ctrl+the first layer to select the shape. Go to select-modify-contract to contract the selection by 1px.
Right, now on the layer you just selected, paint a white line over the lower half of the shape. Take AIRBRUSH size about 13px.
3. Put this layer on SOFTLIGHT. Now, the color of my shape was too bright so I did not need to gaussian blur the softlight layer. You might want to do this for darker colors.
4. Alright, you should still have the dotted lines of selection. If you don't, select the original layer again and contract it by 1 px again.
Create a new layer. Take an AIRBRUSH, size about 20 px and opacity 25%, color -BLACK. Paint the shape as shown.
Remember -
- The points(sharp points) are always darker.
- Curves which bulge out have lesser black.
- Curves which go in have more of black.
Only, this is difficult to explain and you might experience difficulties in deciding where the black goes(only for the first time though). I would be glad to help in that case. Just post your shape in the comments.
5. With the selection still on,we take the color white and size 25 px, opacity - 50% and paint on the shape. Remember, the rules of white are opposite to that of black. So, the corners will have almost no white.
6. Make a new layer. Make sure your selection is on. Then increase the opacity of your brush to 100% and paint white.
This white is for your final highlight. This will come in places of bigger areas. And preferably, not touching any side.
7. Now, gaussian blur the last layer till you get a blended effect.
DONE.
8. We could have stopped here but the edges are too sharp for my liking. So, I went back to our FIRST layer and gaussian blurred it by some 3-5 px.
9. And now, ha! The shadow. I just used the drop shadow tool from the blending options thing and played with it till I got the desired effect.
As always, you can change the color now.
Another example of this technique-
Next tut, on making 3D grids.
- Comment if you found this useful.
- Have fun.
- Don't hesitate to ask if something is not clear.