inquisitory ✭ 30; it's been a long time now
More requests, whee! What a productive way for me to put off my work :')
Request by so_vayne and almateria~ ♥
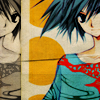
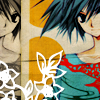
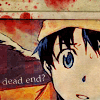
Go from
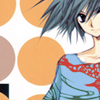
to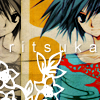
in Photoshop. Uses several Selective Color layers, so not translatable unless you're willing to figure out how to fake it :')
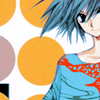
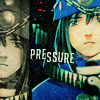
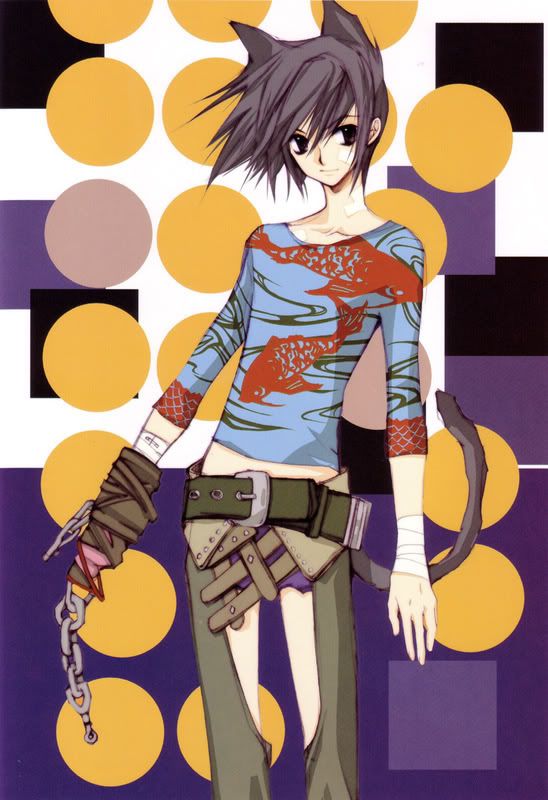
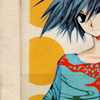
Pretty Loveless art is pretty *A* Whee, base:
You notice how there's the black bit in the corner? You could either opt to brush it out or think "oh hay that'd be a good place for a duplicate" like I did xD Keep that in mind for the future of this icon, yes? Right, okay, moving on, there's a ton of Selective Color... adjustment layers to use, what joy (and none of them from me because, as you know, I fail at SC settings)! Point form ftw:
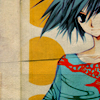
☆ step 3 of this tut by ckdesigns, Normal, 50%, gives you this
☆ step 3 of this tut by almateria, Normal, 50%, gives you this
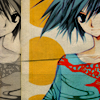
☆ step 3 of this tut by almateria, Normal, 100%, gives you this
☆ step 3 of this tut by hl_upics, Normal, 100%, gives you:
Wow, that was a lot of step 3's xD I really like how all that Selective Coloring brightened up the image, but it lost some contrast in the process. So bring a Soft Light, 100% duplicate to the top to fix it!

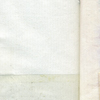
I think we're ready to move into texture mode now >:D To prepare, remember how I mentioned the blank space on the left? We'll cover it over with a soft white brush now. Conveniently, the dots on the image match up with that :3

Okay, so now to start a long list of textures and a fill layer~ More point form, you say?
☆ this texture by toybirds (rotated), Screen, 100%, gives you this
☆ #f9eada, Multiply, 100%, gives you this
☆ this texture by toybirds (flipped horizontally), Multiply, 100%, gives you this
☆ this texture by toybirds, Multiply, 100% DUPLICATED ONCE (so there are two layers), gives you:
Looking much more interesting, don't you think? :) Now to fill up the still-empty space on the left with, you guessed it, a duplicate! Bring your base to the top and position it as you like (putting it on Multiply, 100% so you can see what's below it), then desaturate it (Image > Adjustments > Desaturate) and erase the part that's covering your image. Here, since the space for the duplicate was pretty much laid out for me by the texture, I took the Polygonal Lasso and traced along it (iirc it wasn't exactly straight) to get this.
Now for the finishing touches *__* Since it's looking kinda dark, take a Brightness/Contrast... adjustment layer and set brightness to 6, contrast to 69.
This may be a little weird to explain, so bear with me. You can do this either way, but I like to start from the top, so take this texture by toybirds, inverse it (so it's white-on-black), and set it to Screen, 100%, placing/resizing as you like. Now to get the shadow, inverse it again (so it's black-on-white like it started), nudge it over one pixel right and one pixel down, and set it to Multiply, 100%. Now place the Multiply layer below the Screen layer and you have your spiffy stand-out-y texture! :) You may need to adjust the opacity of the shadow layer so it doesn't stand out too much; I think the one here was 50-70%?
To get the text's shadow, follow the same process, except setting them to Screen and Multiply isn't necessary. As with the texture, you should play with the opacity of the shadow until you like it~ And now we're finally finished!
Other examples:
I encourage you to go play around and show me your finished icons! DOOO IIIIIIT, I wanna see what you guys come up with~
If you like what you see, why not friend ewidentnie for future updates?
Request by so_vayne and almateria~ ♥
Go from
to
in Photoshop. Uses several Selective Color layers, so not translatable unless you're willing to figure out how to fake it :')
Pretty Loveless art is pretty *A* Whee, base:
You notice how there's the black bit in the corner? You could either opt to brush it out or think "oh hay that'd be a good place for a duplicate" like I did xD Keep that in mind for the future of this icon, yes? Right, okay, moving on, there's a ton of Selective Color... adjustment layers to use, what joy (and none of them from me because, as you know, I fail at SC settings)! Point form ftw:
☆ step 3 of this tut by ckdesigns, Normal, 50%, gives you this
☆ step 3 of this tut by almateria, Normal, 50%, gives you this
☆ step 3 of this tut by almateria, Normal, 100%, gives you this
☆ step 3 of this tut by hl_upics, Normal, 100%, gives you:
Wow, that was a lot of step 3's xD I really like how all that Selective Coloring brightened up the image, but it lost some contrast in the process. So bring a Soft Light, 100% duplicate to the top to fix it!
I think we're ready to move into texture mode now >:D To prepare, remember how I mentioned the blank space on the left? We'll cover it over with a soft white brush now. Conveniently, the dots on the image match up with that :3
Okay, so now to start a long list of textures and a fill layer~ More point form, you say?
☆ this texture by toybirds (rotated), Screen, 100%, gives you this
☆ #f9eada, Multiply, 100%, gives you this
☆ this texture by toybirds (flipped horizontally), Multiply, 100%, gives you this
☆ this texture by toybirds, Multiply, 100% DUPLICATED ONCE (so there are two layers), gives you:
Looking much more interesting, don't you think? :) Now to fill up the still-empty space on the left with, you guessed it, a duplicate! Bring your base to the top and position it as you like (putting it on Multiply, 100% so you can see what's below it), then desaturate it (Image > Adjustments > Desaturate) and erase the part that's covering your image. Here, since the space for the duplicate was pretty much laid out for me by the texture, I took the Polygonal Lasso and traced along it (iirc it wasn't exactly straight) to get this.
Now for the finishing touches *__* Since it's looking kinda dark, take a Brightness/Contrast... adjustment layer and set brightness to 6, contrast to 69.
This may be a little weird to explain, so bear with me. You can do this either way, but I like to start from the top, so take this texture by toybirds, inverse it (so it's white-on-black), and set it to Screen, 100%, placing/resizing as you like. Now to get the shadow, inverse it again (so it's black-on-white like it started), nudge it over one pixel right and one pixel down, and set it to Multiply, 100%. Now place the Multiply layer below the Screen layer and you have your spiffy stand-out-y texture! :) You may need to adjust the opacity of the shadow layer so it doesn't stand out too much; I think the one here was 50-70%?
To get the text's shadow, follow the same process, except setting them to Screen and Multiply isn't necessary. As with the texture, you should play with the opacity of the shadow until you like it~ And now we're finally finished!
Other examples:
I encourage you to go play around and show me your finished icons! DOOO IIIIIIT, I wanna see what you guys come up with~
If you like what you see, why not friend ewidentnie for future updates?