Free Motion Quilting
Contents
Design
Fabric
Embroidery
Sewing
Appliqué
QUILT ASSEMBLE GO!
Free motion quilting
Binding
Finishing touches
Baby shower
Free Motion Quilting
I got a DVD out of the library on free motion quilting, and it just seemed like the coolest thing on the planet. I also did some research online, and found a bunch of sites that have different free patterns on them.
(One of them, 365 days of free motion quilting filler designs, happened to have a very appropriate pattern for my subject matter, which I randomly just found while looking for the link for this write up. And I had to link to it. Hilarious!!)
Quiliting with flannel. Or Flannelette. ;)
The DVD was talking about being able to lower your feed dogs to do the quilting, and my machine just wasn't capable of that. However, it did come with a darning plate that fit over them and did essentially the same thing. I was in business!
I thought I needed to buy a new foot for my machine, but the foot I bought didn't work at all. What I wound up doing was just taking the foot off, engaging the pressure foot (sans foot) so the tension worked right, and sewing away. I was slightly terrified of sewing over my finger, but that thankfully never happened. I did start sewing with the presser foot up a bunch of times, which means that my tension was completely screwed, the machine jammed up, and I had to pull everything out.
I also learned to leave myself an escape route in my quilting, not to box myself in too much. The pattern I chose to do let me cross lines, so it wasn't a huge deal, but it could look a little bit awkward. It was surprisingly difficult to doodle a line that was random, and varied.
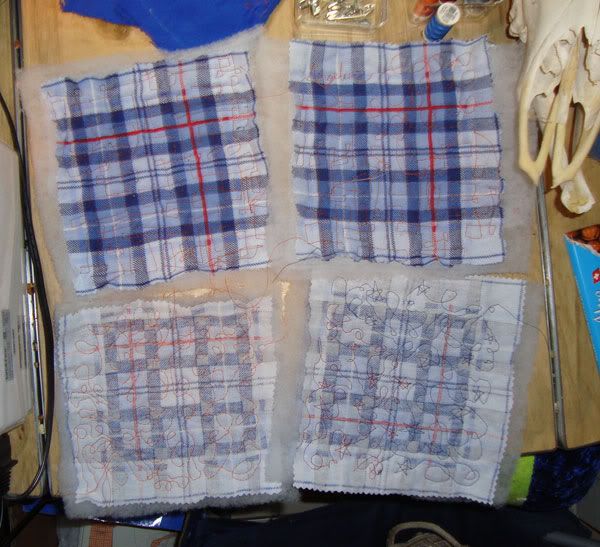
I made myself practise pieces by grabbing some of the extra blanket, and some of the extra batting. It really helped me with my confidence that I wasn't going to ruin this quilt top when I started doing the part that was new to me.
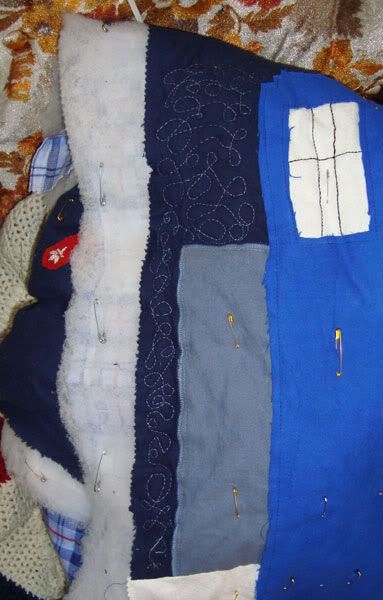
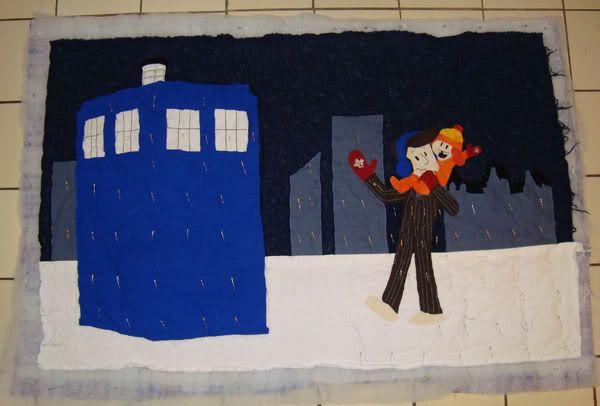
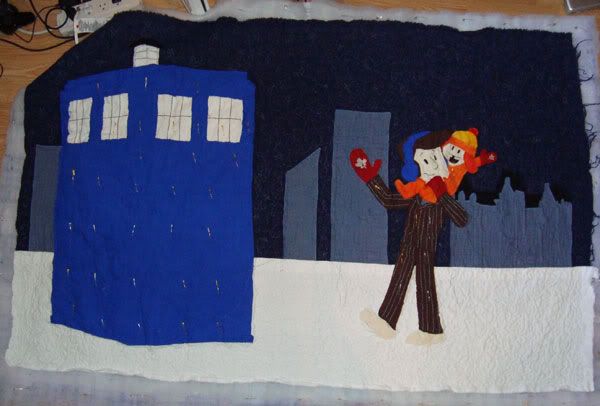
I decided to use a few different designs, depending on what I was quilting. I just zigzagged around the appliqués, and straight stitched down the details in the TARDIS and on the Doctor's jacket. The sky was a loop-d-loop with random stars in it.
After I finished with the sky, I decided to do the snow. BAD IDEA. What I should have done was move onto the buildings and TARDIS, working from left to right and top to bottom of my quilt. By pinning down the bottom of the quilt, I had some bunches to work through when I went to do the Doctor and the TARDIS.
The snow was the same pattern, minus the stars.
Bit clearer detail shot of the quilting, as well as my pin basting.
That one doesn't show up well resized, but you can see it better in the bigger picture it links to. It's the finished sky and snow quilting, from the back.
Originally, I was going to use a white to do the quilting in the snow on the right side of the quilt. But as I was working, some of the ends from the sky wound up falling on the snow, and they looked so much nicer than the white. After asking marii_chan's opinion, I decided to go with the same colour on both parts. It's a neat thing that the colour can look so different depending on what's surrounding it!
I also quilted my name in the snow.
The buildings were a more geometrical pattern so that you could see the design on the front when you looked at the back.
I had difficulty with the geometric pattern, and wound up pulling out the first try at quilting it. To help me avoid doing this again, I tried to sketch it out using some tailor's chalk. It didn't really work because the chalk rubbed off, but it did help me to get the pattern into my head.

Buildings finished.
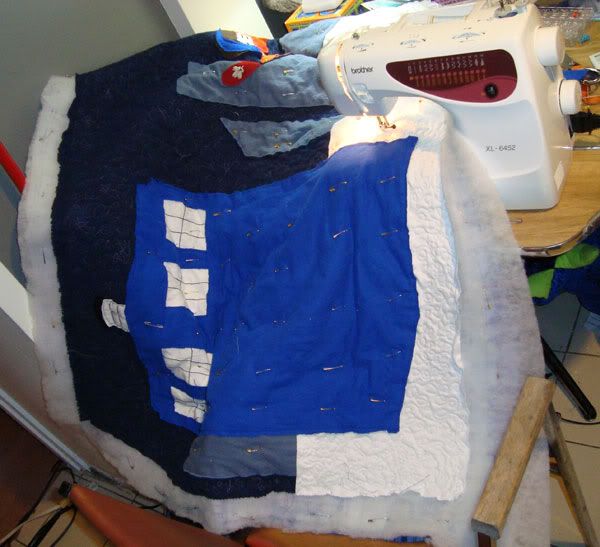
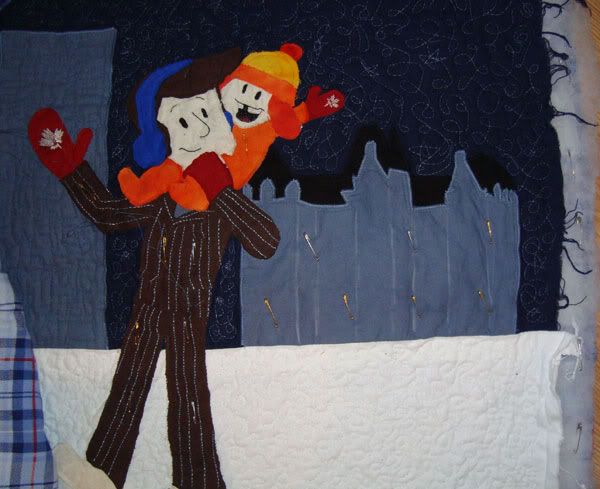
I decided that I didn't want to quilt over the Doctor with any pattern, since he already had such a strong design, and that might take away from it, blend it in. So I zigzagged around the outside of of all the individual pieces…
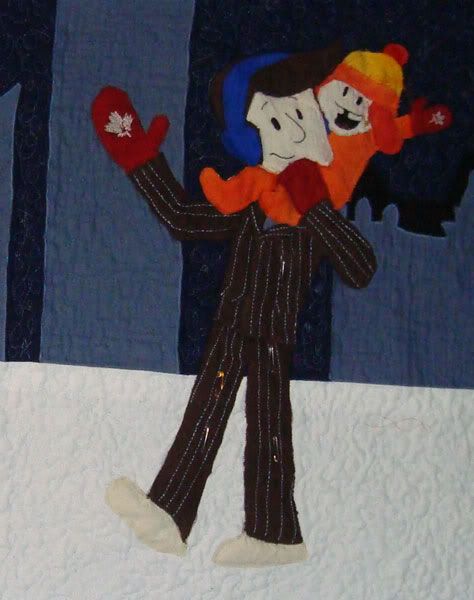
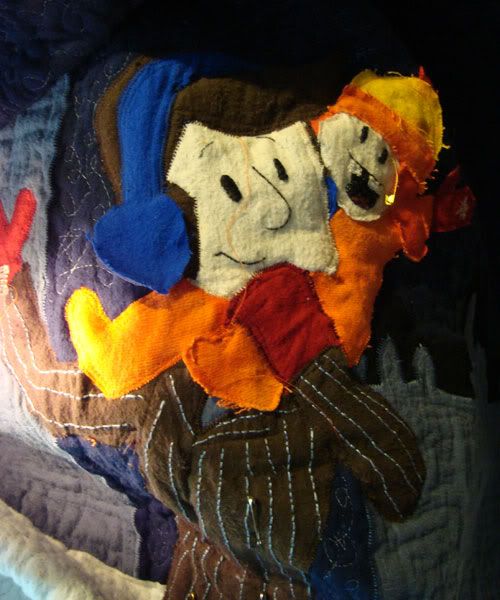
And then straight stitched the details on, like the division between his jacket and his pants, his pockets, his lapels, and on the kid's snow suit.
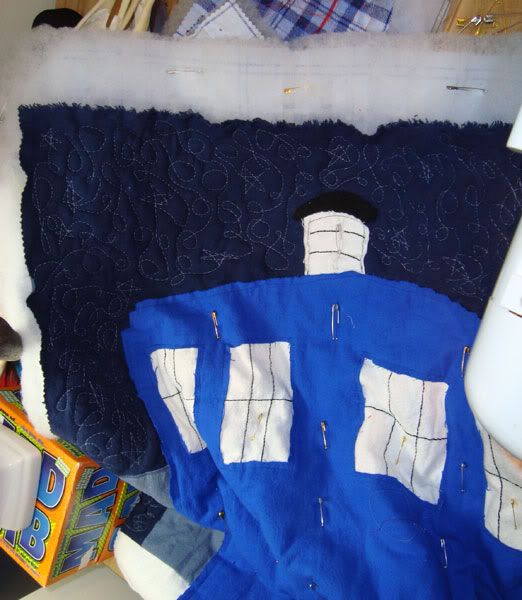
Transferring the design of the TARDIS from my pattern to the fabric was difficult, since somehow the pattern had shifted while I cut and it didn't quite line up perfectly any more. I actually wound up redrawing it with the only 'metre stick' I had at hand, a broom handle. I also found that tailor's chalk really did last the longest for marks on darker fabric.
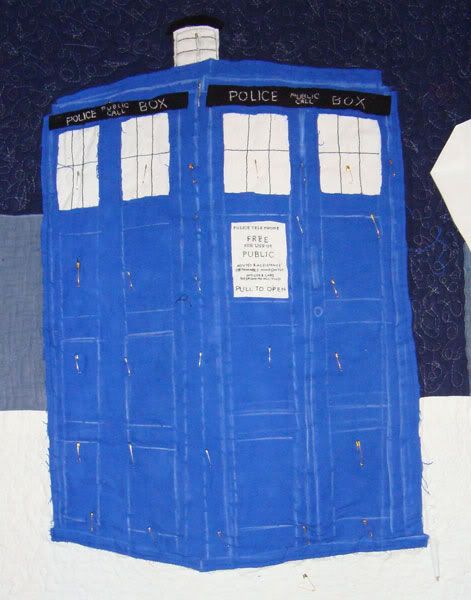
I think I managed to redraw it quite well. It's just unfortunate, because I spent so long getting the pattern right in the first place! I used the Doctor Who LCD game that I got as reference, and it was really quite helpful. Don't judge me!
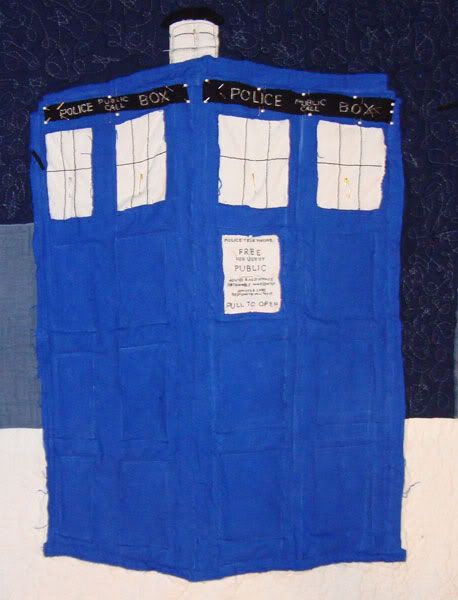
I also chose to use different colours in the bobbin thread when I was quilting. The Doctor's bobbin thread was a darker red, the carefully-gender-neutral Raisin Head was a lighter red, and the TARDIS was a lighter blue than what I was using for the rest of the quilting.
Design
Fabric
Embroidery
Sewing
Appliqué
QUILT ASSEMBLE GO!
Free motion quilting
Binding
Finishing touches
Baby shower
Free Motion Quilting
I got a DVD out of the library on free motion quilting, and it just seemed like the coolest thing on the planet. I also did some research online, and found a bunch of sites that have different free patterns on them.
(One of them, 365 days of free motion quilting filler designs, happened to have a very appropriate pattern for my subject matter, which I randomly just found while looking for the link for this write up. And I had to link to it. Hilarious!!)
Quiliting with flannel. Or Flannelette. ;)
The DVD was talking about being able to lower your feed dogs to do the quilting, and my machine just wasn't capable of that. However, it did come with a darning plate that fit over them and did essentially the same thing. I was in business!
I thought I needed to buy a new foot for my machine, but the foot I bought didn't work at all. What I wound up doing was just taking the foot off, engaging the pressure foot (sans foot) so the tension worked right, and sewing away. I was slightly terrified of sewing over my finger, but that thankfully never happened. I did start sewing with the presser foot up a bunch of times, which means that my tension was completely screwed, the machine jammed up, and I had to pull everything out.
I also learned to leave myself an escape route in my quilting, not to box myself in too much. The pattern I chose to do let me cross lines, so it wasn't a huge deal, but it could look a little bit awkward. It was surprisingly difficult to doodle a line that was random, and varied.
I made myself practise pieces by grabbing some of the extra blanket, and some of the extra batting. It really helped me with my confidence that I wasn't going to ruin this quilt top when I started doing the part that was new to me.
I decided to use a few different designs, depending on what I was quilting. I just zigzagged around the appliqués, and straight stitched down the details in the TARDIS and on the Doctor's jacket. The sky was a loop-d-loop with random stars in it.
After I finished with the sky, I decided to do the snow. BAD IDEA. What I should have done was move onto the buildings and TARDIS, working from left to right and top to bottom of my quilt. By pinning down the bottom of the quilt, I had some bunches to work through when I went to do the Doctor and the TARDIS.
The snow was the same pattern, minus the stars.
Bit clearer detail shot of the quilting, as well as my pin basting.
That one doesn't show up well resized, but you can see it better in the bigger picture it links to. It's the finished sky and snow quilting, from the back.
Originally, I was going to use a white to do the quilting in the snow on the right side of the quilt. But as I was working, some of the ends from the sky wound up falling on the snow, and they looked so much nicer than the white. After asking marii_chan's opinion, I decided to go with the same colour on both parts. It's a neat thing that the colour can look so different depending on what's surrounding it!
I also quilted my name in the snow.
The buildings were a more geometrical pattern so that you could see the design on the front when you looked at the back.
I had difficulty with the geometric pattern, and wound up pulling out the first try at quilting it. To help me avoid doing this again, I tried to sketch it out using some tailor's chalk. It didn't really work because the chalk rubbed off, but it did help me to get the pattern into my head.
Buildings finished.
I decided that I didn't want to quilt over the Doctor with any pattern, since he already had such a strong design, and that might take away from it, blend it in. So I zigzagged around the outside of of all the individual pieces…
And then straight stitched the details on, like the division between his jacket and his pants, his pockets, his lapels, and on the kid's snow suit.
Transferring the design of the TARDIS from my pattern to the fabric was difficult, since somehow the pattern had shifted while I cut and it didn't quite line up perfectly any more. I actually wound up redrawing it with the only 'metre stick' I had at hand, a broom handle. I also found that tailor's chalk really did last the longest for marks on darker fabric.
I think I managed to redraw it quite well. It's just unfortunate, because I spent so long getting the pattern right in the first place! I used the Doctor Who LCD game that I got as reference, and it was really quite helpful. Don't judge me!
I also chose to use different colours in the bobbin thread when I was quilting. The Doctor's bobbin thread was a darker red, the carefully-gender-neutral Raisin Head was a lighter red, and the TARDIS was a lighter blue than what I was using for the rest of the quilting.