Icon Tutorial No. 17: Yuuko2
Tutorial requested by
kokoro_chan93 and granted. 10 steps for the First Place icon of
xxxholic_still Week 13 (Fashion).
Level: Easy
Program: Adobe Photoshop 7.0
Go from this to this:
This tutorial works well on bases that have a particular scheme of color (rich colors, cool colors, etc.).
1. Start with this picture of Yuuko and crop it at 96x96 so that Yuuko's face is more on the right. Don't worry about any text on the bottom.
You should see something like this:
2. Duplicate the first layer (CTRL A>>CTRL C>>CTRL V) and sharpen it by going to FILTER>>SHARPEN>>SHARPEN. Set this layer to 40% opacity.
You should see something like this:
3. Select the first layer again. Use the Rectangle Marquee Tool and select the area around her eyes. Copy this layer and paste it onto the very top (CTRL C>>CTRL V).
You should see something like this:
4. Use the Rectangle Shape Tool and make two rectangles in #FFFFFF: the first so it vertically divides the two pictures, and the second horizontally so it covers less than a third of the bottom.
You should see something like this:
5. Create a new layer, then use this square brush by me in #7E453C so you're just covering over the Yuuko on the side. Set this layer to Saturation at 100%.
You should see something like this:
6. Create another new layer, then use this pattern by me to fill the entire icon. (How to make this pattern: Open a new 4x4 document with a transparent background. Use the Pencil tool and draw two lines on the top and third line from the top horizontally. Then go to EDIT>>DEFINE PATTERN. It should show up on your palate.) Erase any part that is not covering the Yuuko on the left. Set this layer to Overlay 100%.
You should see something like this:
7. Type 'F' in 36 pt Mutlu, #DD7559. Change the blending options so there's OUTER GLOW at 75% and STROKE in 2 pt #FFFFFF. Then type in 'ashtionista' in 9 pt Castellar, #841C00.
You should see something like this:
8. Create a new layer and use this edited brush by
cardcapturunder 'ashionista' in #841C00.
You should see something like this:
9. Create a new layer and fill it with #EA6514. Change layer options to SOFT LIGHT at 75% opacity.
You should see something like this:
10. Save the icon as a .png and open a new 100x100 blank document. Reopen your icon and paste it (CTRL A>>CTRL C>>CTRL V) onto the blank document. Use this dotted border brush by me in #841C00 and you're done!
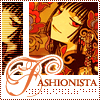
Your finished product should look like this:
_________
Was this tutorial helpful? Confusing? Too hard? Feedback would be wonderful!
[x] Like what you see? FRIEND
wicked_avis to stay updated on fresh tutorials, textures, brushes, and icons!
---
Yes, tutorial requests are still open in honor of 100 Watches--request a tutorial here!
kokoro_chan93 and granted. 10 steps for the First Place icon of
xxxholic_still Week 13 (Fashion).
Level: Easy
Program: Adobe Photoshop 7.0
Go from this to this:

This tutorial works well on bases that have a particular scheme of color (rich colors, cool colors, etc.).
1. Start with this picture of Yuuko and crop it at 96x96 so that Yuuko's face is more on the right. Don't worry about any text on the bottom.
You should see something like this:

2. Duplicate the first layer (CTRL A>>CTRL C>>CTRL V) and sharpen it by going to FILTER>>SHARPEN>>SHARPEN. Set this layer to 40% opacity.
You should see something like this:

3. Select the first layer again. Use the Rectangle Marquee Tool and select the area around her eyes. Copy this layer and paste it onto the very top (CTRL C>>CTRL V).
You should see something like this:

4. Use the Rectangle Shape Tool and make two rectangles in #FFFFFF: the first so it vertically divides the two pictures, and the second horizontally so it covers less than a third of the bottom.
You should see something like this:

5. Create a new layer, then use this square brush by me in #7E453C so you're just covering over the Yuuko on the side. Set this layer to Saturation at 100%.
You should see something like this:

6. Create another new layer, then use this pattern by me to fill the entire icon. (How to make this pattern: Open a new 4x4 document with a transparent background. Use the Pencil tool and draw two lines on the top and third line from the top horizontally. Then go to EDIT>>DEFINE PATTERN. It should show up on your palate.) Erase any part that is not covering the Yuuko on the left. Set this layer to Overlay 100%.
You should see something like this:

7. Type 'F' in 36 pt Mutlu, #DD7559. Change the blending options so there's OUTER GLOW at 75% and STROKE in 2 pt #FFFFFF. Then type in 'ashtionista' in 9 pt Castellar, #841C00.
You should see something like this:

8. Create a new layer and use this edited brush by
cardcapturunder 'ashionista' in #841C00.
You should see something like this:

9. Create a new layer and fill it with #EA6514. Change layer options to SOFT LIGHT at 75% opacity.
You should see something like this:

10. Save the icon as a .png and open a new 100x100 blank document. Reopen your icon and paste it (CTRL A>>CTRL C>>CTRL V) onto the blank document. Use this dotted border brush by me in #841C00 and you're done!
Your finished product should look like this:

_________
Was this tutorial helpful? Confusing? Too hard? Feedback would be wonderful!
[x] Like what you see? FRIEND

wicked_avis to stay updated on fresh tutorials, textures, brushes, and icons!
---
Yes, tutorial requests are still open in honor of 100 Watches--request a tutorial here!