Shayid Tutorial
Shayid 'Cry' Tutorial
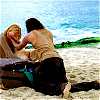
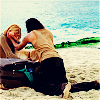
Go From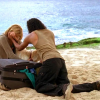
to
Made in PSP7, but should be transferable to other programs
Image Heavy.
First off, you need a base, I'm using this one (Credit to lost-media.com for the screen cap)
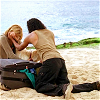
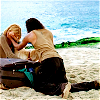
Sharpen once:

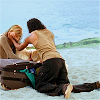
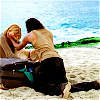
Duplicate your base layer twice, set the first to screen, 50% opacity and the second to soft light 25% opacity:
Next few steps are a variation of this tutorial ;
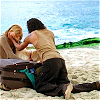
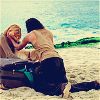
Create a new layer and flood fill with a light blue colour, I used #89C7E9:

Now, keeping the blend mode on normal, lower the opacity to about 50%, so you can see the picture underneath, and take your eraser, and erase the blue thats covering Shannon and Sayid:
Now, set the blue layer to burn, and put the opacity back up to 100%:
Now, create another new layer, this time floodfill with light grey, I used #C0C0C0, which was the default light grey, but heres the picture anyway:

Set your grey layer to burn, 50%:
Now, press ctrl + a to select the canvas, and then press ctrl + shift + c to copy merge your layers (or, alternatively you can go edit > copy merged) now, ctrl + l to paste you copy of your icon....onto your icon. (do not merge the original layers, you might want to tweak them when we're done)
Now, set your duplicate of your icon to screen 30%:
Duplicate that screened layer, and set the newly duplicated layer to soft light, keeping the opacity at 30%:
Create a new layer, and flood fill with a dark blue colour, I used #09123F:

Set the dark blue layer to exclusion 100%:
Next, make your blue layer invisible, by clicking the little glasses picture, and have the layer underneath it selected, like so:
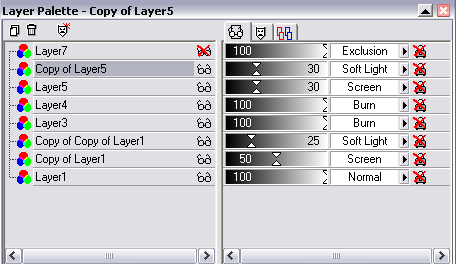
Now, do the whole ctrl + a / ctrl + shift + c copy merge thing again, then, paste the copy merged layer on top of your exclusion layer (which you can now make visible again) and set the copy merged layer to soft light 100%:
Now you can go back and if need be, adjust any setting that dont look quite right, then flatten you image.
Next, on a new layer, for the text, I used Carpenter ICG, size 22, to write 'cry' , sharpen your text layer and voila:
Any problems/questions/confusion, jsut comment and I will try my best to answer :)
Tutorial for the icon didnt turn out exactley like the original image, but I tried my best to duplicate it (although, the original was made in photoshop, then I switched over to psp7 half way though, then to psp8 to do the text since my psp7 goes mental when I try to add text, I thought all that would be a bit difficult for a tutorial, as its using three different programs so I just made do with psp7, so, if you're using photoshop, just change the 'burn' layers to 'colour burn' and it should turn out okay :):
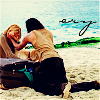
ORINGAL: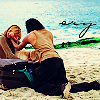
REMAKE:
Join this community
(Graphic Master List) ( Text Master List)
Go From
to
Made in PSP7, but should be transferable to other programs
Image Heavy.
First off, you need a base, I'm using this one (Credit to lost-media.com for the screen cap)
Sharpen once:
Duplicate your base layer twice, set the first to screen, 50% opacity and the second to soft light 25% opacity:
Next few steps are a variation of this tutorial ;
Create a new layer and flood fill with a light blue colour, I used #89C7E9:
Now, keeping the blend mode on normal, lower the opacity to about 50%, so you can see the picture underneath, and take your eraser, and erase the blue thats covering Shannon and Sayid:
Now, set the blue layer to burn, and put the opacity back up to 100%:
Now, create another new layer, this time floodfill with light grey, I used #C0C0C0, which was the default light grey, but heres the picture anyway:
Set your grey layer to burn, 50%:
Now, press ctrl + a to select the canvas, and then press ctrl + shift + c to copy merge your layers (or, alternatively you can go edit > copy merged) now, ctrl + l to paste you copy of your icon....onto your icon. (do not merge the original layers, you might want to tweak them when we're done)
Now, set your duplicate of your icon to screen 30%:
Duplicate that screened layer, and set the newly duplicated layer to soft light, keeping the opacity at 30%:
Create a new layer, and flood fill with a dark blue colour, I used #09123F:
Set the dark blue layer to exclusion 100%:
Next, make your blue layer invisible, by clicking the little glasses picture, and have the layer underneath it selected, like so:
Now, do the whole ctrl + a / ctrl + shift + c copy merge thing again, then, paste the copy merged layer on top of your exclusion layer (which you can now make visible again) and set the copy merged layer to soft light 100%:
Now you can go back and if need be, adjust any setting that dont look quite right, then flatten you image.
Next, on a new layer, for the text, I used Carpenter ICG, size 22, to write 'cry' , sharpen your text layer and voila:
Any problems/questions/confusion, jsut comment and I will try my best to answer :)
Tutorial for the icon didnt turn out exactley like the original image, but I tried my best to duplicate it (although, the original was made in photoshop, then I switched over to psp7 half way though, then to psp8 to do the text since my psp7 goes mental when I try to add text, I thought all that would be a bit difficult for a tutorial, as its using three different programs so I just made do with psp7, so, if you're using photoshop, just change the 'burn' layers to 'colour burn' and it should turn out okay :):
ORINGAL:
REMAKE:
Join this community
(Graphic Master List) ( Text Master List)