Phantoms
Here are two tutorials requested by the lovely Danielle. The original icons and several others can be found at this post. The first tutorial involves Alice & Jasper =] and is recommended for images with moderate green coloring and negative space. The second tutorial is from an Emily Browning icon that works best with pale colors and dark negative space. Psd is available with a comment, make sure you indicate which one you want. I send the psd by message so I can moniter who is taking them so please enable your messaging.
PSD LINKS NO LONGER NEED COMMENT, THEY ARE UNDER THE CUT
Program: Photoshop CS2
Involves: Selective Coloring, Color Balance, Curves
Level: Easy - Intermediate
Examples-
From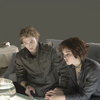
to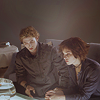
From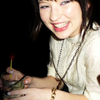
to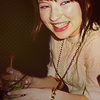
ALICE & JASPER TUTORIAL.
1. For my first step I followed the second & third step in this previous tutorial of mine. This will gave your base a purple tint and lighten it.

to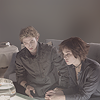
2. Create a new Hue/Saturation layer, I used these settings:
RGB: 0, +15, 0
Red: 0, +5, 0
The opacity was set at 65%
3. Create a new fill layer with #000000 and set it to 'Soft Light', my opacity is at 29%.
4. Create a new fill layer with #ff2a00 and set the layer to 'Overlay' at 4% opacity.
5. Create a new fill layer with #2e0d03 and set the layer to 'Exclusion' at 55% opacity.
6. Create a new fill layer with #fcd73c and set the layer to 'Soft Light' at 10% opacity.
Those four previous color layers add some more reds back into the image. If the red is already to drastic then you can eliminate step #4 or lower the opacity of step #5.
7. Create a new Selective Color layer, I used the following settings:
Reds: -6, +10, +11, +47
Yellows: 0, 0, +59, 0
Neutrals: -9, -3, -6, +7
8. Create a new Selective Color layer, I used the following settings:
Reds: -11, 0, 0, +22
Yellows: 0, 0, 0, +24
Neutrals: +11, 0, 0, 0
Those two selective coloring layers enhance the reds without being to drastic and adds some yellows to our image.
8. Create a new fill layer with #1f1603 and set the layer to 'Exclusion' at 65% opacity.
9. Create a new fill layer with #e260fe and set the layer to 'Difference' at 1% opacity.
10. Create a new fill layer with #a7e794 and set the layer to 'Color Burn' at 4% opacity.
11. Create a new Color Balance layer, I used the following settings:
Midtones: +12, +6, +11
Shadows: -16, -5, +7
Highlight: -7, 0, +17
12. Create a new Selective Color layer, I used the following settings:
Reds: -22, -1, +15, +6
Yellows: 0, 0, +9, +5
Whites: +33, 0, -15, -18
Neutrals: +12, +7, +8, -6
Black: 0, 0, 0, +4
13. Create a new Curves layer, I used the following settings:
RGB: 1st point, Input-128 Output-141
14. Duplicate your base layer twice and bring it to the top, set on layer to 'Soft Light' and one layer to 'Screen'. I adjusted my opacity to very low values of less than 20%.
15. I do this often in icons. I highlight my icons with white and black very subtle blobs. I set the layers to 'Soft Light' and adjust the opacity to [usually] below 20%.
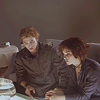
to
Psd is here.
EMILY BROWNING TUTORIAL.
1. For my first step I followed the second & third step in this previous tutorial of mine. This will gave your base a purple tint and lighten it.

to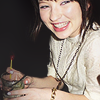
2. Create a new Curves layer, I used the following settings:
RGB: 1st point, Input-0 Output-24
2nd point, Input-114 Output-131
3. Create a new fill layer with #c8ff79 and set it to 'Saturation', my opacity is at 16%.
4. Create a new Selective Color layer, I used the following settings:
Reds: -26, +29, +30, +27
Yellows: +23, +20, +42, +31
Neutrals: +3, +7, +18, -13
Blacks: 0, 0, 0, +15
5. I used this texture and set the layer to 'Pin Light' at 25% opacity. [If this is your texture please let me know]
6. I used this texture and set the layer to 'Difference' at 19% opacity. [If this is your texture please let me know]
7. Ok last texture, I used this one and set it to 'Darken' at 11% opacity.
8. Create a new Color Balance layer, I used the following settings:
Midtones: +12, +12, +24
Shadows: -2, -12, -7
9. Create a Level layer, I used the following settings:
RGB: 9, 0.90, 247
Red: 10, 1.00, 255
Blue: 11, 1.00, 255
10. I added a halftone brush onto my image in the top left corner. My brush was set to white and my layer was set to 'Soft Light' at low opacity.

Psd is here.
Like what you see? Then join phanatasmaa
PSD LINKS NO LONGER NEED COMMENT, THEY ARE UNDER THE CUT
Program: Photoshop CS2
Involves: Selective Coloring, Color Balance, Curves
Level: Easy - Intermediate
Examples-
From

to

From

to

ALICE & JASPER TUTORIAL.
1. For my first step I followed the second & third step in this previous tutorial of mine. This will gave your base a purple tint and lighten it.

to

2. Create a new Hue/Saturation layer, I used these settings:
RGB: 0, +15, 0
Red: 0, +5, 0
The opacity was set at 65%
3. Create a new fill layer with #000000 and set it to 'Soft Light', my opacity is at 29%.
4. Create a new fill layer with #ff2a00 and set the layer to 'Overlay' at 4% opacity.
5. Create a new fill layer with #2e0d03 and set the layer to 'Exclusion' at 55% opacity.
6. Create a new fill layer with #fcd73c and set the layer to 'Soft Light' at 10% opacity.
Those four previous color layers add some more reds back into the image. If the red is already to drastic then you can eliminate step #4 or lower the opacity of step #5.
7. Create a new Selective Color layer, I used the following settings:
Reds: -6, +10, +11, +47
Yellows: 0, 0, +59, 0
Neutrals: -9, -3, -6, +7
8. Create a new Selective Color layer, I used the following settings:
Reds: -11, 0, 0, +22
Yellows: 0, 0, 0, +24
Neutrals: +11, 0, 0, 0
Those two selective coloring layers enhance the reds without being to drastic and adds some yellows to our image.
8. Create a new fill layer with #1f1603 and set the layer to 'Exclusion' at 65% opacity.
9. Create a new fill layer with #e260fe and set the layer to 'Difference' at 1% opacity.
10. Create a new fill layer with #a7e794 and set the layer to 'Color Burn' at 4% opacity.
11. Create a new Color Balance layer, I used the following settings:
Midtones: +12, +6, +11
Shadows: -16, -5, +7
Highlight: -7, 0, +17
12. Create a new Selective Color layer, I used the following settings:
Reds: -22, -1, +15, +6
Yellows: 0, 0, +9, +5
Whites: +33, 0, -15, -18
Neutrals: +12, +7, +8, -6
Black: 0, 0, 0, +4
13. Create a new Curves layer, I used the following settings:
RGB: 1st point, Input-128 Output-141
14. Duplicate your base layer twice and bring it to the top, set on layer to 'Soft Light' and one layer to 'Screen'. I adjusted my opacity to very low values of less than 20%.
15. I do this often in icons. I highlight my icons with white and black very subtle blobs. I set the layers to 'Soft Light' and adjust the opacity to [usually] below 20%.

to

Psd is here.
EMILY BROWNING TUTORIAL.
1. For my first step I followed the second & third step in this previous tutorial of mine. This will gave your base a purple tint and lighten it.

to

2. Create a new Curves layer, I used the following settings:
RGB: 1st point, Input-0 Output-24
2nd point, Input-114 Output-131
3. Create a new fill layer with #c8ff79 and set it to 'Saturation', my opacity is at 16%.
4. Create a new Selective Color layer, I used the following settings:
Reds: -26, +29, +30, +27
Yellows: +23, +20, +42, +31
Neutrals: +3, +7, +18, -13
Blacks: 0, 0, 0, +15
5. I used this texture and set the layer to 'Pin Light' at 25% opacity. [If this is your texture please let me know]
6. I used this texture and set the layer to 'Difference' at 19% opacity. [If this is your texture please let me know]
7. Ok last texture, I used this one and set it to 'Darken' at 11% opacity.
8. Create a new Color Balance layer, I used the following settings:
Midtones: +12, +12, +24
Shadows: -2, -12, -7
9. Create a Level layer, I used the following settings:
RGB: 9, 0.90, 247
Red: 10, 1.00, 255
Blue: 11, 1.00, 255
10. I added a halftone brush onto my image in the top left corner. My brush was set to white and my layer was set to 'Soft Light' at low opacity.

Psd is here.
Like what you see? Then join phanatasmaa