Back from the Bahamas
Here is a tutorial requested by jess_unlimited. The original icon and several others can be found at this post. This tutorial is meant for images that have black, or very dark, sections of negative space. Just keep this in mind. Comment for the .psd, it will be sent by message so I can moniter who is taking it.
PSD LINKS NO LONGER NEED COMMENT, THEY ARE UNDER THE CUT
Program: Photoshop CS2
Involves: Selective Coloring, Color Balance, Curves
Level: Easy - Intermediate
Example-
From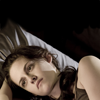
to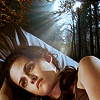
BELLA SWAN TUTORIAL.
1. Begin with your base, I added the negative space at the top. I also sharpened my base layer, in this case it does not need any intial brightening.

2. Next I used a forest texture I found at flickr and set the layer to 'Lighten'. For the record, here is a copy of the image I used [click]

to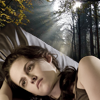
3. These next few steps I do often, I actually got it from one of Danielle's tutorials. Create a new fill layer with #fc1414 and set the layer to 'Overlay' at 2% opacity.
4. Create a new fill layer with #1a1302 and set the layer to 'Exculsion' at 42% opacity.
5. Create a new fill layer with #f2d61c and set the layer to 'Soft Light' at 14% opacity.
Those three fill layers add interesting depth and enhance the natural colors which are often unsaturated in Twilight pictures.
6. Create a new Selective Color layer (Layer - New Adjustment Layer - Selective Color). I used the following settings:
Reds: -70, +12, +45, 36
Yellows: +48, +21, +100, +27
Whites: +100, -7, -67, -14
This layer is quite drastic and will look bad on most images. My image is very unsaturated so it works, adjust yours accordingly.
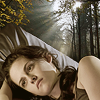
to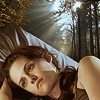
7. Create a new Color Balance layer (Layer - New Adjustment Layer - Color Balance) I used the following settings:
Midtones: -29, -16, +21
Shadows: +9, +3, -12
Highlights: -15, -11, +5
This layer will help balance out the strong reds and yellows created in the previous layer.

to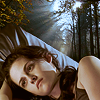
8. Create a new Selective Color layer (Layer - New Adjustment Layer - Selective Color). I used the following settings:
Reds: -20, +11, +18, +24
Yellows: -7, 0, +10, +23
Cyans: +100, 0, 0, 0
Whites: 0, 0, -7, -12
Neutrals: +12, +9, +9, -4

to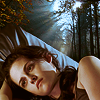
9. Create a new Curves layer (Layer - New Adjustment Layer - Curves) I used the following settings:
RGB: Point one, Input: 3 - Output: 0
Point two, Input: 131 - Output: 143

to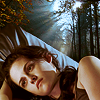
10. Here is where some thought and creativity comes in. I often do this with icons. I create new layers and draw subtly with a soft-edged brush using black and white, I set these layers to 'Soft Light' and lower to opacity to usually 20-40%. These will help highlight or darken certain areas.

to
Psd is here.
Like what you see? Then join phanatasmaa
PSD LINKS NO LONGER NEED COMMENT, THEY ARE UNDER THE CUT
Program: Photoshop CS2
Involves: Selective Coloring, Color Balance, Curves
Level: Easy - Intermediate
Example-
From

to

BELLA SWAN TUTORIAL.
1. Begin with your base, I added the negative space at the top. I also sharpened my base layer, in this case it does not need any intial brightening.

2. Next I used a forest texture I found at flickr and set the layer to 'Lighten'. For the record, here is a copy of the image I used [click]

to

3. These next few steps I do often, I actually got it from one of Danielle's tutorials. Create a new fill layer with #fc1414 and set the layer to 'Overlay' at 2% opacity.
4. Create a new fill layer with #1a1302 and set the layer to 'Exculsion' at 42% opacity.
5. Create a new fill layer with #f2d61c and set the layer to 'Soft Light' at 14% opacity.
Those three fill layers add interesting depth and enhance the natural colors which are often unsaturated in Twilight pictures.
6. Create a new Selective Color layer (Layer - New Adjustment Layer - Selective Color). I used the following settings:
Reds: -70, +12, +45, 36
Yellows: +48, +21, +100, +27
Whites: +100, -7, -67, -14
This layer is quite drastic and will look bad on most images. My image is very unsaturated so it works, adjust yours accordingly.

to

7. Create a new Color Balance layer (Layer - New Adjustment Layer - Color Balance) I used the following settings:
Midtones: -29, -16, +21
Shadows: +9, +3, -12
Highlights: -15, -11, +5
This layer will help balance out the strong reds and yellows created in the previous layer.

to

8. Create a new Selective Color layer (Layer - New Adjustment Layer - Selective Color). I used the following settings:
Reds: -20, +11, +18, +24
Yellows: -7, 0, +10, +23
Cyans: +100, 0, 0, 0
Whites: 0, 0, -7, -12
Neutrals: +12, +9, +9, -4

to

9. Create a new Curves layer (Layer - New Adjustment Layer - Curves) I used the following settings:
RGB: Point one, Input: 3 - Output: 0
Point two, Input: 131 - Output: 143

to

10. Here is where some thought and creativity comes in. I often do this with icons. I create new layers and draw subtly with a soft-edged brush using black and white, I set these layers to 'Soft Light' and lower to opacity to usually 20-40%. These will help highlight or darken certain areas.

to

Psd is here.
Like what you see? Then join phanatasmaa