(no subject)
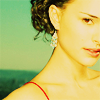
We’re going from 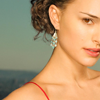
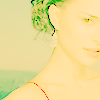
to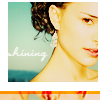
using PS CS.
Combining ideas from tutorials by brasaremean, which can be found here, and ___route66, which can be found here, and my own (your own) creativity.
I wrote this tutorial because i’m quite fond of the result, and so are a few others, and because i found out i combined a few techniques, that some others wrote tutorials about.
So i figured this is the perfect icon to show you what you can achieve when you combine and alter multiple tutorials, instead of just copying one, word by word.
If you don't know how curves work, i'd suggest you read this first!!!
I'm my original tutorial (written in word) i included details about the curves i used, but my entry turned out too large so i had to delete part of it, and considering that tutorial pretty much explains everything there is to know about curves, i decided to delete my curves part and link to that tutorial instead.
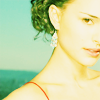
First, start of with your base. I’ve chosen a picture of Natalie Portman, cropped it and resized it.
I didn’t sharpen it, didn’t mess with the colors, it's just a cropped picture.
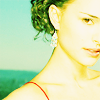
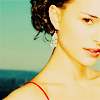
Now, make a new layer and fill it with a lovely shade of minty green, i used #ACF2B1.
Set the layer to 25% linear light. This will result into
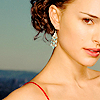
Now duplicate you base and set it to screen, 100%. This will lighten it up a bit more.
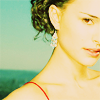
To add a bit of color, make 2 new layers, fill one of them with your lovely minty green and the other one with a nice shade of blue, i used #8CCAE1. Set both your layers to color burn at 100%. The result looks like
This will get you some nice, vivid coloring. You can leave one of them out, just use the blue one if you only want to enhance the blue shades, and get rid of a bit of red, and use the green one to enhance the green shades and add a bit of yellow to your result.
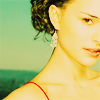
Now, duplicate your base once again, set it to screen at 100%.
Make a new layer, fill it with a light tan color, i used #F5EDD5, set it to multiply at 45%.
This will balance out some the lightning, it will prevent you from ending up with an icon with a pretty colored background and a really white person in the foreground.
Result:
Now comes the tricky part:
Make a new layer, hit Alt-Ctrl-Shift-E! This will stamp every layer that’s visible onto the new one, and you will get a merged layers effect, with all your original layers underneath it.
Set the layer to overlay, at 37%, and you’ll end up with something like
Go back to your green linear light layer, and set it to multiply at 28%. You don’t have to do this, you could also delete the layer, but whatever you do, don’t keep it on linear light!
I chose multiply because it gave a subtle, but pretty effect to my background.
Go to your tan multiply layer, add 2 new layers underneath it, fill one with #E18C8C, set to multiply at 24%, this gives Natalie a bit more of a pinkish/natural looking glow
and fill the other layer with #D8A44B, set to color burn at 29#. This might look a bot too orange for you, but we’ll fix that later on.
Go to layer >> new adjustment layer >> curves. Keep it on RBG and click somewhere on the line. Make sure a little dot shows up, and type for the first dot:
Input = 188, output = 176
Now click again, doesn’t really matter where, and type:
Input = 121, output = 108.
For the rest of the curves:
Red:
Input = 209, output = 200.
Input = 80, output = 115
Green:
Input = 175, output = 185.
Input = 1149, output = 74.
Blue:
Nothing!!!
Set the Curves layer to multiply, 30%.
Make another curves layer, and use these settings by brasaremean (i didn’t use these for my original icon, but they give a pretty similar effect).
RBG: Input = 106 , output = 150.
Red: Input = 115, output = 137.
Green: Input = 114, output = 130.
Blue: Input = 82, output = 142.
Set the layer to softlight, at 92%. This will lighten our icon, but it will preserve the contrast

Natalie turned out too orange/yellow for me, so i adjusted the colors. Go to layer >> new adjustment layer >> color balance. Use the next settings:
Color levels: +2, -15, +91.
Keep it on normal at 64% opacity
Now for the finishing touches.....
Sharpen your base once. If it’s still blurry, sharpen one of the duplicates! If it ends up too sharp, go to edit >> fade sharpen, but you can only use this option right after the sharpening.
Make a new layer, get a soft round brush, make a white circle on the background. Set it to softlight to light it up a bit.
Add some text, i added ‘shining’ using a font called miss.
Add another layer and make a white banner.
Select a little part of your icon that has some nice and vibrant coloring, go to edit >> copy merged, then paste it onto the icon, rotate 90% and place it where you want.
Add another layer, select a color from your icon, i used #D3360E, make a selection where you want the colored bar (or square) and set it to vivid light.
And you’re all done!!
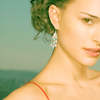
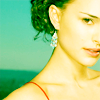
For comparison i made 2 icons, one using the tutorial by brasaremean and one using the tutorial by ___route66 and i ended up with these....
Quite the difference not?
Now, do NOT copy every word of the tutorial, rather use it as a guideline and use your own creativity!
to
using PS CS.
Combining ideas from tutorials by brasaremean, which can be found here, and ___route66, which can be found here, and my own (your own) creativity.
I wrote this tutorial because i’m quite fond of the result, and so are a few others, and because i found out i combined a few techniques, that some others wrote tutorials about.
So i figured this is the perfect icon to show you what you can achieve when you combine and alter multiple tutorials, instead of just copying one, word by word.
If you don't know how curves work, i'd suggest you read this first!!!
I'm my original tutorial (written in word) i included details about the curves i used, but my entry turned out too large so i had to delete part of it, and considering that tutorial pretty much explains everything there is to know about curves, i decided to delete my curves part and link to that tutorial instead.
First, start of with your base. I’ve chosen a picture of Natalie Portman, cropped it and resized it.
I didn’t sharpen it, didn’t mess with the colors, it's just a cropped picture.
Now, make a new layer and fill it with a lovely shade of minty green, i used #ACF2B1.
Set the layer to 25% linear light. This will result into
Now duplicate you base and set it to screen, 100%. This will lighten it up a bit more.
To add a bit of color, make 2 new layers, fill one of them with your lovely minty green and the other one with a nice shade of blue, i used #8CCAE1. Set both your layers to color burn at 100%. The result looks like
This will get you some nice, vivid coloring. You can leave one of them out, just use the blue one if you only want to enhance the blue shades, and get rid of a bit of red, and use the green one to enhance the green shades and add a bit of yellow to your result.
Now, duplicate your base once again, set it to screen at 100%.
Make a new layer, fill it with a light tan color, i used #F5EDD5, set it to multiply at 45%.
This will balance out some the lightning, it will prevent you from ending up with an icon with a pretty colored background and a really white person in the foreground.
Result:
Now comes the tricky part:
Make a new layer, hit Alt-Ctrl-Shift-E! This will stamp every layer that’s visible onto the new one, and you will get a merged layers effect, with all your original layers underneath it.
Set the layer to overlay, at 37%, and you’ll end up with something like
Go back to your green linear light layer, and set it to multiply at 28%. You don’t have to do this, you could also delete the layer, but whatever you do, don’t keep it on linear light!
I chose multiply because it gave a subtle, but pretty effect to my background.
Go to your tan multiply layer, add 2 new layers underneath it, fill one with #E18C8C, set to multiply at 24%, this gives Natalie a bit more of a pinkish/natural looking glow
and fill the other layer with #D8A44B, set to color burn at 29#. This might look a bot too orange for you, but we’ll fix that later on.
Go to layer >> new adjustment layer >> curves. Keep it on RBG and click somewhere on the line. Make sure a little dot shows up, and type for the first dot:
Input = 188, output = 176
Now click again, doesn’t really matter where, and type:
Input = 121, output = 108.
For the rest of the curves:
Red:
Input = 209, output = 200.
Input = 80, output = 115
Green:
Input = 175, output = 185.
Input = 1149, output = 74.
Blue:
Nothing!!!
Set the Curves layer to multiply, 30%.
Make another curves layer, and use these settings by brasaremean (i didn’t use these for my original icon, but they give a pretty similar effect).
RBG: Input = 106 , output = 150.
Red: Input = 115, output = 137.
Green: Input = 114, output = 130.
Blue: Input = 82, output = 142.
Set the layer to softlight, at 92%. This will lighten our icon, but it will preserve the contrast
Natalie turned out too orange/yellow for me, so i adjusted the colors. Go to layer >> new adjustment layer >> color balance. Use the next settings:
Color levels: +2, -15, +91.
Keep it on normal at 64% opacity
Now for the finishing touches.....
Sharpen your base once. If it’s still blurry, sharpen one of the duplicates! If it ends up too sharp, go to edit >> fade sharpen, but you can only use this option right after the sharpening.
Make a new layer, get a soft round brush, make a white circle on the background. Set it to softlight to light it up a bit.
Add some text, i added ‘shining’ using a font called miss.
Add another layer and make a white banner.
Select a little part of your icon that has some nice and vibrant coloring, go to edit >> copy merged, then paste it onto the icon, rotate 90% and place it where you want.
Add another layer, select a color from your icon, i used #D3360E, make a selection where you want the colored bar (or square) and set it to vivid light.
And you’re all done!!
For comparison i made 2 icons, one using the tutorial by brasaremean and one using the tutorial by ___route66 and i ended up with these....
Quite the difference not?
Now, do NOT copy every word of the tutorial, rather use it as a guideline and use your own creativity!