Cedric Diggory coloring & effect tutorial
As requested by sg_rockstar.
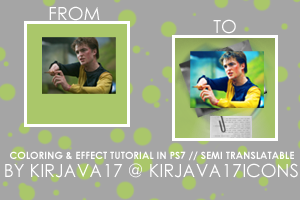
The effects are translatable but the coloring is not.

Start off with a pretty color. I picked #AAC76A and filled my 100x100 blank with it. Then I took a picture of Cedric and resized it until I was satisfied.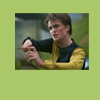
Duplicate the picture layer, set it to Screen, 100%.

I then selected only the picture part of the icon. This is so you can make a mask. Create a new Hue/Saturation Layer. Increase the saturation by +35. With the picture selected, the adjustment layer should have been masked to the picture and will not affect the background.

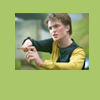
Select only the picture again. You'll be doing this for a while. Create a new color Balance layer with the following settings:
Shadows: +13 -5 +16
Midtones: -50 -21 +35
Highlights: 0 0 0

Create a new layer. Select only the picture area, and fill it with #002157 and set it to Exclusion, 60%.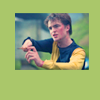

Create a new layer. Select only the picture area, and fill it with #FDC689 and set it to Color Burn, 30%.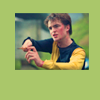
Select only the picture again. Create a Curves layer.
In RGB (2 points)
Point 1: Input 78, Output 62; Point 2: Input 184, Output 200.
In Green (1 point)
Input 255, Output 255.
In Blue (2 points)
Point 1: Input 68, Output 71; Point 2: Input 186, Output 202.
Select only the picture again. Create a selective color layer. Plug in the following settings:
Reds: -100 0 +100 0
Yellows: -100 0 +100 0
Cyans: +100 0 -100 0
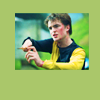
Last color layer! Select only the picture again. Create a Color Balance layer. Plug in the following settings.
Shadows: +14 +13 +22
Midtones: +12 +15 +24
Highlights: 0 0 0

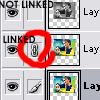
Now link all the color & picture layers (everything except layer 1). Merge them (ctrl e).

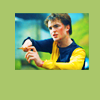
Duplicate the layer you just merged. Desaturate it and move it behind the main picture. Hit ctrl t to transform it. Flip it a little to the side so it sticks out.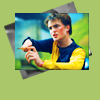
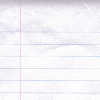
Copy the texture (by dusty_memories) on the left and paste it into a new layer. Set it to Multiply, 100%. Move it to the bottom, above Layer 1 (the green background).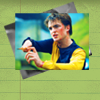

Copy the texture (by me) on the left and paste it into a new layer. Move it to the bottom, but above layer 1 and the last texture layer.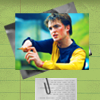
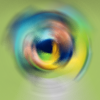
Final step! Create a new layer. Copy merged - shift Ctrl Alt E. Now go to Filter >> Blur >> Radial Blur. Set the Amount to 50, Blur Method to Spin, and Quality to Best. Move this layer between the first texture (notebook) and the second (paperclip).
You're done! If you have any questions/are confused, feel free to ask.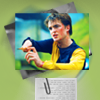
previous tutorials click icon for tutorial

For more icons, tutorials, and everything else, please join kirjava17icons!
The effects are translatable but the coloring is not.
Start off with a pretty color. I picked #AAC76A and filled my 100x100 blank with it. Then I took a picture of Cedric and resized it until I was satisfied.
Duplicate the picture layer, set it to Screen, 100%.
I then selected only the picture part of the icon. This is so you can make a mask. Create a new Hue/Saturation Layer. Increase the saturation by +35. With the picture selected, the adjustment layer should have been masked to the picture and will not affect the background.
Select only the picture again. You'll be doing this for a while. Create a new color Balance layer with the following settings:
Shadows: +13 -5 +16
Midtones: -50 -21 +35
Highlights: 0 0 0
Create a new layer. Select only the picture area, and fill it with #002157 and set it to Exclusion, 60%.
Create a new layer. Select only the picture area, and fill it with #FDC689 and set it to Color Burn, 30%.
Select only the picture again. Create a Curves layer.
In RGB (2 points)
Point 1: Input 78, Output 62; Point 2: Input 184, Output 200.
In Green (1 point)
Input 255, Output 255.
In Blue (2 points)
Point 1: Input 68, Output 71; Point 2: Input 186, Output 202.
Select only the picture again. Create a selective color layer. Plug in the following settings:
Reds: -100 0 +100 0
Yellows: -100 0 +100 0
Cyans: +100 0 -100 0
Last color layer! Select only the picture again. Create a Color Balance layer. Plug in the following settings.
Shadows: +14 +13 +22
Midtones: +12 +15 +24
Highlights: 0 0 0
Now link all the color & picture layers (everything except layer 1). Merge them (ctrl e).
Duplicate the layer you just merged. Desaturate it and move it behind the main picture. Hit ctrl t to transform it. Flip it a little to the side so it sticks out.
Copy the texture (by dusty_memories) on the left and paste it into a new layer. Set it to Multiply, 100%. Move it to the bottom, above Layer 1 (the green background).
Copy the texture (by me) on the left and paste it into a new layer. Move it to the bottom, but above layer 1 and the last texture layer.
Final step! Create a new layer. Copy merged - shift Ctrl Alt E. Now go to Filter >> Blur >> Radial Blur. Set the Amount to 50, Blur Method to Spin, and Quality to Best. Move this layer between the first texture (notebook) and the second (paperclip).
You're done! If you have any questions/are confused, feel free to ask.
previous tutorials click icon for tutorial
For more icons, tutorials, and everything else, please join kirjava17icons!