Tutorial 02
Tutorial requested by helenbutterfly. Please note that this tutorial is very graphic heavy, contains numerous steps and contains some selective coloring, making it non-translatable for PSP users.
I'll show you how to go from:
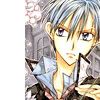
to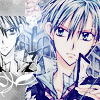
Made with Photoshop CS2.

Start off with our base. You don't need a white background, I just left one there because it's more convenient when writing a tutorial. Sharpen the base and go Edit > Fade Sharpen and lower the opacity if the image is too sharp.

The next few steps (including this one) follow the Aged Plum tutorial. Add a new layer and fill it with #6FBE57 and set it to Color Burn, 66%.
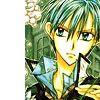

Fill the new layer with #03073B and set to Exclusion, 100%.
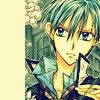

Fill another new layer with #A09E72, and set to Darken, 44%.
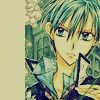

Add a new layer and fill with #FFA9A9, set to Soft Light, 100%.
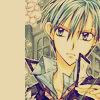

Again, create a new layer and fill with #D7E8F9. Set the layer mode to Color Burn, 100%.
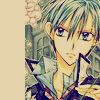
Now, duplicate the base, bring to the top and set to Soft Light and desaturate.
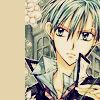

Add another layer and fill with, #132754. Set the layer mode to Screen, 100%.
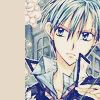
Now I'm going to enhance the colours of my icon by adding a New Adjustment Layer > Color Balance; I enhance the blues and magentas and tone down other colours. Next I add another New Adjustment Layer > Selective Color; I again enhance the colours I want, tone down colours I don't want and I build constrast within the icon details. As you can it's starting to look better.
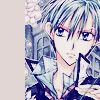

I take this texture by colorfilter. I "crop" it so to speak so that it fits in the empty space in the left area of my icon. Desaturate the texture and then play with Brightness and Constrast so it stands out more. I lowered brightness and upped the constrast. After that, duplicate the texture again and set to Soft Light.
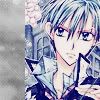
Take your base image, bring it to the top. "Crop" and resize it. Flip the base if you want. Duplicate this layer twice and set both layers to Soft Light. Add a Gaussian Blur of around 2-4 to the second (top) layer of your mini base.
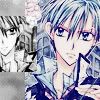
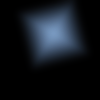
Take a texture like this (I made it, but it's really something everyone can make) and set it to Screen. I move it around so it doesn't cover Shizumasa's face.
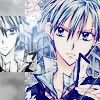
Add your final touches. I just added a brush by Lovely Trash, from the Carved Box Set.

That's the tutorial. It's meant to be a guide so I suggest exoerimenting with opacities, layer modes and textures because the results are going to vary for each person. :) Feel free to post results or ask questions if you're having troubles or something.
I'll show you how to go from:

to
Made with Photoshop CS2.

Start off with our base. You don't need a white background, I just left one there because it's more convenient when writing a tutorial. Sharpen the base and go Edit > Fade Sharpen and lower the opacity if the image is too sharp.

The next few steps (including this one) follow the Aged Plum tutorial. Add a new layer and fill it with #6FBE57 and set it to Color Burn, 66%.


Fill the new layer with #03073B and set to Exclusion, 100%.


Fill another new layer with #A09E72, and set to Darken, 44%.


Add a new layer and fill with #FFA9A9, set to Soft Light, 100%.


Again, create a new layer and fill with #D7E8F9. Set the layer mode to Color Burn, 100%.

Now, duplicate the base, bring to the top and set to Soft Light and desaturate.


Add another layer and fill with, #132754. Set the layer mode to Screen, 100%.

Now I'm going to enhance the colours of my icon by adding a New Adjustment Layer > Color Balance; I enhance the blues and magentas and tone down other colours. Next I add another New Adjustment Layer > Selective Color; I again enhance the colours I want, tone down colours I don't want and I build constrast within the icon details. As you can it's starting to look better.


I take this texture by colorfilter. I "crop" it so to speak so that it fits in the empty space in the left area of my icon. Desaturate the texture and then play with Brightness and Constrast so it stands out more. I lowered brightness and upped the constrast. After that, duplicate the texture again and set to Soft Light.

Take your base image, bring it to the top. "Crop" and resize it. Flip the base if you want. Duplicate this layer twice and set both layers to Soft Light. Add a Gaussian Blur of around 2-4 to the second (top) layer of your mini base.


Take a texture like this (I made it, but it's really something everyone can make) and set it to Screen. I move it around so it doesn't cover Shizumasa's face.

Add your final touches. I just added a brush by Lovely Trash, from the Carved Box Set.
That's the tutorial. It's meant to be a guide so I suggest exoerimenting with opacities, layer modes and textures because the results are going to vary for each person. :) Feel free to post results or ask questions if you're having troubles or something.