Tutorial 03
Tutorial requested by catastrophiel (although I'm not that proud of this icon). Please note that this tutorial is very graphic heavy, contains numerous steps and contains some selective coloring. Although I'd say this tutorial is quite newbie friendly.
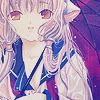
I'll show you how to go from:

to
Made with Photoshop CS2.

Start off with our base and Sharpen the it. Go to Edit > Fade Sharpen and lower the opacity if the image is too sharp.

Add a new layer and fill it with a light gray colour and set to Multiply, 100%. I used #dcdcdc.


Add another layer and fill with a dark blue colour (I use #182258) and set to Exclusion, 100%.


Now I add a blue-purplish gradient (this one I made), and set to Soft Light, 100%.

Duplicate your base, bring to the top and set to Color Burn. I lower the opacity to around 20-30%.
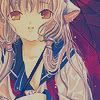
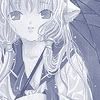
Duplicate your base again, bring to the top. Hit Ctrl + U or go Image > Adjustments > Hue Saturation and hit the Colorize box. Change the settings until you get a colour you want (mine just happened to turn out blue). Now set to Soft Light.
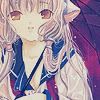

Add another colour layer. I added a light purple colour (#c7cdee), and set to Color Burn and lower the opacity to around 40%.
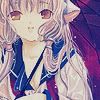

Add a new gradient layer. I chose a purple gradient that I made myself. Set the layer mode to Soft Light, 100%.
Take this texture by gender and set to Screen.

Next I'm going to add a New Adjustment Layer > Color Balance to make some colour changes. Then I add a New Adjustment Layer > Selective Color to enhance colours I want and build contrast within the icon. This part is where you have to experiment for yourself as results will vary.


Take this texture by silverqe and set to Screen.

Duplicate your base and bring to the top. Hit Ctrl + U or go Image > Adjustments > Hue and Saturation and lower the saturation bar to -60 to -80. (Or you could just desaturate the base completely). Now set to Soft Light. Duplicate this layer and add a Gaussian Blur of around 2-4. Add any finishing touches and you're done!

Feel free to give me feedback about my tutorial or ask questions if you're stuck or something doesn't make sense or post your results. Also be sure to experiment with layer modes and opacities, as all results will vary. :D
I hope no one minds me answering me one question. For this tutorial I used slightly lower quality JPEG's (you can tell slightly). Would you rather have higher quality JPEG's or slightly lower quality JPEG's? Since I include alot of images in my tuts I don't want it to take forever to load for others, but on the other hand I don't want to compromise quality too much...
Friend me to keep with updates?
I'll show you how to go from:

to
Made with Photoshop CS2.

Start off with our base and Sharpen the it. Go to Edit > Fade Sharpen and lower the opacity if the image is too sharp.

Add a new layer and fill it with a light gray colour and set to Multiply, 100%. I used #dcdcdc.


Add another layer and fill with a dark blue colour (I use #182258) and set to Exclusion, 100%.


Now I add a blue-purplish gradient (this one I made), and set to Soft Light, 100%.

Duplicate your base, bring to the top and set to Color Burn. I lower the opacity to around 20-30%.


Duplicate your base again, bring to the top. Hit Ctrl + U or go Image > Adjustments > Hue Saturation and hit the Colorize box. Change the settings until you get a colour you want (mine just happened to turn out blue). Now set to Soft Light.


Add another colour layer. I added a light purple colour (#c7cdee), and set to Color Burn and lower the opacity to around 40%.


Add a new gradient layer. I chose a purple gradient that I made myself. Set the layer mode to Soft Light, 100%.


Take this texture by gender and set to Screen.

Next I'm going to add a New Adjustment Layer > Color Balance to make some colour changes. Then I add a New Adjustment Layer > Selective Color to enhance colours I want and build contrast within the icon. This part is where you have to experiment for yourself as results will vary.


Take this texture by silverqe and set to Screen.

Duplicate your base and bring to the top. Hit Ctrl + U or go Image > Adjustments > Hue and Saturation and lower the saturation bar to -60 to -80. (Or you could just desaturate the base completely). Now set to Soft Light. Duplicate this layer and add a Gaussian Blur of around 2-4. Add any finishing touches and you're done!

Feel free to give me feedback about my tutorial or ask questions if you're stuck or something doesn't make sense or post your results. Also be sure to experiment with layer modes and opacities, as all results will vary. :D
I hope no one minds me answering me one question. For this tutorial I used slightly lower quality JPEG's (you can tell slightly). Would you rather have higher quality JPEG's or slightly lower quality JPEG's? Since I include alot of images in my tuts I don't want it to take forever to load for others, but on the other hand I don't want to compromise quality too much...
Friend me to keep with updates?