Text Light Texture Tutorial
Text Light Texture Tutorial
(FOR ADOBE PHOTOSHOP CS2)
I doubt it's translatable.

^ that's what we'll be making. :)
okay. so it took a lot of time, questions, and googling for me to figure this out. lol but i finally did. :)
1. Open a new layer. i chose the dimensions 550x350 just so i have enough room to do what i want.
2. Create a new layer.
3. Choose a font. I chose "hakee2". This might work (and look) better with a cursivey type of font. But it's totally up to you.
4. Type text. I chose 100pt for the size. Depending on what type of font you use, that might be too big. Just keep it in the box.
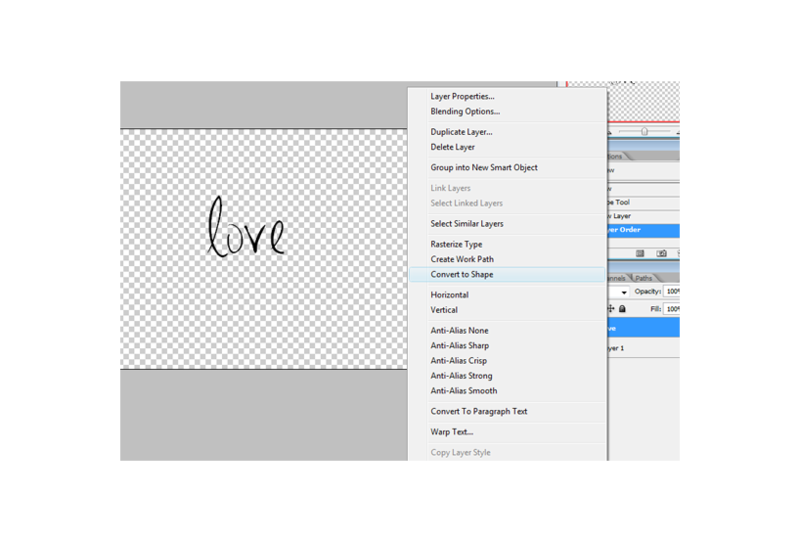
5. Now right click on text layer and click "Convert to Shape"
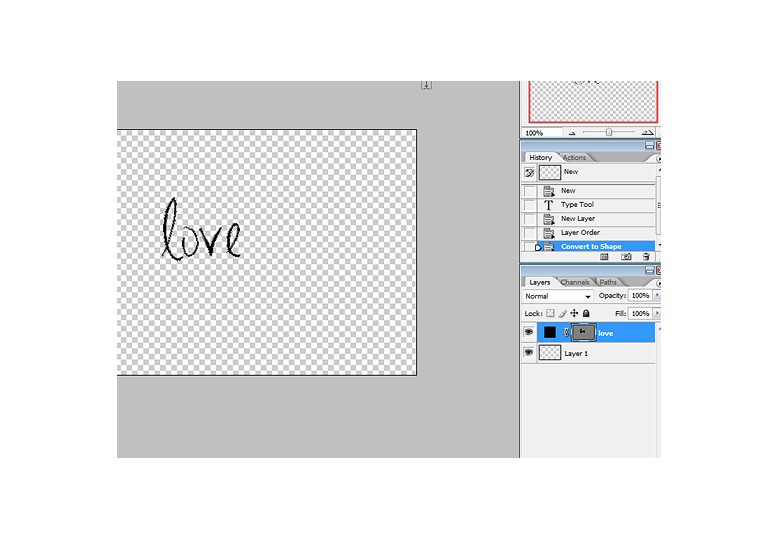
6. Go to Edit > Definie Custom Shape...
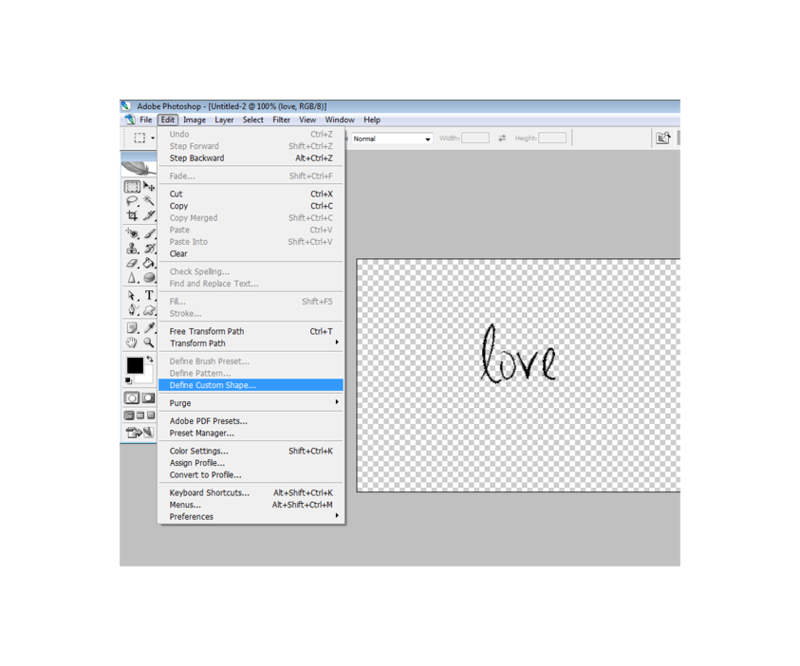
A little thing will pop-up asking you what you want to name it. You can name it whatever you want, then click ok.
7. Open new layer. (same dimensions: 550 x 350). Fill with #000000 (Black), then create another new layer.
* If you're using Photoshop CS3, don't create a new layer. Just create the custom shape onto the first layer. *
8. Right click on the Rectangle Tool > choose the Custom Shapes Tool. Right click on the canvas, and choose the text shape you just made. It'll be at the bottom, most likely.
Click the canvas and drag until you get the size you want.
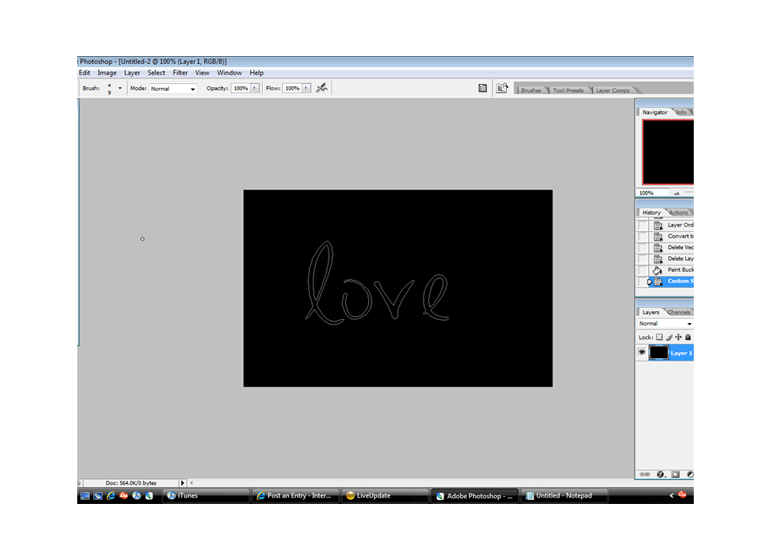
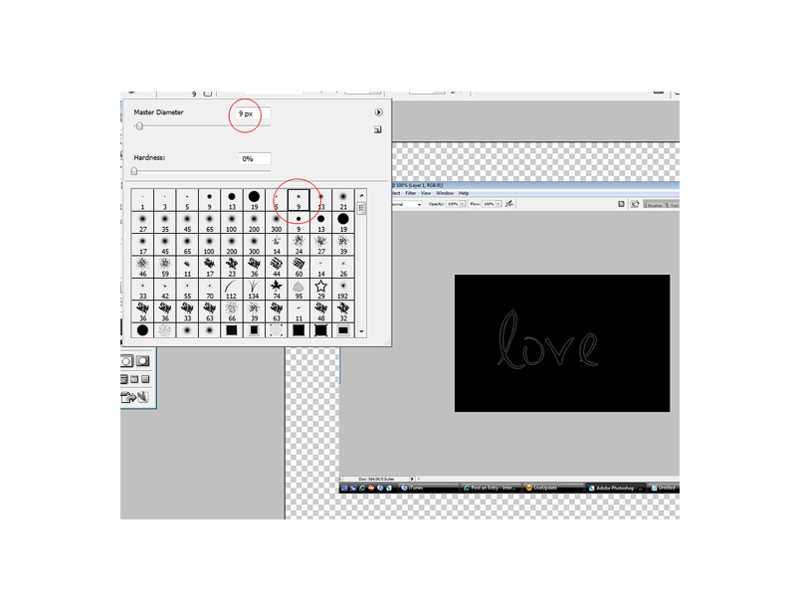
9. Click the Brush Tool. Choose the Soft Brush at 9px and make the foreground color #FFFFFF (White).
10. Select the Pen Tool. Then right click on the shape > Stroke Path...
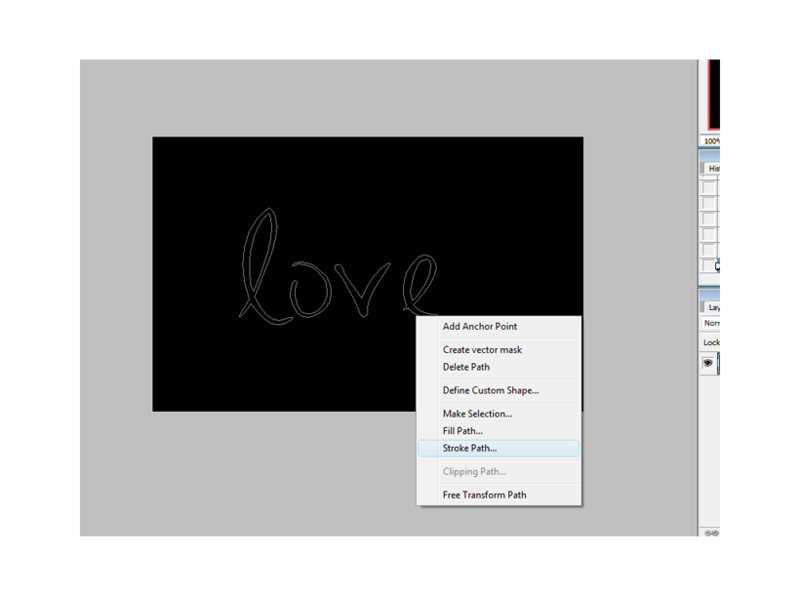
11. Choose "Brush" and check Simulate Pressure.

12. Right click this layer, and go to Blending Options > Outer Glow.
- Blend mode: Normal
- Opacity: 100%
- Choose any color
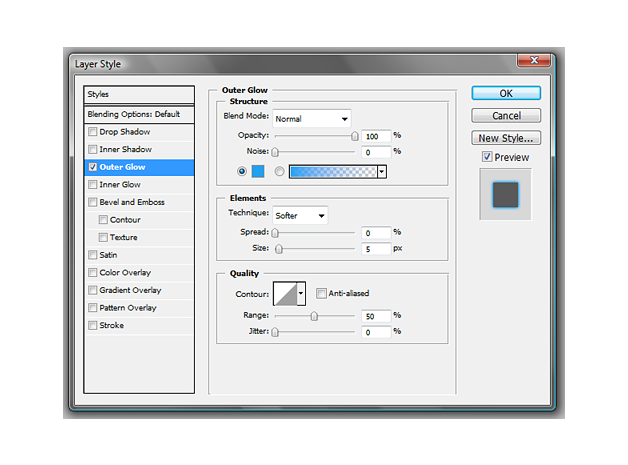
13. Now, you can leave it like this if you'd like. If you do, then skip to STEP #15. and you'll get this: http://img.photobucket.com/albums/v235/shagging/LIVEJOURNAL/lovebl.png
But I added a little more:
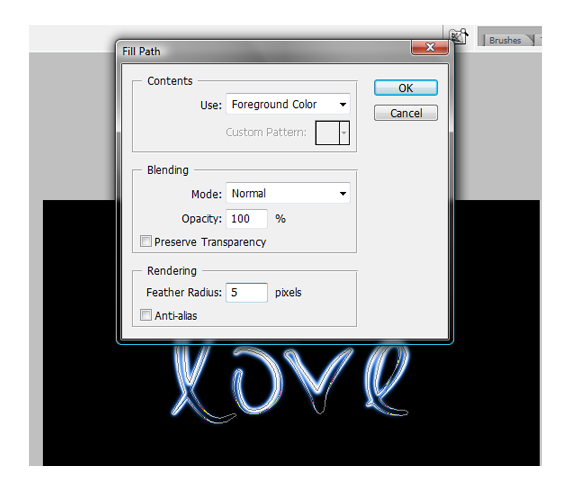
14. Select the pen tool again, and right click the lines like you would for the stroke path. Now, instead of choosing, Stroke Path... choose Fill Path...
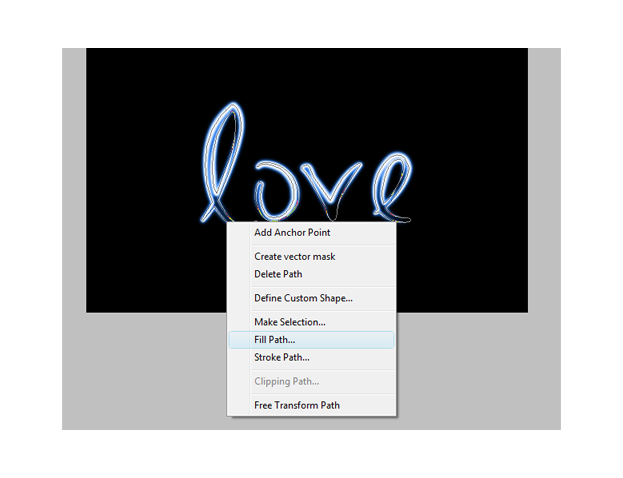
- For "Use:" select (foreground color)
- Make sure your foreground color is #FFFFFF (White).
- Set the "Feather Radius" to 5.
Leave everything else the same.
15. Select canvas (CTRL + A) and click the Delete button on your keyboard. Then unselect canvas. Merge layers.

And that's it! :) It sounds tricky, but it's really not.
Questions or comments? Contact me: unlistings
Let me know if you like this tutorial, I'd love to see your finished work! :]
(FOR ADOBE PHOTOSHOP CS2)
I doubt it's translatable.

^ that's what we'll be making. :)
okay. so it took a lot of time, questions, and googling for me to figure this out. lol but i finally did. :)
1. Open a new layer. i chose the dimensions 550x350 just so i have enough room to do what i want.
2. Create a new layer.
3. Choose a font. I chose "hakee2". This might work (and look) better with a cursivey type of font. But it's totally up to you.
4. Type text. I chose 100pt for the size. Depending on what type of font you use, that might be too big. Just keep it in the box.
5. Now right click on text layer and click "Convert to Shape"


6. Go to Edit > Definie Custom Shape...

A little thing will pop-up asking you what you want to name it. You can name it whatever you want, then click ok.
7. Open new layer. (same dimensions: 550 x 350). Fill with #000000 (Black), then create another new layer.
* If you're using Photoshop CS3, don't create a new layer. Just create the custom shape onto the first layer. *
8. Right click on the Rectangle Tool > choose the Custom Shapes Tool. Right click on the canvas, and choose the text shape you just made. It'll be at the bottom, most likely.
Click the canvas and drag until you get the size you want.

9. Click the Brush Tool. Choose the Soft Brush at 9px and make the foreground color #FFFFFF (White).

10. Select the Pen Tool. Then right click on the shape > Stroke Path...

11. Choose "Brush" and check Simulate Pressure.

12. Right click this layer, and go to Blending Options > Outer Glow.
- Blend mode: Normal
- Opacity: 100%
- Choose any color

13. Now, you can leave it like this if you'd like. If you do, then skip to STEP #15. and you'll get this: http://img.photobucket.com/albums/v235/shagging/LIVEJOURNAL/lovebl.png
But I added a little more:
14. Select the pen tool again, and right click the lines like you would for the stroke path. Now, instead of choosing, Stroke Path... choose Fill Path...

- For "Use:" select (foreground color)
- Make sure your foreground color is #FFFFFF (White).
- Set the "Feather Radius" to 5.
Leave everything else the same.

15. Select canvas (CTRL + A) and click the Delete button on your keyboard. Then unselect canvas. Merge layers.

And that's it! :) It sounds tricky, but it's really not.
Questions or comments? Contact me: unlistings
Let me know if you like this tutorial, I'd love to see your finished work! :]