67
in
icon_tutorial
HEEE.
I FIGURED IT OUT OMG YOU GUISE hurp hurp
How to make this piece of badassery:

Using Photoshop 7.0
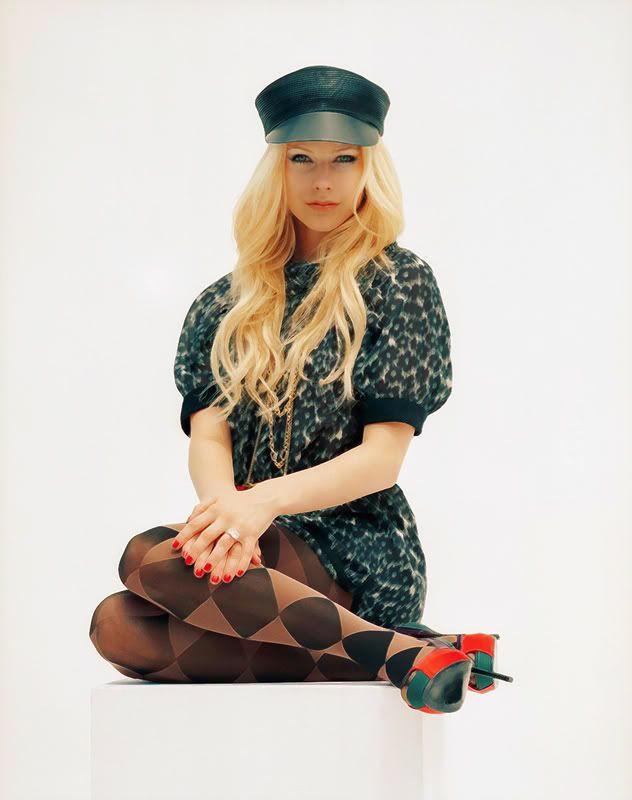
1. Get your image. I recommend one with a simple background, that's also relatively high quality. I discovered this effect and it took a few tries to find an image it worked on.
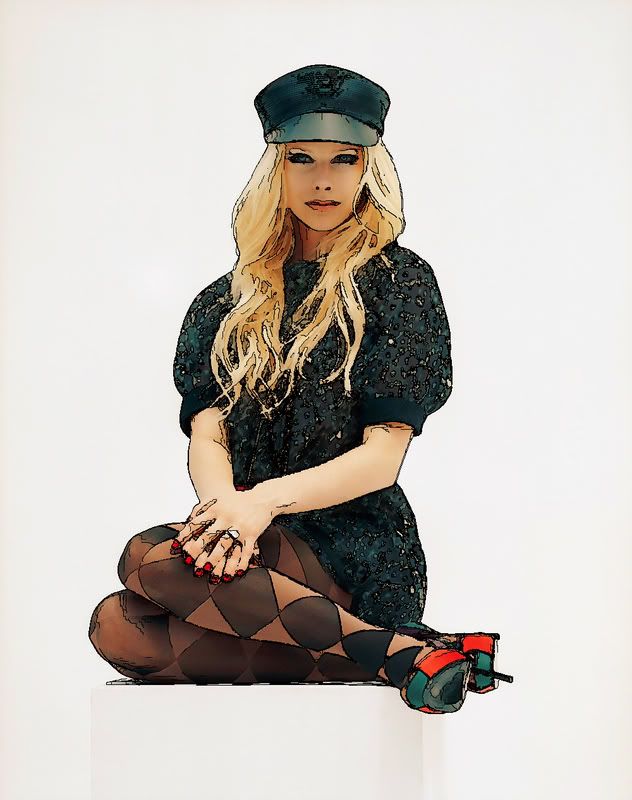
2. Follow this tutorial for a painted effect.
At this point, I have this:
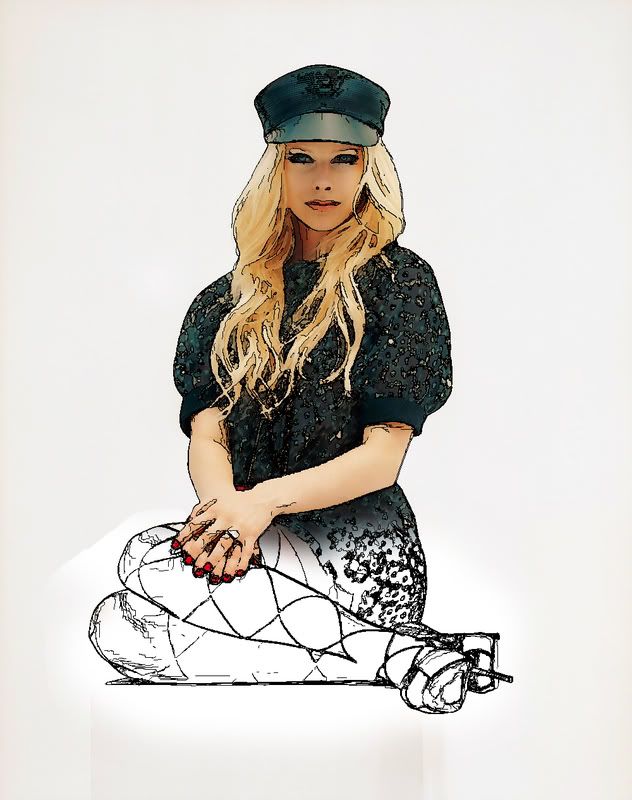
3. I duplicated that layer, and went to Filter-> blur-> smart blur and entered these settings:
Radius: 44.4
Threshold: 66.9
Quality: High
Mode: overlay edge
I got this:

Nice, right?
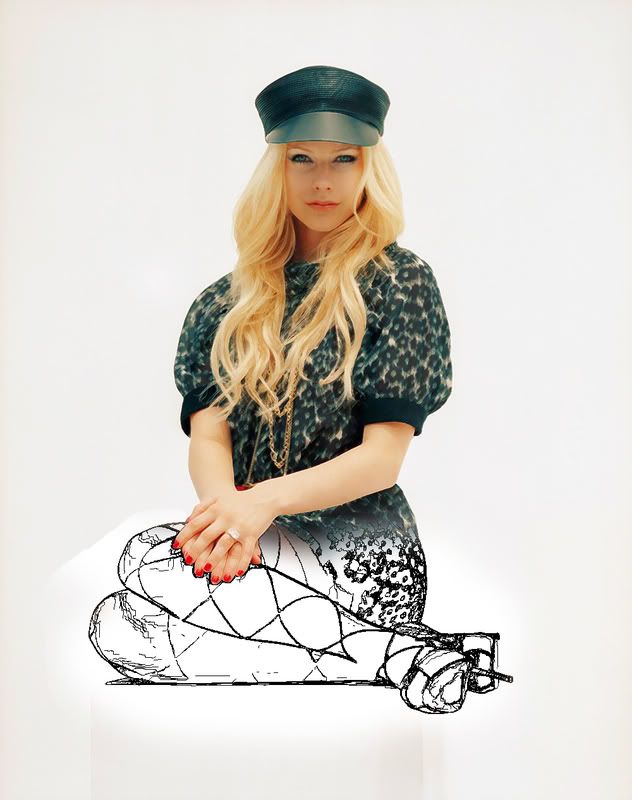
4. Invert- control+I, or command+I.
5. Press 'd' to make your color palate revert to its default black/white.
6. Select-> color range, fuzziness = 0.
7. Select-> inverse and press delete.
Close!
8. I then went back to the base paint-y layer and erased some of it.
9. Then, I erased the parts of Avril that were covered by the lines that I didn't want to be.
Ta-dah! :D
Things to keep in mind:
-Your picture may need different settings for blur
-Erasure is by no mean a necessity, it's your image
-This will need some fooling around with to perfect; I did this in about fifteen minutes as I'm actually in school right now. The more effort you put into it the better it will look. I recommend an airbrush for a more painted/sketched look, but don't have time right now.
And that's it :]
I'd love to see what you make with it! Feel free to ask questions, too :]
FOR MORE TUTORIALS AND GRAPHICS, JOIN POCKETFLASK
How to make this piece of badassery:
Using Photoshop 7.0
1. Get your image. I recommend one with a simple background, that's also relatively high quality. I discovered this effect and it took a few tries to find an image it worked on.
2. Follow this tutorial for a painted effect.
At this point, I have this:
3. I duplicated that layer, and went to Filter-> blur-> smart blur and entered these settings:
Radius: 44.4
Threshold: 66.9
Quality: High
Mode: overlay edge
I got this:
Nice, right?
4. Invert- control+I, or command+I.
5. Press 'd' to make your color palate revert to its default black/white.
6. Select-> color range, fuzziness = 0.
7. Select-> inverse and press delete.
Close!
8. I then went back to the base paint-y layer and erased some of it.
9. Then, I erased the parts of Avril that were covered by the lines that I didn't want to be.
Ta-dah! :D
Things to keep in mind:
-Your picture may need different settings for blur
-Erasure is by no mean a necessity, it's your image
-This will need some fooling around with to perfect; I did this in about fifteen minutes as I'm actually in school right now. The more effort you put into it the better it will look. I recommend an airbrush for a more painted/sketched look, but don't have time right now.
And that's it :]
I'd love to see what you make with it! Feel free to ask questions, too :]
FOR MORE TUTORIALS AND GRAPHICS, JOIN POCKETFLASK