Colouring Tutorial // Bree
How to go from
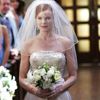
to

Made in PSE 4
100% translatable
lonelysis asked me to make a tutorial for my latest icon, and here it is =D (God, Bree looks so BEAUTIFUL, I'm in love ♥) . I've made it in Photoshop Elements 4.0, and its totally translatable, because it uses just color layers and layer duplicates, it'll be very easy, I promise =)
Step 1:
Get your base. I don't wanna be boring, so do anything you do when you're making an icon base.

Step 2:
Duplicate your base, and set it to Screen 50%.

Step 3:

Make a new layer, fill it with #9cd9ff, and set it to Color Burn 100%.

Step 4:

Make another layer, fill it with #fbe8d4, and set it to Soft Light 100%.

Step 5:
Duplicate the #fbe8d4 layer, and set it to Color Burn 100%.

Step 6:
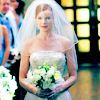
This part is a bit tricky. Do a Copy Merge (Merge your layers, press ctrl+a, ctrl+c, ctrl+z, ctrl+z and ctrl+v) and paste it as a new layer. Go to Adjustments -> Hue & Saturation. Set the saturation to 50. Your image should now look like this:
Step 7:
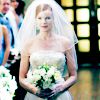
Looks scary, I know, but don't worry, we're going to fix it. Set this layer to Soft Light 100%.
Step 8:
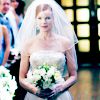
See? Looks nice again and we've almost finished the coloring. Merge your layers. Go to Adjustments -> Auto Color.
Step 9:
Now, we've finished the coloring. Looks a bit like Selective Color, doesn't it? But we're not finshed with the icon. Make a new layer, take your rectangular marquee tool, make a rectangle and fill it with white.
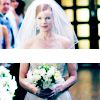
Step 10:
Let's add some text. I picked a nice blue color out of the icon, I think it was #1885d2, and wrote "Becoming Happy Again" in Manzanita, 24p.

And you're finished! I hope, this tut was helpful, and I'd love to see your outcomes =)