White Boots Tutorial
Go from 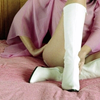
to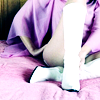
Made in Adobe Photoshop. May or may not be translatable.
Note: This tutorial may need to be altered for different icons. Please feel free to mess with the layers, etc. And please, let me see what you made! <3
Take your image. Crop it, do whatever you usually do to get your base.
Mine is a stock from Veer.com.

Take your base and duplicate it. Set it to screen @ 100%.
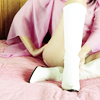
Make a new Colour Balance adjustment layer.
Shadows: -50 +50 +50
Midtones: -50 -50 +50
Highlights: -5 +5 +6
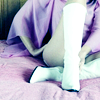
Make a new Channel Mixer adjustment layer.
Red Output Layer: +114%
Blue Output Layer: +6%
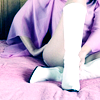
Duplicate your base. Drag it to the top and set it to Softlight.

And you're done! Add text, brushes, etc.
Other icons made with this tutorial:


to

Made in Adobe Photoshop. May or may not be translatable.
Note: This tutorial may need to be altered for different icons. Please feel free to mess with the layers, etc. And please, let me see what you made! <3
Take your image. Crop it, do whatever you usually do to get your base.
Mine is a stock from Veer.com.

Take your base and duplicate it. Set it to screen @ 100%.

Make a new Colour Balance adjustment layer.
Shadows: -50 +50 +50
Midtones: -50 -50 +50
Highlights: -5 +5 +6

Make a new Channel Mixer adjustment layer.
Red Output Layer: +114%
Blue Output Layer: +6%

Duplicate your base. Drag it to the top and set it to Softlight.

And you're done! Add text, brushes, etc.
Other icons made with this tutorial:

