Tutorial #3 - Kristen Bell

to

with curves / color balance / defaults (PS7)...
Kristen Bell Tutorial
Rotate image (duplicate first) and crop your base. I used this image of Kristen Bell.
crtl + alt + shft + L (Image > Adjustments > Auto Contrast)
crtl + shft + L (Image > Adjustments > Auto Levels)
crtl + shft + B (Image > Adjustments > Auto Color)

Duplicate base. Overlay, 79%.

New Layer. Soft round 35 px brush. Black.

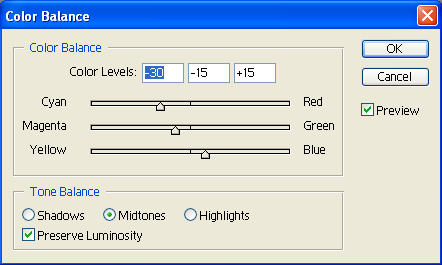
New Adjustment Layer > Color Balance [MY SETTINGS] (place between base and overlay layers)

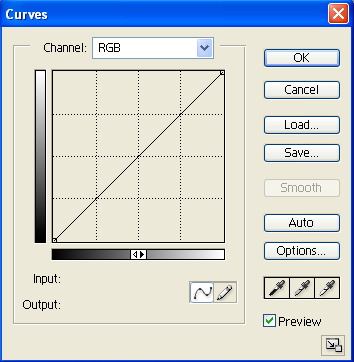
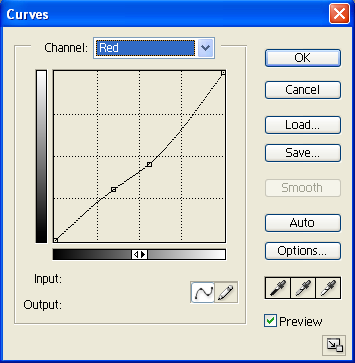
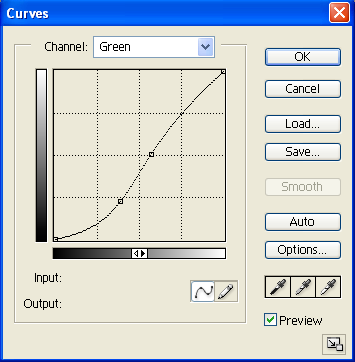
New Adjustment Layer > Curves
I like to do new sepearte adjustment layers for RGB/green/red/blue so I can play with their visibility afterwards. But for easyness sake, they're all in the same layer here.
Note: For help with curves, refer to this tutorial by herdestiny.
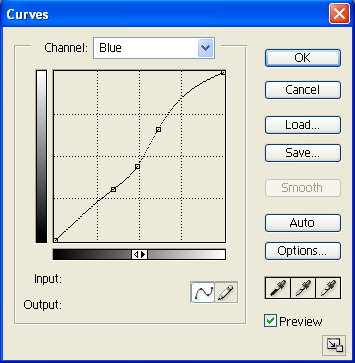
Really, curves are very individual things, but these were my settings (without exact input/output values, since these probably wouldn't work the same for your icon)...
[RGB]
[RED]
[GREEN]
[BLUE]

New Layer. Soft round 35 px brush. White - to make a light spot.

Add tiny text in Times New Roman, 2 pt, smooth.

Duplicate tiny text layer. Lower Opacity to 74%

Sharpen/fade/soften base as necessary.
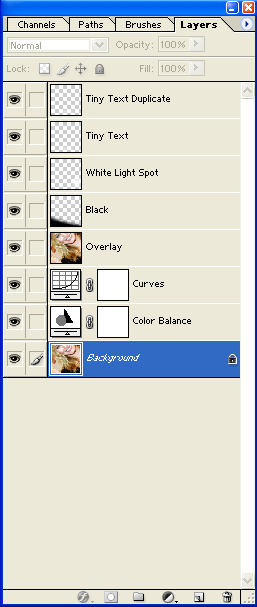
[Layers Pallate]