Tutorial #8; Cristine Rose
Icon tutorial made in Photoshop7.0
Not translatable.
involves: Selective Coloring, Color Balance, Hue/Saturation
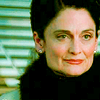
Go from: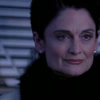
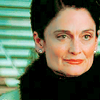
to: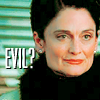
Resources found: HERE *not used in the tutorial
Please comment and tell if it's easily understood and etc. ^_^
First all, as usual. Duplicate the original layer and keep it aside.
Sharpen the image.
Duplicate original layer again, set to Screen 100%.
-->
Now, let's brighten her colour a little bit.
Layer > New Adjustment Layer > Hue/Saturation...
Turn the Saturation to +30.
Next make a new fill layer, #A6C5FF, set to Soft Light 100%.
New fill layer again, #F6E1FF, Color Burn 100%.
Next; Layer > New Adjustment Layer > Selective Color...
Method: Relative
Reds: +56, -25, +45
Yellows: +52, -46, -37
Cyans: +65, +20, +91
Neutrals: +9, -9, +70, +4
Layer > New Adjustment Layer > Selective Color...
Method: Relative
Reds: +45, +29, +100
Yellows: +65, 0, +100
Cyans: +35, -21, +100
Blues: +38, -31, +57
Neutrals: -28, -12, +21, +3
Layer > New Adjustment Layer > Selective Color...
Method: Relative
Reds: -54, +35, +57
Yellows: +45, +44, -47
Cyans: +43, +21, +37
Blues: +39, -30, +40, -18
Neutrals: -19, -6, +21

Now we need another fill layer, #A6C5FF. Soft Light, 20%.
Layer > New Adjustment Layer > Selective Color...
Make sure Preserve Luminosity is ticked.
Midtones: +24, +5, +31
Shadows: -10, +6, -37
Highlights: -9, -19, -53
Layer > New Adjustment Layer > Selective Color...
Method: Relative
Reds: -64, 0, +73
Yellows: -56, 0, -57
Blues: +48, -92, -100
Neutrals: +3, -9, -14
Dada..

Now, Select All (Ctrl + A) and Copy all the layers (Shift + Ctrl + C)
Now get the Smudge Tool. Get a soft edged brush at 3px and 20% strength.
It makes little difference, I personally like to add this extra step.
Smooth out the skin on her face. It just makes the different shades blend together nicely.
Now, you can leave it like this or add some text. ^_^
I used Mekanik LET font from DaFont at size 30 in white.
I also added a little Drop Shadow from the "Layer Style" function.
Change these;
Blend Mode: Normal
Opactiy: 100%
Distance: 1
Spread: 0
Size: 0
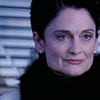
And...you're finished!
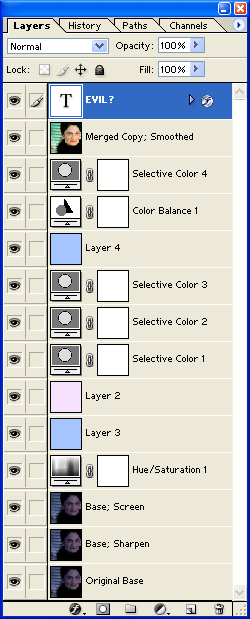
Your final layers palette should look like:
Comments are love
Not translatable.
involves: Selective Coloring, Color Balance, Hue/Saturation
Go from:
to:
Resources found: HERE *not used in the tutorial
Please comment and tell if it's easily understood and etc. ^_^
First all, as usual. Duplicate the original layer and keep it aside.
Sharpen the image.
Duplicate original layer again, set to Screen 100%.
-->
Now, let's brighten her colour a little bit.
Layer > New Adjustment Layer > Hue/Saturation...
Turn the Saturation to +30.
Next make a new fill layer, #A6C5FF, set to Soft Light 100%.
New fill layer again, #F6E1FF, Color Burn 100%.
Next; Layer > New Adjustment Layer > Selective Color...
Method: Relative
Reds: +56, -25, +45
Yellows: +52, -46, -37
Cyans: +65, +20, +91
Neutrals: +9, -9, +70, +4
Layer > New Adjustment Layer > Selective Color...
Method: Relative
Reds: +45, +29, +100
Yellows: +65, 0, +100
Cyans: +35, -21, +100
Blues: +38, -31, +57
Neutrals: -28, -12, +21, +3
Layer > New Adjustment Layer > Selective Color...
Method: Relative
Reds: -54, +35, +57
Yellows: +45, +44, -47
Cyans: +43, +21, +37
Blues: +39, -30, +40, -18
Neutrals: -19, -6, +21
Now we need another fill layer, #A6C5FF. Soft Light, 20%.
Layer > New Adjustment Layer > Selective Color...
Make sure Preserve Luminosity is ticked.
Midtones: +24, +5, +31
Shadows: -10, +6, -37
Highlights: -9, -19, -53
Layer > New Adjustment Layer > Selective Color...
Method: Relative
Reds: -64, 0, +73
Yellows: -56, 0, -57
Blues: +48, -92, -100
Neutrals: +3, -9, -14
Dada..
Now, Select All (Ctrl + A) and Copy all the layers (Shift + Ctrl + C)
Now get the Smudge Tool. Get a soft edged brush at 3px and 20% strength.
It makes little difference, I personally like to add this extra step.
Smooth out the skin on her face. It just makes the different shades blend together nicely.
Now, you can leave it like this or add some text. ^_^
I used Mekanik LET font from DaFont at size 30 in white.
I also added a little Drop Shadow from the "Layer Style" function.
Change these;
Blend Mode: Normal
Opactiy: 100%
Distance: 1
Spread: 0
Size: 0
And...you're finished!
Your final layers palette should look like:
Comments are love