Tutorial #7; Charming
Tutorial for Photoshop7.0
Not translatable. Sorry, maybe you could improvise?
involves: Selective Coloring, Color Balance, Hue/Saturation
Go from: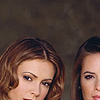
to: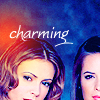
Resources found: HERE *not used in the tutorial
Please comment and tell if it's easily understood and etc. ^_^
First all, make all the obligatory base touch-ups. From my older tutorial.
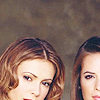
Now, duplicate the layer and set to Screen at 100%

>>
Now, goto; Layer > New Adjustment Layer > Color Balance...
Make sure Preserve Luminosity is ticked.
Midtones: +33, -10, +24
Shadows: -27, -5, +51
Highlights: 0, 0, 0
Next; Layer > New Adjustment Layer > Selective Color...
Method: Relative
Reds: -100, +23, +55
Yellows: -81, 0, +45
Neutrals: +100, 0, -30, -11
Set this layer to Color; 100%
Now get a new fill color, #A2FAFF, set to Soft Light at 20%.
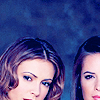
Layer > New Adjustment Layer > Selective Color...
Method: Relative
Reds: -100, +23, +57
Yellows: -87, 0, +40
Neutrals: +100, 0, -25, -12
Set this layer to Soft Light at 30%
Layer > New Adjustment Layer > Hue/Saturation...
Make the Saturation +28
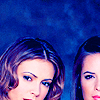
New fill color; #FFE8A2, Soft Light at 20%
Duplicate the layer and set to Color Burn at 15%
Layer > New Adjustment Layer > Selective Color...
Method: Relative
Reds: -100, 0, +28
Yellows: -100, 0, +100
Neutrals: -25, 0, -21
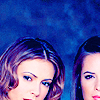
Now you can just stop here, or continue on by adding some "red blobs of doom" and some text.
Next grab this:
It's just a soft edge paint brush, #FF8F22, set at Hard Light, 100%.
Now, with some text, correctly positioned over the blob, your icons is complete!
Finished Product;

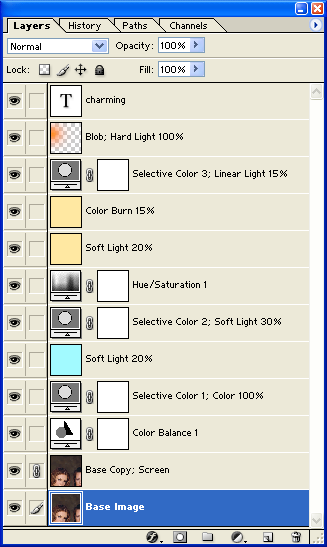
Final Layers Palette:

Not translatable. Sorry, maybe you could improvise?
involves: Selective Coloring, Color Balance, Hue/Saturation
Go from:

to:

Resources found: HERE *not used in the tutorial
Please comment and tell if it's easily understood and etc. ^_^
First all, make all the obligatory base touch-ups. From my older tutorial.
Now, duplicate the layer and set to Screen at 100%

>>

Now, goto; Layer > New Adjustment Layer > Color Balance...
Make sure Preserve Luminosity is ticked.
Midtones: +33, -10, +24
Shadows: -27, -5, +51
Highlights: 0, 0, 0
Next; Layer > New Adjustment Layer > Selective Color...
Method: Relative
Reds: -100, +23, +55
Yellows: -81, 0, +45
Neutrals: +100, 0, -30, -11
Set this layer to Color; 100%
Now get a new fill color, #A2FAFF, set to Soft Light at 20%.

Layer > New Adjustment Layer > Selective Color...
Method: Relative
Reds: -100, +23, +57
Yellows: -87, 0, +40
Neutrals: +100, 0, -25, -12
Set this layer to Soft Light at 30%
Layer > New Adjustment Layer > Hue/Saturation...
Make the Saturation +28

New fill color; #FFE8A2, Soft Light at 20%
Duplicate the layer and set to Color Burn at 15%
Layer > New Adjustment Layer > Selective Color...
Method: Relative
Reds: -100, 0, +28
Yellows: -100, 0, +100
Neutrals: -25, 0, -21

Now you can just stop here, or continue on by adding some "red blobs of doom" and some text.
Next grab this:

It's just a soft edge paint brush, #FF8F22, set at Hard Light, 100%.
Now, with some text, correctly positioned over the blob, your icons is complete!
Finished Product;

Final Layers Palette:
