Icon Tutorial; Holly Marie Combs
Icon made in Adobe Photoshop 7.0
Assumed knowledge: Basics, Masks
Please comment about quality of Tutorial.
Graphics heavy~
go from:
to:
Alrighty, first crop and resize your image to your likings.

Next, copy the base layer and hit: Filter > Sharpen > Sharpen.

It's a bit over pixelated, but we'll fix that later.
Copy the base layer twice, and bring them ontop of the sharpened layer.
On the first copy set the blend to Soft Light >
On the last copied layer, hit Ctrl + Shift + U to desaturate and set to Screen with Opacity: 45%

Now you can either merge the layers or copy the whole image like I did, up to you. If you know me, I like to keep my layers seperate so I hit: Ctrl + A, then Ctrl + Shift + C to copy all layers and pasted again.
Now, grab the Smudge Tool (R). Brush size - 5, change size with features and such. Strength: Between 35% - 50%. Smudge all of her skin, be careful to follows the lines of shadows and the shape of her face, she she doesn't look flat.
from:
to:
Duplicate this layer, and grab the Magic Wand tool. Select the black around her face. Then: Select > Feather. Feather: 0.8, Delete.
Don't worry about the other layers under it, you'll put something between them later.
Duplicate the cut layer, hit: Ctrl+U, colorize and fiddle around with the collors until you get something like:

Set the layer to Color Burn at 60%.
Hit the Mask button: located on the bottom of the Layer Palette:
Flood fill the Mask section with black. Next get a white brush and paint her skin. The colors of the layer will show through again. You'll get something like this:

Next, duplicate the original cut layer, hit Ctrl+U, the colorize. This color is for the eyes, I decided to use a greenish color:

Hit the Mask button again, and do the same but with the eyes.

Set the layer to Screen
Your result:
A slight difference.
Time for the lips.
Copy Cut layer, Ctrl+u, Colorize.

Mask the layer, as above:

Set to Hard Light and result:
Now we have the base all finished.
The following textures are made by: gender
Now, under the original cut layer, put this texture:
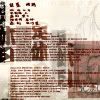
>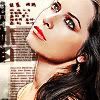
Now paste this texture, rotate 180゜, and set to Hard Light:
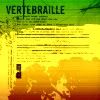
>
Now I love textures, so I think I'll add like 100 more.^_^
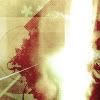
Set to Hard Light:

final texture:
Set to Overlay:
Well, it looks incomplete, so I'll toss in a border as well. New layer, on top.
This color: #880B29

Set to Hard Light.
And it's finished!!

Here's your final Layre Palette: Click Here
Assumed knowledge: Basics, Masks
Please comment about quality of Tutorial.
Graphics heavy~
go from:

to:

Alrighty, first crop and resize your image to your likings.

Next, copy the base layer and hit: Filter > Sharpen > Sharpen.

It's a bit over pixelated, but we'll fix that later.
Copy the base layer twice, and bring them ontop of the sharpened layer.
On the first copy set the blend to Soft Light >

On the last copied layer, hit Ctrl + Shift + U to desaturate and set to Screen with Opacity: 45%

Now you can either merge the layers or copy the whole image like I did, up to you. If you know me, I like to keep my layers seperate so I hit: Ctrl + A, then Ctrl + Shift + C to copy all layers and pasted again.
Now, grab the Smudge Tool (R). Brush size - 5, change size with features and such. Strength: Between 35% - 50%. Smudge all of her skin, be careful to follows the lines of shadows and the shape of her face, she she doesn't look flat.
from:

to:

Duplicate this layer, and grab the Magic Wand tool. Select the black around her face. Then: Select > Feather. Feather: 0.8, Delete.
Don't worry about the other layers under it, you'll put something between them later.
Duplicate the cut layer, hit: Ctrl+U, colorize and fiddle around with the collors until you get something like:

Set the layer to Color Burn at 60%.
Hit the Mask button: located on the bottom of the Layer Palette:

Flood fill the Mask section with black. Next get a white brush and paint her skin. The colors of the layer will show through again. You'll get something like this:

Next, duplicate the original cut layer, hit Ctrl+U, the colorize. This color is for the eyes, I decided to use a greenish color:

Hit the Mask button again, and do the same but with the eyes.

Set the layer to Screen
Your result:

A slight difference.
Time for the lips.
Copy Cut layer, Ctrl+u, Colorize.

Mask the layer, as above:

Set to Hard Light and result:

Now we have the base all finished.
The following textures are made by: gender
Now, under the original cut layer, put this texture:

>

Now paste this texture, rotate 180゜, and set to Hard Light:

>

Now I love textures, so I think I'll add like 100 more.^_^

Set to Hard Light:

final texture:

Set to Overlay:

Well, it looks incomplete, so I'll toss in a border as well. New layer, on top.
This color: #880B29

Set to Hard Light.
And it's finished!!

Here's your final Layre Palette: Click Here