A Voyage to the Mun (Part the First) #KSP #photoessay
Here's a photo essay on my Kerbal Space Program Munar "Direct Assent" mission design test flight, made just because I can! (cue "mad scientist laughter and thunderbolt" FX)
I decided to go with "Direct Assent", instead of the weight-saving "Lunar Rendezvous" profile of the real world's Apollo program, because I haven't figured out how to do rendezvous orbits in the game yet. Direct assent, or sending the crew capsule straight to the Mun instead of using a dedicated and light-weight Lunar Module for the landing and take-off, cuts out a lot of tricky orbital dynamics but costs HUGELY in weight.
I don't know how to sum up the ship specs in KSP, but my "SatternVb8"* is massive. It has four stages with a total of 15 liquid fuelled engines plus 8 solid rocket boosters. As I said above, there's a price to pay for a direct assent profile...
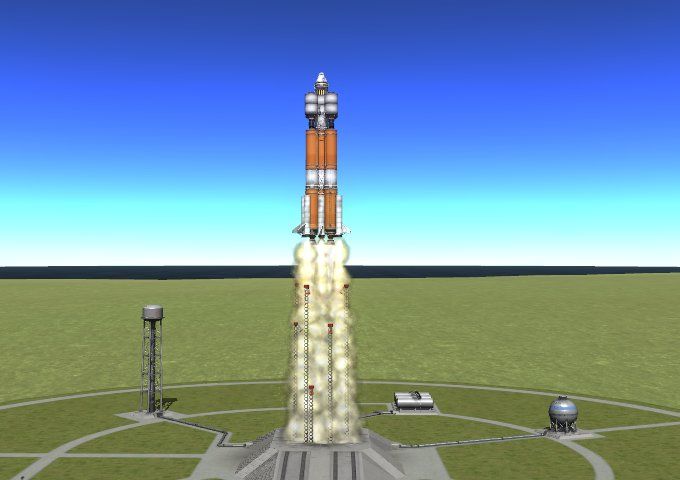
The first stage has 5 3m/10' diameter "Mainsail" engines, the most powerful chemical rockets in the game, connected to a total of 9 fuel tanks; 5 of the 3m diameter orange tanks (again, largest in the game) plus another 4 of the 1m/3' double-height tanks nestled in between that feed into the big boys. I thought of making those 4 feeder tanks detachable but found that I needed their diameter to allow 4 of the SRBs to fit onto that stage.** Also, each feeder tank is topped with a pair of gyrostabilizers to counteract all the torque generated by those monster engines. (The SRBs are fin-stabilized as they never leave the atmosphere and generate little torque.) At launch all these engines are at full throttle until clearing the tower array, then the Mainsails throttle back to ~70% to conserve fuel and avoid overheating before staging. The SRBs, of course, keep on keepin' on as you can't throttle back those candles once lit.
This stage is expended in purely vertical ascent, as the upper stages have significant atmospheric drag so it's better to push up above the thicker stuff before trying for down-range velocity. In the real world I'd have to do a slight pitch-over after launch in order to assure that the first stage doesn't hit occupied land after separation, but Kermen care not for such trifles as collateral damage so I can afford to be ruthless. The SRBs are expended at about 2600m (~8000') altitude with the craft having a total velocity of ~70m/s (~160mph); the main stage is expended at 6800m (~22 000') altitude and a velocity of ~110m/s (250mph).
The second stage ignites immediately after separation, which tends to have rather drastic consequences for the first stage but since it's expended and it won't splash back on the second stage why not enjoy some fireworks? The second stage has another 5 Mainsails fed by those orange 3m tanks. I run these at 66% throttle for their entire run. At 16km (16 000m, ~50 000') altitude, where the air is pretty thin, I pitch the craft over about 45° from the vertical to get more downrange velocity; by the time those thirsty boys have guzzled all the fuel the craft is at 40km (25mi) altitude with a velocity of 1300m/s (2900mph).
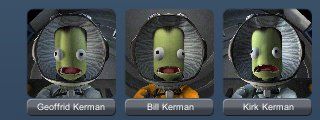
KSP displays video head-shots of the crew in the bottom-right corner of the screen during flight. From their expressions, they may be having second thoughts about the whole thing when approaching Main Engine Cut-off...
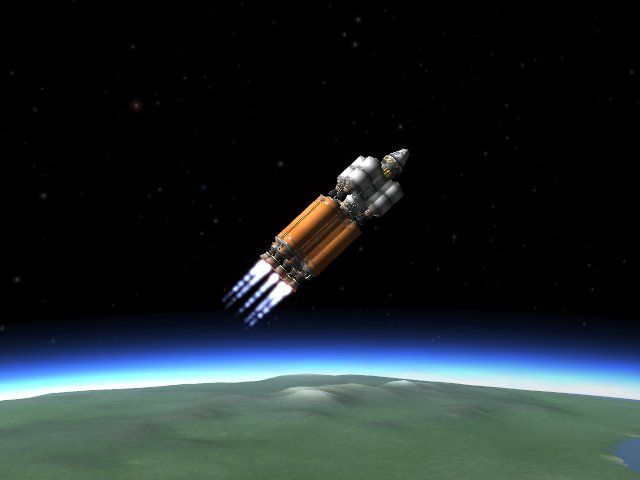
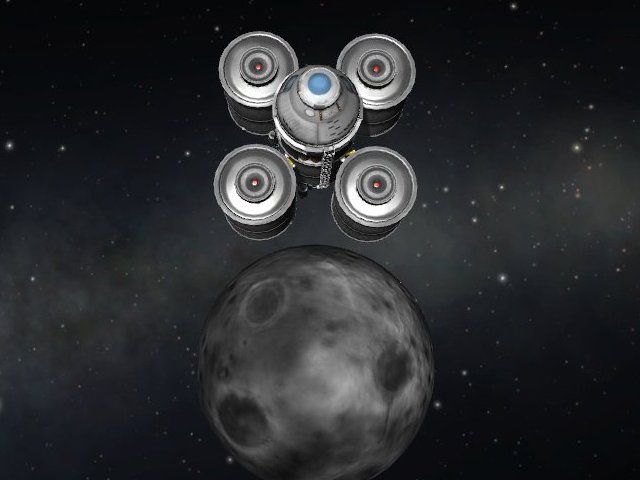
After second stage burnout there's about a minute and a half before the craft hits apoapsis (the highest point of its trajectory) which gives me time to separate the third stage at a more leisurely pace; minimum throttle for about 1s to clear the spent stage. Then it's time to align the craft so that it'll be parallel to Kerbin's surface when it hits that peak. Technically the third stage is 4 3m Skipper engines (that trade about half the thrust of their Mainsail big brothers for about twice the fuel efficiency) fed by 4 gyrostabilized double-height 3m tanks, mounted radially with the Capsule Service Module (which also acts as my lander in this design) but I also fire the CSM main engine in parallel with them for the extra thrust. The tanks are cross-fed into the CSM's main tank so that any fuel expended by the CSM engine is immediately replaced; when the third stage tanks are expended the CSM tankage is still fully fuelled.
If I've done it right, apoapsis is at about 70km (~40 miles). I then hit all 5 engines at full throttle to get into orbit. I don't bother to make a circular orbit, just one with a periapsis (lowest point) still in vacuum so I don't encounter any drag that would steal away precious velocity. On my test run The Stars Were Right and I attained orbit just before reaching my target periapsis*** so instead of cutting off my engines when reaching orbit I kept burning them to directly enter a transfer orbit to the Mun. Again because The Stars Were Right only a few extra seconds on that burn changed the transfer orbit enough to get the trajectory to enter the Mun's gravitation. So this is pretty much a "best case" test.
At this point I fooled around a bit with the game's (undocumented so far as I can tell) flight computer but didn't see anything I liked, so I used the Force eyeballed it and hit the "time warp" button to turn the 7-odd hours it would take to reach Munar capture into a few minutes. Once captured by the Mun's gravity the flight computer was much more straightforward to understand and I used it to compute a third-stage burn that would result in a Mun-grazing trajectory; then after looking at the fuel state of the third stage tanks (about 10% remaining) decided there was no point in a test mission dragging them along and then separating them to become free-flying collision hazards for the real missions to follow****, so I lined up with the Mun and ejected them to die spectacularly in an hour or so. Had I really intended to land, I probably would've kept them; every kilo of fuel is precious then.
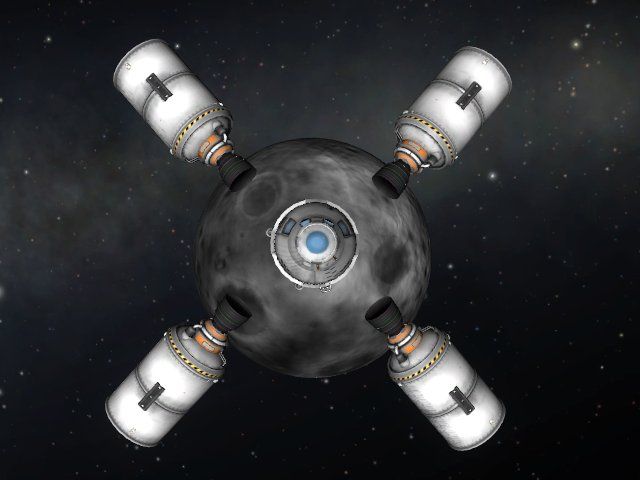
You must admit this viking funeral is awfully pretty to set up, like those aquatic dance routines at the Olympics and those 50's Esther Williams movies.
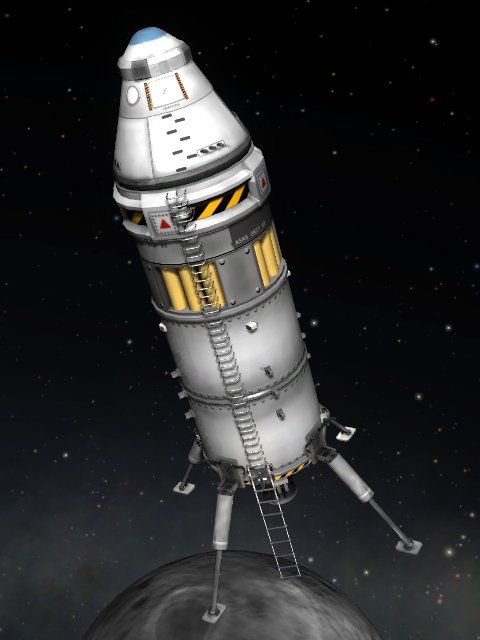
A few minutes after third-stage separation I did a "gear out" test of the lander; I'd aborted a previous test mission on the series because upon reaching Kerbal orbit I saw the extendable landing legs didn't extend far enough clear the engine bell of that CSM's Skipper main engine. I substituted the littlest brother of the 3m engine family, the Poodle low-thrust/high-efficiency engine with its much shorter bell, for the Skipper and, truth be told, that's probably a better pick for a rendezvous and low-G landing engine anyway. I just have to wonder if I've carried enough fuel to land the thing and still reach a Kerbal-return transfer orbit to bring it home, though its 3m double-height tank was the biggest I dared put on a lander.
The yellow corrugated drum above is the fuel tank for the reaction control system that helps steer the craft; I have two RCS quad-blocks mounted just above it, on the Advanced Stabilisation System (yay acronyms) drum module that controls all the gyros on the craft, and another pair mounted orthogonally on opposite sides just above the engine mount. This is massive overkill when the CSM is alone, but essential when the third stage tanks are still attached. I'm trying to figure out if it's worth moving the RCS blocks onto the third stage tanks themselves, though the positioning (right at the centre of mass, instead of at the ends of the craft) would make them much less efficient.
The danger-striped drum above the ASS (again, yay acronyms) is the stage separator that allows the capsule to detach from the CSM when it's time to hit Kerbin's atmosphere. Then there's the capsule itself, home to three Kermen, and at the very top is a 10m/30' parachute to soften the landings.
I didn't think to take a screenshot of one of the crew making an EVA to test the ladder arrangement. I'm tempted to do another one later to capture it.
And that's when I ran out of time to play, so the game's paused with Our Brave Adventurers hurtling towards a violent collision with the Mun.
-- Steve will pick this up again later when time permits.
* "Sattern" for the main engine & tankage I picked for the first stage, Roman numeral "V" for having 5 main engines, "b8" because I put 8 solid rocket boosters on the damned thing just to get some altitude before the first stage runs out of fuel.
** I had thought of making them detachable anyway, but found that the thirsty Mainsails would have drained them before SRB burn-out; by the point in the flight I could afford to jettison them the weight penalty of carrying them empty is probably smaller than the weight penalty of hauling 4 more sets of separator gear from the get-go, given my experience with my earlier Sattern IXb4 attempt.
*** Oversimplified way to explain orbital dynamics; everything you do has its greatest effect at the opposite side of the orbit. If you want to raise your low point, add velocity at apoapsis. If you want to lower the high point, brake at periapsis. Since I wanted to raise the apoapsis of my orbit to the same altitude as the Mun, I needed to add speed at the periapsis.
**** Yes, the game tracks your orbital debris; unless you go in and manually use game controls to destroy it, or arrange for convenient close encounters of the atmospheric or lithic kind, the sky can look rather cluttered when looking at the Mission Control debris-tracking screen. And collisions do happen; I found this out when I botched a stage separation burn and got rammed by the spent stage catching up to me after I fired a de-orbit burn.