Tutorial: Colored bg with masks
for twilights_muse
technique: how to make a colored background while still using a mask.
difficulty: easy
program: PS7+ (tough to translate, unless there's a masking option) / variation for PSP7+
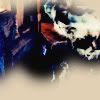
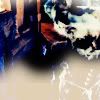
fromthis

to

1) PREPARE YOUR BASE;
So to be quick and because it works well, I used one of my actions.

2) PICK DESIRED BG COLOR FOR FOREGROUND;
I tend to use colors in the pictures...so in this case, I used #E1D0B3.
3) NEW LAYER WITH COLOR;
Make a new layer and fill it with #E1D0B3 (or you can make a "fill layer." Basically, make sure you have a new layer on top of your base with your chosen color.
4) ADD A LAYER MASK;
Find the layer mask button (

) on your layer palette (if it's not visible go to window > layers and create a new one. The one you get should be all white.
(CRASH COURSE ON MASKS: White indicates complete visibility. Black is completely invisible, and as you can figure out, gray is in between (translucent) and varies with darkness. )
ANYWAYS, now choose the brush you want to use. Of course, I used one from my recent pack.

With the foreground set to #000000, imprint it on mask. MAKE SURE THE MASK IS SELECTED; otherwise, you'll just get a big black spot...not that attractive.

5) FINISHING TOUCHES;
Obviously you add text, more brushes, etc. Whatever you want to finish it.

THE END.
VARIATION FOR PSP - this gives you basically the same result (I can't see a big difference), but requires more work from your part, unfortunately.
1) PREPARE YOUR BASE;
As always.

2) PICK DESIRED BG COLOR FOR FOREGROUND;
I tend to use colors in the pictures...so in this case, I used #E1D0B3.
3) NEW LAYER WITH COLOR;
Make a new layer and fill it with #E1D0B3 (or you can make a "fill layer." Basically, make sure you have a new layer on top of your base with your chosen color.
4) USE YOUR BRUSH;
So, use the brush you choose with foreground color #000000.

5) SET TO SCREEN;
Set the layer to screen.

5) ACHIEVE OPAQUE COLOR;
Though this effect may interest some of you, I know many of you probably want to get something like the PS7 effect, with the color not being transparent.
So...
Make a new layer.
Select approximately where the background colors are with feather 30 or 40.

Fill in with your background color (in my case, #E1D0B3).
You can also use the paintbrush to color in parts that aren't close to the fading.

6) FINISHING TOUCHES;
Obviously you add text, more brushes, etc. Whatever you want to finish it.

THE END.
You can copy step by step if you'd like...but believe me, that won't help you!