Tutorial #6: Florid Allure
A manga tutorial for this icon effect, requested by _vale_chan_, featuring the sexy Usagi from BSSM. XD As always, please try not to remake the icon 100%, and experimentation on your part is highly encouraged! Now have fun!
Today we're learning how to turn:
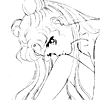
into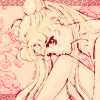
For Photoshop CS2, translatable.
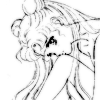
1. Take your base, duplicate it, and Gaussian Blur it (Filter >> Blur >> Gaussian Blur) to a 1.0 radius. Now set it to Linear Burn at around 70% opacity.

>
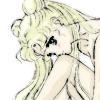
2. Now for the fun part, it's time to color (if you're not using a b&w manga base, you may skip this part)! Make a new layer (Layer >> New >> Layer), and set that layer to Multiply. Now using whatever means you like (I tend to use a round anti-aliased brush OR the Polygonal Lasso Tool) fill in your image with color in anyway you want. Don't forget to include shadows & shines to give your picture a more dimensional effect! When you're done, you should have something like this:
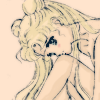
3. New layer, fill it with a dark blue (I choose #003663) and set it to Exclusion at around 50% opacity.

>
4. New layer, fill it with a bright blue (I choose #6dcff6) and it to Color Burn.

>
5. New layer, fill it with pink (I choose #f49ac1) and set it to Soft Light.

>
6. New layer, fill it with orange (I choose #e7a076) and set it to Hard Light.

>
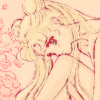
7. Now slap this darling texture by colorfilter on, rotate it however you'd like (I flipped it horizontally, because I wanted to the flowers towards the left). Now set it to Vivid Light at around 50% opacity. IMPORTANT: Make sure to erase parts that are blocking your image!

>
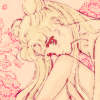
8. Now, I wanted more flowers around the image, so I slapped on this texture again and rotated it to where there were lack of flowers (which was the right side, behind Usagi). Now set this layer to the same settings in Step 5, and again, erase the parts that are blocking your icon.

>
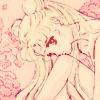
9. Duplicate your base, and ERASE THE BACKGROUND, leaving only the main focus of your icon left -- which is, of course, your character/pairing/whatever. :) Now set it to Soft Light at around 40% opacity.

>
10. Duplicate your image from the previous step, and change the settings to Color Burn at around 40% opacity.

>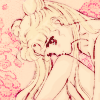
That's it! Easy, eh? Add your border, brushes, text, anything you'd like and you're all done. Feel free to ask questions, and I'd love to see your result if you tried it! ^_^
Thanks for dropping by, and I hope you found it useful. :D If you like what you see, then consider watching my journal for updates on icons, tutorials, resources, and more goodies~ ♥
Today we're learning how to turn:
into
For Photoshop CS2, translatable.
1. Take your base, duplicate it, and Gaussian Blur it (Filter >> Blur >> Gaussian Blur) to a 1.0 radius. Now set it to Linear Burn at around 70% opacity.
>
2. Now for the fun part, it's time to color (if you're not using a b&w manga base, you may skip this part)! Make a new layer (Layer >> New >> Layer), and set that layer to Multiply. Now using whatever means you like (I tend to use a round anti-aliased brush OR the Polygonal Lasso Tool) fill in your image with color in anyway you want. Don't forget to include shadows & shines to give your picture a more dimensional effect! When you're done, you should have something like this:
3. New layer, fill it with a dark blue (I choose #003663) and set it to Exclusion at around 50% opacity.
>
4. New layer, fill it with a bright blue (I choose #6dcff6) and it to Color Burn.
>
5. New layer, fill it with pink (I choose #f49ac1) and set it to Soft Light.
>
6. New layer, fill it with orange (I choose #e7a076) and set it to Hard Light.
>
7. Now slap this darling texture by colorfilter on, rotate it however you'd like (I flipped it horizontally, because I wanted to the flowers towards the left). Now set it to Vivid Light at around 50% opacity. IMPORTANT: Make sure to erase parts that are blocking your image!
>
8. Now, I wanted more flowers around the image, so I slapped on this texture again and rotated it to where there were lack of flowers (which was the right side, behind Usagi). Now set this layer to the same settings in Step 5, and again, erase the parts that are blocking your icon.
>
9. Duplicate your base, and ERASE THE BACKGROUND, leaving only the main focus of your icon left -- which is, of course, your character/pairing/whatever. :) Now set it to Soft Light at around 40% opacity.
>
10. Duplicate your image from the previous step, and change the settings to Color Burn at around 40% opacity.
>
That's it! Easy, eh? Add your border, brushes, text, anything you'd like and you're all done. Feel free to ask questions, and I'd love to see your result if you tried it! ^_^
Thanks for dropping by, and I hope you found it useful. :D If you like what you see, then consider watching my journal for updates on icons, tutorials, resources, and more goodies~ ♥