Tutorial #5: Yellow Fire Light
Last tutorial requested by aquarian_abyss, for this icon effect. YAY I got them done XD Now to get working on the other 10...*gulp* As always, please try not to remake the icon 100%, and experimentation on your part is highly encouraged! Be creative, and have fun!
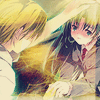
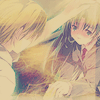
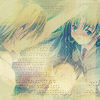
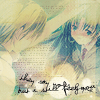
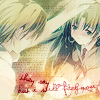
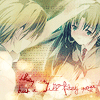
Today we're learning how to turn:
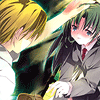
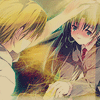
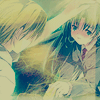
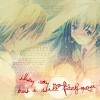
into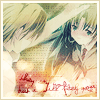
For Photoshop CS2, translatable, and moderately easy.
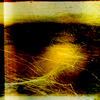
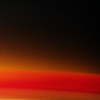
1. Set this texture by the awesome-tastic 77words to Screen.
>
2. New layer, fill it with a dark navy blue (I chose #0d1739) and set it to Exclusion.

>
3. New layer, fill it with a medium brown (I chose #c7b299) and set it to Multiply at around 40% opacity.

>
4. New layer, fill it with a soft peach color (I chose #ffe0c1) and set it to Soft Light.

>
5. New layer, fill it with a dark navy blue (again, I chose #0d1739) and set it to Screen at 50% opacity.
>
6. New layer, fill it with a dark navy blue, or duplicate your previous layer. :) Now set it to Exclusion.
>
7. New layer, fill it with a bright torquise blue (I chose #85dfe4), and set it to Color Burn.

>
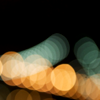
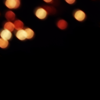
8. Set this light texture by ewanism to Screen at around 70% opacity.
>
9. You don't have to do this step, but you can do like I did, and set tiny text around in your background. It works best if you do it in a dark, saturated green color of your choice, set it to Linear Burn at around 50% opacity, and make sure to erase the parts that block the focus of your image. ^^
>
10. Set this texture by 77words to Screen at around 50% opacity.
>
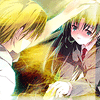
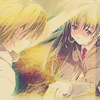
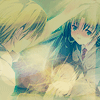
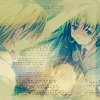
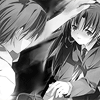
11. Again, you don't have to do this step depending on your icon, but for your text area to have that "round light" effect you can break out some of your circle brushes, chose a light peach color, set your layer to Screen at around 80% opacity, and puts some circles where your text will be. Now you can add your text (I chose to make it black, which will turn into red later due to textures). Your icon should now look something like this:
12. Set this texture by (unknown) to Screen at around 95% opacity.
>
13. Duplicate your base, drag it untop, Desaturate it, and set it to Soft Light.
>
14. Set this light texture by Ewanism to Screen, and flip it vertically.
>
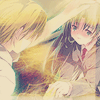
Add your border, brushes, text, anything you'd like and you're all done. Feel free to ask questions, and I'd love to see your result if you tried it. ^_^ Thanks for reading, and I hope you found it useful! Don't forget to consider watching me for updates on icons, tutorials, resources, and more goodies.
Today we're learning how to turn:
into
For Photoshop CS2, translatable, and moderately easy.
1. Set this texture by the awesome-tastic 77words to Screen.
>
2. New layer, fill it with a dark navy blue (I chose #0d1739) and set it to Exclusion.
>
3. New layer, fill it with a medium brown (I chose #c7b299) and set it to Multiply at around 40% opacity.
>
4. New layer, fill it with a soft peach color (I chose #ffe0c1) and set it to Soft Light.
>
5. New layer, fill it with a dark navy blue (again, I chose #0d1739) and set it to Screen at 50% opacity.
>
6. New layer, fill it with a dark navy blue, or duplicate your previous layer. :) Now set it to Exclusion.
>
7. New layer, fill it with a bright torquise blue (I chose #85dfe4), and set it to Color Burn.
>
8. Set this light texture by ewanism to Screen at around 70% opacity.
>
9. You don't have to do this step, but you can do like I did, and set tiny text around in your background. It works best if you do it in a dark, saturated green color of your choice, set it to Linear Burn at around 50% opacity, and make sure to erase the parts that block the focus of your image. ^^
>
10. Set this texture by 77words to Screen at around 50% opacity.
>
11. Again, you don't have to do this step depending on your icon, but for your text area to have that "round light" effect you can break out some of your circle brushes, chose a light peach color, set your layer to Screen at around 80% opacity, and puts some circles where your text will be. Now you can add your text (I chose to make it black, which will turn into red later due to textures). Your icon should now look something like this:
12. Set this texture by (unknown) to Screen at around 95% opacity.
>
13. Duplicate your base, drag it untop, Desaturate it, and set it to Soft Light.
>
14. Set this light texture by Ewanism to Screen, and flip it vertically.
>
Add your border, brushes, text, anything you'd like and you're all done. Feel free to ask questions, and I'd love to see your result if you tried it. ^_^ Thanks for reading, and I hope you found it useful! Don't forget to consider watching me for updates on icons, tutorials, resources, and more goodies.