Tutorial #7: Spots of Color on B&W
A tutorial requested by infiniteskies, featuring Haine from SD+. I didn't have the PSD for the original icon so I tried to re-do it, though it's not the same I hope it's okay. :) As always, please try not to remake the icon 100%, and experimentation on your part is highly encouraged!
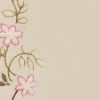
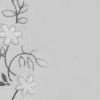
Today we're learning how to turn:

into
For Photoshop CS2, translatable (and painfully easy XD).
1. First, create your base, and bright/sharpen/etc it to your liking. Using whatever means you'd like, erase the background from your image. I personally like to use the Polygonal Lasso Tool, but something like a round anti-aliased brush is fine too. :) Now Desaturate it.
>
>
2. Slap a flower-y texture (or any texture you'd like, really) of your choice onto your icon, set it a layer underneath your now extracted base, and Desaturate it. I used this lovely one by colorfilter:
>
>
3. Now duplicate your base. Gaussian Blur it to about a 1.0 radius, and set it to Multiply at around 80% opacity.
>
4. Duplicate your base again (the non-blurred one), drag it untop, and set it to Multiply.
>
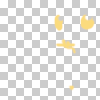
5. Make a new layer, and with the color of your choice, fill in over the spots where you want there to be color. Since my original image had a yellow-theme, I picked a golden yellow, and choose to fill in Haine's eyes, flower, and necklace. Now set that layer to Overlay.
>
6. If you wish, set this dashed border on your icon.

>
That's it! XD Add anything else you'd like and you're all done. Feel free to ask questions, and I'd love to see your result if you tried it!
BTW, thanks for dropping by, and I hope you found it useful! If you like what you see, then consider watching my journal for updates on icons, tutorials, resources, and more goodies~ ♥
Today we're learning how to turn:
into
For Photoshop CS2, translatable (and painfully easy XD).
1. First, create your base, and bright/sharpen/etc it to your liking. Using whatever means you'd like, erase the background from your image. I personally like to use the Polygonal Lasso Tool, but something like a round anti-aliased brush is fine too. :) Now Desaturate it.
>
>
2. Slap a flower-y texture (or any texture you'd like, really) of your choice onto your icon, set it a layer underneath your now extracted base, and Desaturate it. I used this lovely one by colorfilter:
>
>
3. Now duplicate your base. Gaussian Blur it to about a 1.0 radius, and set it to Multiply at around 80% opacity.
>
4. Duplicate your base again (the non-blurred one), drag it untop, and set it to Multiply.
>
5. Make a new layer, and with the color of your choice, fill in over the spots where you want there to be color. Since my original image had a yellow-theme, I picked a golden yellow, and choose to fill in Haine's eyes, flower, and necklace. Now set that layer to Overlay.
>
6. If you wish, set this dashed border on your icon.
>
That's it! XD Add anything else you'd like and you're all done. Feel free to ask questions, and I'd love to see your result if you tried it!
BTW, thanks for dropping by, and I hope you found it useful! If you like what you see, then consider watching my journal for updates on icons, tutorials, resources, and more goodies~ ♥