that black shadow. Look #1 - Clean Lines
Ok, first and foremost, let's talk about buildability, I mentioned it in my Rainbow Eyes, so we will go in depth since you need it for this one!
Buildability (is that a word?) is what I use to refer to how light/dark you can make a pigment by adding, or BUILDING, on to itself. One thing I love about Madd Style Cosmetics is that 99% of her pigments are buildable. I can have a light/translucent color, or I can build the color up until BAM! full color payoff.
Keep in mind that once you reach your full color payoff, there isn't a way to get more color *unless you already used a colored base in that same color range*
For the love of all things I did in my teen angst, the one thing I DID regret was raccoon eyes. No, you cannot see my 12 yr old "punk rock, goth, whatever" self, everything about how I did makeup was wrong, and even though most of what I did wrong was intention, the coon eyes were NOT. Instead, maybe you can troll your local mall and see some coon eyes in real life... if you think it might be raccoon-y in the not-so-cute-way, it probably is. You CAN, however, enjoy this low quality picture of me pretending to be full of angst, woe is me, mehh in actually GOOD mostly black eyemakeup, which is our tut for the day.

I wouldn't want someone to give up their love of black eyeliner and eyeshadow just because it is time to "grow up", and you really don't even have to do a smokey eye. In this look, it's ALL ABOUT piling (building) that black up!
By using a couple of clean lines and a highlighter, you totally avoid the crack whore myspace look....... OK HERE WE GO!
Things you need:
Tape/sticky note/index card
MSC Matte Stack, or a white, medium grey, and black pigment
TWO clean shadow brushes at least.
Start with a clean, naked eye. I did not prime for this look, nor did I use a base. You are more than welcome to prime and use a base (black is recommended so that it doesn't lighten your black so that you have to build for ages and get tons of fallout) if you want, but I didn't.
Please excuse my stray eyebrows, they don't like to be plucked more than once a week!
ANYWAY stick your stickiness (or if you are using an index card) from your outer corner to the end of your eyebrows. I just used some random theater tape we had laying around, I recommend if you are using a really sticky one to stick it on the back of your hand, THEN apply to eyes, so that you don't rip your skin off!
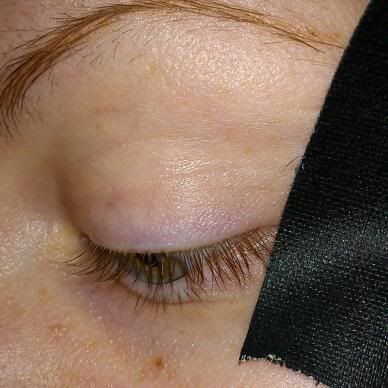
Next, take your grey and apply it to the inner 1/3 of your lid. You don't have to blend it out, but I did out of habit. Don't waste your time, you will be blending black into the grey.
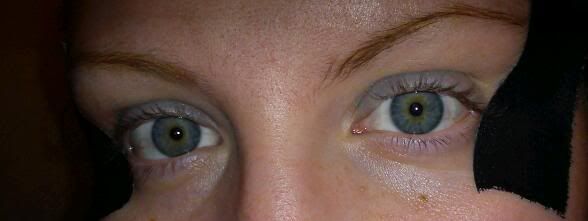
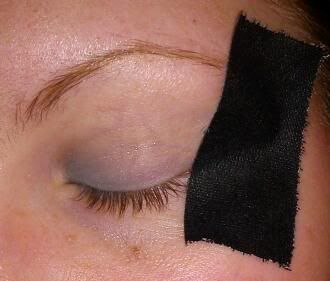
Next, take a little bit of black pigment on your brush; you don't want excess because then you will lose a lot of pigment, and that fallout is a bizzle to clean up!
Start applying it from the highest point along the tape that you want it, down towards your lash line. Then, create the shape you want the black to be on your lids. Fill in the empty space, and blend in towards the grey. Rinse and repeat until you have an even black, with the density built however you prefer. Even color is important, splotchy black is the worst!
In these photos you can see that my eye on the right is completely built up and blended, my eye on the left has not been completely built up and blended yet.
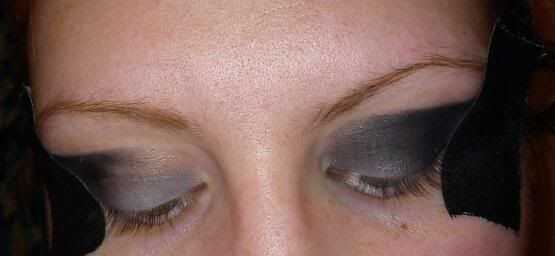
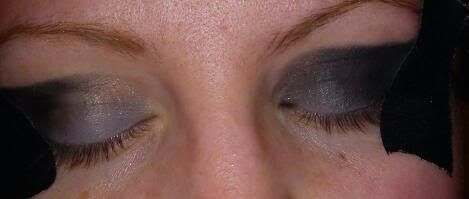
So, after everything is filled in, make sure your shapes, blending and opacity are all even.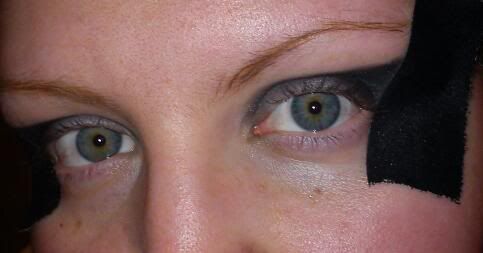
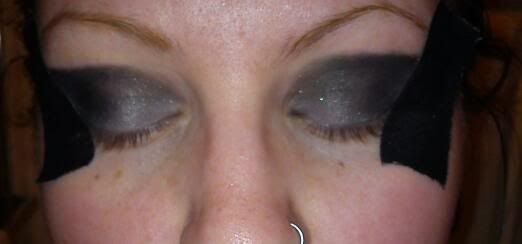
Take your clean, unused brush and apply your white to your brow bone and inner corner. Nothing says "yes, I DO know what I am doing!" when wearing this much black shadow than HIGHLIGHTING! Also, the white will help keep your eyes from looking sunken and beady.
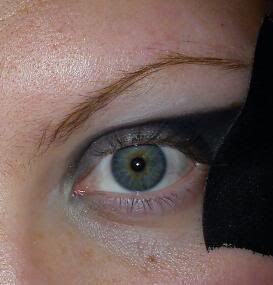
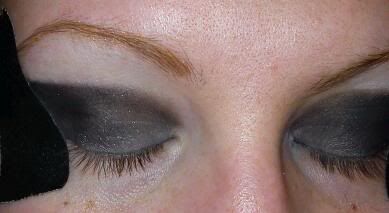
Remove your tape veeeeerrrryyyy carefully. You don't want to go ripping your skin off! You will be left with a very clean line. I generally will leave the line alone, but with the intensity of the black, I thought it needed to be softened a little.
BEFORE:
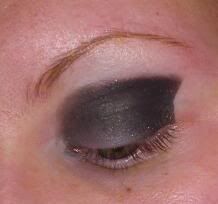
I just put my (clean) finger directly on the line, vertically, and held it for maybe 1 1/2 seconds. I don't know why this works without removing the color, but it does, so I do it.
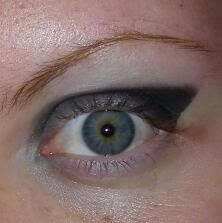
Ooooohhh soft.
DO line your upper water line ( I use Urban Decay in Zero, but you can use any black you want as long as it wont become a runny mess!) with a pencil. DO line your lashline with a liquid liner. DO put that extra coat of mascara on the ends of your lashes.
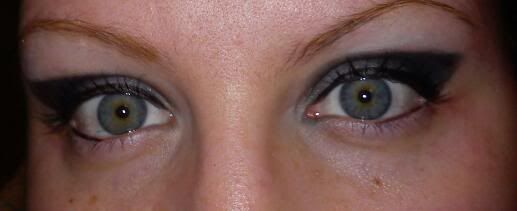
Oh, and ... line half of your bottom water line. Start at your outer corner and pull your lid out and make a straight line, rather than follow your lid exactly. You will have an even lift-off instead of a harsh line where there is no liner... the inside middle of your lower lid will have no liner while the outside will... Let's see if this pic will show it well.
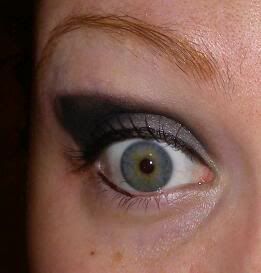
I might still need to make a video for this bottom liner...let me know if it makes sense with just words and a photo, orr if you need a video.
You should end up with something similar to this:
Now go finish your face!!
P.S. If you like the idea of the clean, angled line, here is a video with a few other looks that I did NOT soften the line of... or you can just use my videos to listen to rad music... either way!
Buildability (is that a word?) is what I use to refer to how light/dark you can make a pigment by adding, or BUILDING, on to itself. One thing I love about Madd Style Cosmetics is that 99% of her pigments are buildable. I can have a light/translucent color, or I can build the color up until BAM! full color payoff.
Keep in mind that once you reach your full color payoff, there isn't a way to get more color *unless you already used a colored base in that same color range*
For the love of all things I did in my teen angst, the one thing I DID regret was raccoon eyes. No, you cannot see my 12 yr old "punk rock, goth, whatever" self, everything about how I did makeup was wrong, and even though most of what I did wrong was intention, the coon eyes were NOT. Instead, maybe you can troll your local mall and see some coon eyes in real life... if you think it might be raccoon-y in the not-so-cute-way, it probably is. You CAN, however, enjoy this low quality picture of me pretending to be full of angst, woe is me, mehh in actually GOOD mostly black eyemakeup, which is our tut for the day.

I wouldn't want someone to give up their love of black eyeliner and eyeshadow just because it is time to "grow up", and you really don't even have to do a smokey eye. In this look, it's ALL ABOUT piling (building) that black up!
By using a couple of clean lines and a highlighter, you totally avoid the crack whore myspace look....... OK HERE WE GO!
Things you need:
Tape/sticky note/index card
MSC Matte Stack, or a white, medium grey, and black pigment
TWO clean shadow brushes at least.
Start with a clean, naked eye. I did not prime for this look, nor did I use a base. You are more than welcome to prime and use a base (black is recommended so that it doesn't lighten your black so that you have to build for ages and get tons of fallout) if you want, but I didn't.
Please excuse my stray eyebrows, they don't like to be plucked more than once a week!
ANYWAY stick your stickiness (or if you are using an index card) from your outer corner to the end of your eyebrows. I just used some random theater tape we had laying around, I recommend if you are using a really sticky one to stick it on the back of your hand, THEN apply to eyes, so that you don't rip your skin off!

Next, take your grey and apply it to the inner 1/3 of your lid. You don't have to blend it out, but I did out of habit. Don't waste your time, you will be blending black into the grey.


Next, take a little bit of black pigment on your brush; you don't want excess because then you will lose a lot of pigment, and that fallout is a bizzle to clean up!
Start applying it from the highest point along the tape that you want it, down towards your lash line. Then, create the shape you want the black to be on your lids. Fill in the empty space, and blend in towards the grey. Rinse and repeat until you have an even black, with the density built however you prefer. Even color is important, splotchy black is the worst!
In these photos you can see that my eye on the right is completely built up and blended, my eye on the left has not been completely built up and blended yet.


So, after everything is filled in, make sure your shapes, blending and opacity are all even.


Take your clean, unused brush and apply your white to your brow bone and inner corner. Nothing says "yes, I DO know what I am doing!" when wearing this much black shadow than HIGHLIGHTING! Also, the white will help keep your eyes from looking sunken and beady.


Remove your tape veeeeerrrryyyy carefully. You don't want to go ripping your skin off! You will be left with a very clean line. I generally will leave the line alone, but with the intensity of the black, I thought it needed to be softened a little.
BEFORE:

I just put my (clean) finger directly on the line, vertically, and held it for maybe 1 1/2 seconds. I don't know why this works without removing the color, but it does, so I do it.

Ooooohhh soft.
DO line your upper water line ( I use Urban Decay in Zero, but you can use any black you want as long as it wont become a runny mess!) with a pencil. DO line your lashline with a liquid liner. DO put that extra coat of mascara on the ends of your lashes.
Oh, and ... line half of your bottom water line. Start at your outer corner and pull your lid out and make a straight line, rather than follow your lid exactly. You will have an even lift-off instead of a harsh line where there is no liner... the inside middle of your lower lid will have no liner while the outside will... Let's see if this pic will show it well.

I might still need to make a video for this bottom liner...let me know if it makes sense with just words and a photo, orr if you need a video.
You should end up with something similar to this:

Now go finish your face!!
P.S. If you like the idea of the clean, angled line, here is a video with a few other looks that I did NOT soften the line of... or you can just use my videos to listen to rad music... either way!