Chocolate making picspam and instructions part I: set-up and decorations
A week or two ago, I made chocolates! And promised Sciatrix I would take pictures of the process and post about it afterwards since she couldn't be there. SO.
(apologies for bad image quality, I used my phone.)
We start off with our ingredients:
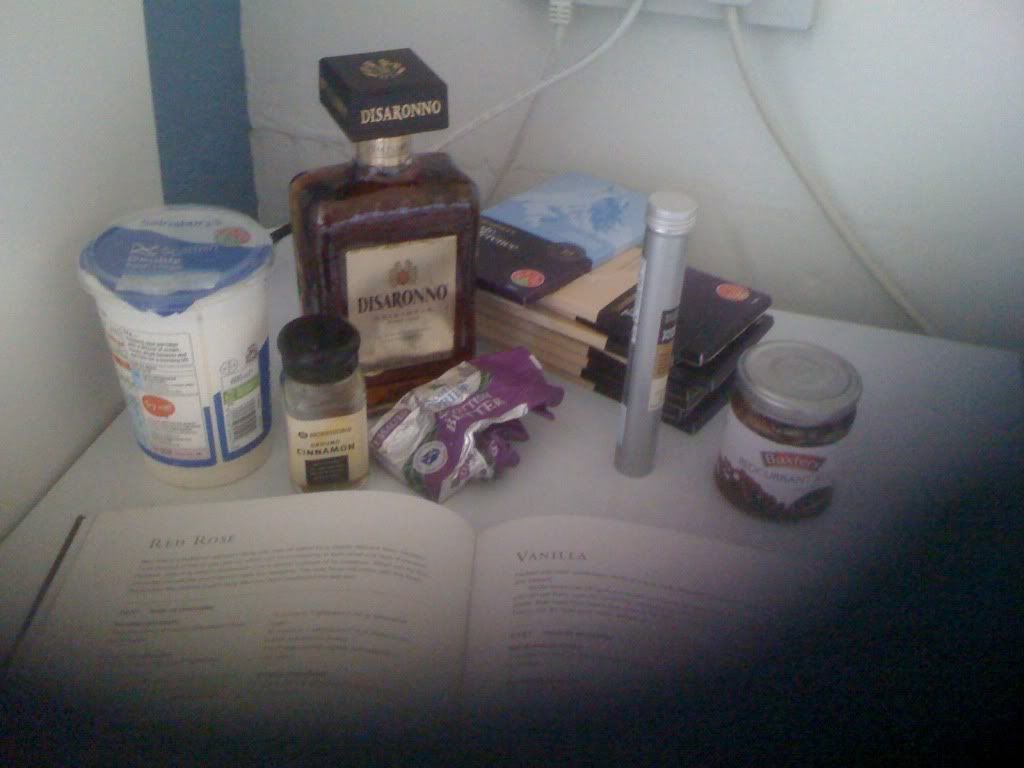
That is:
- 800g Sainsbury's Taste the Difference white chocolate (I ended up using only 600g but wanted to be sure I'd have enough)
- 100g Sainsbury's Taste the Difference milk chocolate (for decorative purposes, I used much less)
- double cream (I used 150ml but was planning to do some other stuff with it cookingwise so in the picture there's a half-litre container)
- a sorry remainder of unsalted butter (luckily I didn't need much - about a tablespoon or two)
- amaretto
- vanilla pods (yes, *actual* vanilla pods - used one but they come in packs of two only)
- cinnamon
- redcurrant jelly
you can also see the cookbook I use for a reference open.
(Everything past the butter is ~nonessential~ but for flavouring. My usual recipe doesn't use redcurrant jelly, but I wanted to experiment and see how it worked for flavouring this time. My usual recipe also uses chopped hazelnuts but I couldn't find any when I was shopping for ingredients! :/)
Something you can note from this: this is PRETTY EXPENSIVE. D: The frustrating thing about chocolate-making is that ingredient quality is of absolutely vital importance; if what you start with isn't high-quality your chocolates will taste like shit and there is nothing you can do about it. As an example, I've done *some* experimenting with ex vanilla aroma or vanilla seeds in a packet and every time I found it tastes really inferior - real beans or bust. I really like the taste of amaretto here but I can only get it in half-litre bottles which, yeah, expensive. Chocolate quality is also a big one, which is why I'm mentioning the brand I used above; it's always tough trying to balance between taste and having the things not cost a fortune, especially since you need huge amounts of chocolate (I suggest you look around if you have any 3-for-2 deals or similar...). For instance, Green & Black's organic chocolate makes for a lovely taste (and their white chocolate has vanilla flavouring that tastes pretty good so is an alternative to using beans) but is ridiculously expensive, whereas most cheap chocolates (and especially chocolate specifically for cooking/baking, DO NOT USE THIS, you've got to use chocolate that's meant to be eaten on its own) will make the result taste awful. This is also of course subject to what brands you have available, ex I've not actually been able to find a high-quality white chocolate in Germany? and god only knows what's available in the US *has nightmares about Hershey's, okay.*

This is the book I use as a reference. ('Making Fine Chocolates: Flavour-infused Truffles, Chocolates and Confections' by Andrew Garrison Shotts) Note that by that I mean: I am not following any recipe from in here (in fact, I don't like many of the recipes in the book because I find them too weird! the recipe I use is multiple adaptations, additions, replacements and "hmm I wonder what would happen if I.."s removed from a white chocolate truffle recipe I ran across in a different recipe book), but I use it for tips, tricks, techniques, and things like estimates of ingredient amounts and proportions for which it is truly very very useful! :)


Stuff what I need for this.
- a silicone chocolate mould - these look sort of like silicone ice cube trays, with multiple moulds (the one I have here is 4x6 making 24 chocolates altogether). Sometimes they have cool shapes, this one is just simple rounded buttons (which is why I went to all the trouble with decoration...). The one I have *is* actually specifically meant for chocolates. Technically there ought to be no reason why a silicone ice cube tray shouldn't work just as well, but I once bought one and I could not get the stink of silicone off it for the life of me; the chocolates I tried making in it were completely inedible. :/ So be warned. I've also seen chocolate moulds around in plastic (this time of year you can often find Easter egg ones forex) but they tend to be shallower, I think, so that you can actually get the chocolate out afterwards. I would not recommend using a standard ice cube tray for the same reason, unless you have some sort of cooking spray or other cool way to keep them from sticking. This is sadly unavoidable equipment for this sort of chocolates; truffles you can make without this, but then you need to shape each truffle individually and you have less options for the centre because it needs to be solid enough to be a proper truffle.
- a chopping board
- multiple microwaveable bowls or other containers - I've got three, one for melting chocolate (this should be pretty large), one for making ganache and one because although I want to experiment with redcurrant jelly I want to play it safe as well and so I'm making two separate flavours of filling.
- measuring equipment (for me that's one of the microwavable thingies - a glass pint jug with markings)
- a sharp large knife
- various teaspoons
- aluminium foil
I've actually put foil all over the whole countertop here because this stuff gets MESSY. :/ and you often end up dripping chocolate all over and then wanting to reuse it afterwards.
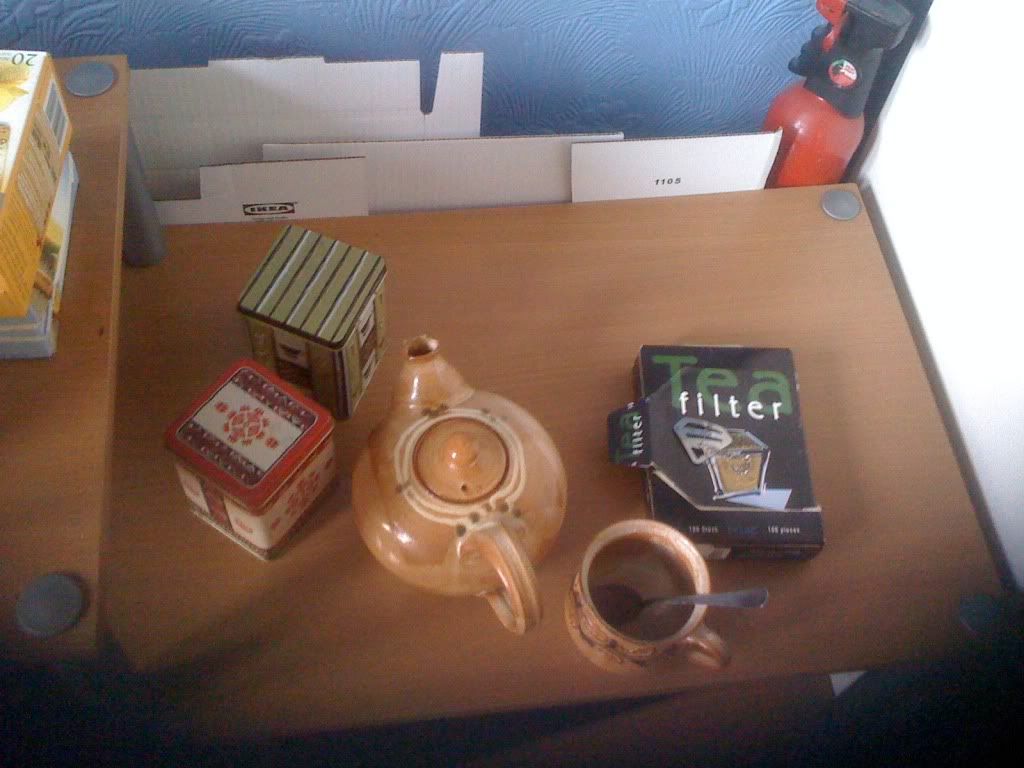
This is going to take a long time and eat many, many spoons. Tea breaks are essential, and I am already prepared. :)
(note: I actually really underestimated how many spoons this would eat - I started in the afternoon and only finished the chocolate-making the next morning because of all the breaks I needed to take, and clean-up took a lot longer. I learned from this that this is something I will need help, if only in form of moral support, to make again because doing it on my own is nothing short of reckless use of spoons. Friends who live near me take note!)
AND NOW WE START.
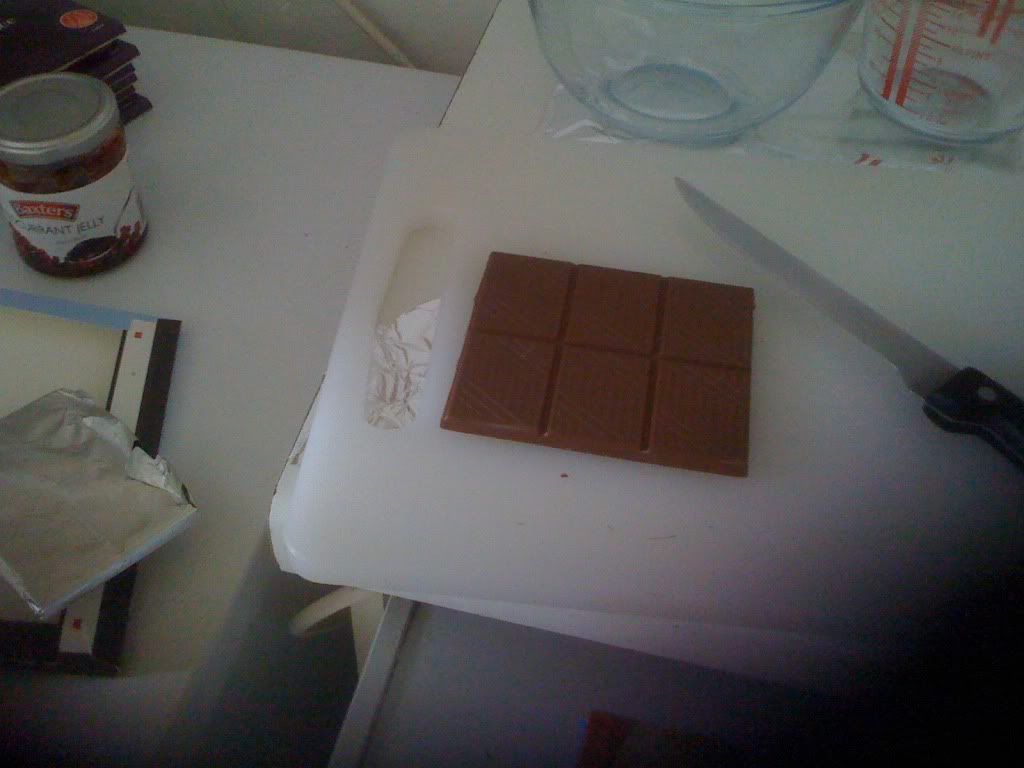
I want the chocolates to have decoration on top, in form of milk chocolate patterns! this is partially because I WAS BEING REALLY RECKLESS WITH MY SPOONS IN ORDER TO SHOW OFF TO THE INTERNET but mainly because with the separate recipes I really wanted a way to tell apart the redcurrant-jelly-chocolates and the amaretto-vanilla-etc. chocolates afterwards, especially given one of them would contain alcohol. Ergo, we start by melting some milk chocolate. I did half a bar here which was WAY TOO MUCH as we will see in a bit.

Tip for chopping I stole from the book: chop diagonally. It makes it easier to get the pieces small enough, I think. I generally try to get the pieces a bit smaller than 1cm cubes or so *estimates wildly*.

Here I've put about ~two thirds to three quarters of the chopped chocolate into a bowl ready for the microwaving, leaving the rest on the chopping board.
"But Kaz," I hear you ask, mystified, "why aren't you melting all of it? What's the leftover chocolate for?"
Gather ye round, children, and I shall tell you about the great mystery known as tempering chocolate.
If you've ever melted chocolate and then let it set, you may have noticed that it ends up quite different from store-bought chocolate. In particular, it's softer, less glossy, and melts at a much lower temperature. The reason for this is that if you just let melted chocolate cool it isn't tempered and apparently some different structures develop etc. etc. there is a chemical explanation for this but I cannot be bothered right now. In order to get the nice hard finish, you need to temper the chocolate, which roughly means: melt it, let it cool down (this is generally achieved via mixing in chopped unmelted chocolate), then reheating it again very very briefly. The temperature ranges you need here are actually both very precise and dependent on the brand of chocolate you use; I actually bought a kitchen thermometer for this purpose but am not using it here because a) I never managed to get the tempering to work ANYWAY and b) there are not enough spoons in the world. Instead, I am doing a half-arsed version of "let's guesstimate all the times and stuff and hope it works." - melt three quarters of the chocolate in the microwave, stir in the remaining quarter, microwave at half power for around ten seconds, hope very hard it worked. Generally it doesn't (by some fluke, this time, I actually got it to work in the second step, this is not usual!) but one can try. Also, more usefully, stirring more chopped chocolate in means you cool down the chocolate quite a bit which makes it MUCH easier to work with (hardens faster and, in particular, if you're adding chocolate on top of stuff you've already worked with you don't end up remelting everything). Otherwise you'd probably end up sitting around waiting for it to cool anyway.
Melting the chocolate: stick it into the microwave at half power at one minute intervals, stirring after each minute. The stirring is actually pretty important here, don't skip it! I have not yet managed to burn chocolate like this but apparently it is possible and you will, I am told, know immediately from the smell.
You can also melt chocolate via the double boiler method on the hob - have a pan of boiling water, put a bowl into the pot so that it doesn't touch the water, put the chocolate in the bowl. The steam from the water will melt the chocolate and prevent it from burning (which is the danger if you melt it directly on the hob). The book says that a lot of people like this because it gives them better control over the temperature than the microwave for tempering purposes and that the author doesn't use it because he doesn't want water near chocolate as it means the chocolates don't keep as long. I use the microwave because a) I can't get the tempering to work consistently ANYWAY so why bother b) SPOONS. OKAY.

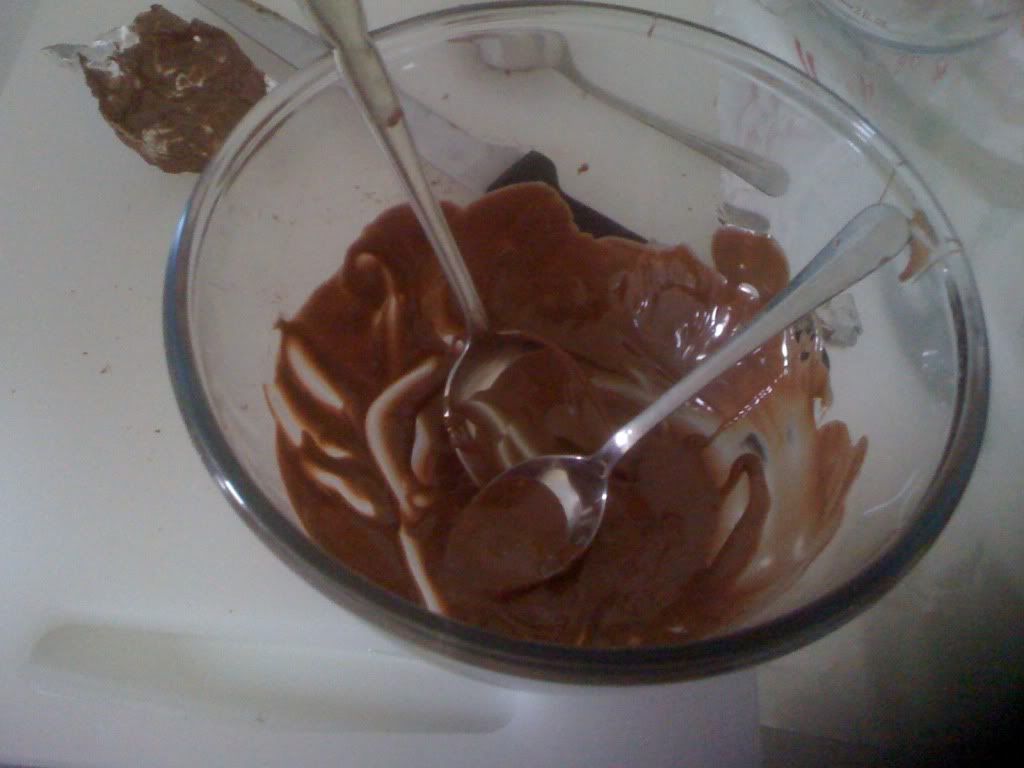
Here's the chocolate melted, after I did all the fiddly attempt-at-tempering stuff. Doesn't it look yummy. :)

And now for the actual decorating. In case you can't tell, the twenty-four moulds have small patterns squirted into them - eight have an attempt at a spiral, eight have an attempt at a zigzag thing and eight just have the bottom covered in chocolate.
I know there is specialty equipment available for squirting patterns like this. I don't have any! What works quite well instead is making a small cone out of paper (baking paper works really well here, I think) with a small gap at the bottom, spooning chocolate into that and using it. This time I tried using aluminium foil instead, which worked much worse and which is the reason I am using "attempt at X" instead of "X" up above, it looks much better if you use proper paper.
I was originally going to have zigzags, spirals, and plain white chocolates for my three versions of redcurrant-jelly, amaretto-vanilla-cinnamon and amaretto-vanilla (I'm not entirely sold on the cinnamon, so) but discovered I'd melted way too much milk chocolate at this stage. I could have eaten it, but I knew my stomach would be called upon to digest a lot of molten chocolate throughout this and didn't want to start too early. That's why those eight moulds ended up with about a teaspoon of molten chocolate each - not very pretty.
Unfortunately, I still had chocolate left over!
At this stage I was still pretty early on in the cooking stage and still had enough spoons to be creative. So I went "hmmmm...", noticed that I had a bunch of fresh apples lying around, and decided to experiment.

I took an apple, quartered it and took out the core. I then mixed some allspice in with the leftover chocolate and covered each quartered apple with it so that none of the flesh was visible, leaving the peel free. This used up all the leftover chocolate, was my dessert later that day and was absolutely delicious! :) I am going to have to experiment some with apples plus chocolate plus spices later...
ETA: At this point, we wait for the chocolate to become solid and cool and in the meantime wash some dishes - I need to use that microwave dish again for something else - drink tea, do INTERNETZ to recover, etc. so this is a good place to end the post for now.
And okay, this post is long enough so I will leave it there. Part II will come... eventually, or possibly never, depending on whether I can be bothered.
...it is possible admiring comments may affect this. >>
(apologies for bad image quality, I used my phone.)
We start off with our ingredients:
That is:
- 800g Sainsbury's Taste the Difference white chocolate (I ended up using only 600g but wanted to be sure I'd have enough)
- 100g Sainsbury's Taste the Difference milk chocolate (for decorative purposes, I used much less)
- double cream (I used 150ml but was planning to do some other stuff with it cookingwise so in the picture there's a half-litre container)
- a sorry remainder of unsalted butter (luckily I didn't need much - about a tablespoon or two)
- amaretto
- vanilla pods (yes, *actual* vanilla pods - used one but they come in packs of two only)
- cinnamon
- redcurrant jelly
you can also see the cookbook I use for a reference open.
(Everything past the butter is ~nonessential~ but for flavouring. My usual recipe doesn't use redcurrant jelly, but I wanted to experiment and see how it worked for flavouring this time. My usual recipe also uses chopped hazelnuts but I couldn't find any when I was shopping for ingredients! :/)
Something you can note from this: this is PRETTY EXPENSIVE. D: The frustrating thing about chocolate-making is that ingredient quality is of absolutely vital importance; if what you start with isn't high-quality your chocolates will taste like shit and there is nothing you can do about it. As an example, I've done *some* experimenting with ex vanilla aroma or vanilla seeds in a packet and every time I found it tastes really inferior - real beans or bust. I really like the taste of amaretto here but I can only get it in half-litre bottles which, yeah, expensive. Chocolate quality is also a big one, which is why I'm mentioning the brand I used above; it's always tough trying to balance between taste and having the things not cost a fortune, especially since you need huge amounts of chocolate (I suggest you look around if you have any 3-for-2 deals or similar...). For instance, Green & Black's organic chocolate makes for a lovely taste (and their white chocolate has vanilla flavouring that tastes pretty good so is an alternative to using beans) but is ridiculously expensive, whereas most cheap chocolates (and especially chocolate specifically for cooking/baking, DO NOT USE THIS, you've got to use chocolate that's meant to be eaten on its own) will make the result taste awful. This is also of course subject to what brands you have available, ex I've not actually been able to find a high-quality white chocolate in Germany? and god only knows what's available in the US *has nightmares about Hershey's, okay.*
This is the book I use as a reference. ('Making Fine Chocolates: Flavour-infused Truffles, Chocolates and Confections' by Andrew Garrison Shotts) Note that by that I mean: I am not following any recipe from in here (in fact, I don't like many of the recipes in the book because I find them too weird! the recipe I use is multiple adaptations, additions, replacements and "hmm I wonder what would happen if I.."s removed from a white chocolate truffle recipe I ran across in a different recipe book), but I use it for tips, tricks, techniques, and things like estimates of ingredient amounts and proportions for which it is truly very very useful! :)
Stuff what I need for this.
- a silicone chocolate mould - these look sort of like silicone ice cube trays, with multiple moulds (the one I have here is 4x6 making 24 chocolates altogether). Sometimes they have cool shapes, this one is just simple rounded buttons (which is why I went to all the trouble with decoration...). The one I have *is* actually specifically meant for chocolates. Technically there ought to be no reason why a silicone ice cube tray shouldn't work just as well, but I once bought one and I could not get the stink of silicone off it for the life of me; the chocolates I tried making in it were completely inedible. :/ So be warned. I've also seen chocolate moulds around in plastic (this time of year you can often find Easter egg ones forex) but they tend to be shallower, I think, so that you can actually get the chocolate out afterwards. I would not recommend using a standard ice cube tray for the same reason, unless you have some sort of cooking spray or other cool way to keep them from sticking. This is sadly unavoidable equipment for this sort of chocolates; truffles you can make without this, but then you need to shape each truffle individually and you have less options for the centre because it needs to be solid enough to be a proper truffle.
- a chopping board
- multiple microwaveable bowls or other containers - I've got three, one for melting chocolate (this should be pretty large), one for making ganache and one because although I want to experiment with redcurrant jelly I want to play it safe as well and so I'm making two separate flavours of filling.
- measuring equipment (for me that's one of the microwavable thingies - a glass pint jug with markings)
- a sharp large knife
- various teaspoons
- aluminium foil
I've actually put foil all over the whole countertop here because this stuff gets MESSY. :/ and you often end up dripping chocolate all over and then wanting to reuse it afterwards.
This is going to take a long time and eat many, many spoons. Tea breaks are essential, and I am already prepared. :)
(note: I actually really underestimated how many spoons this would eat - I started in the afternoon and only finished the chocolate-making the next morning because of all the breaks I needed to take, and clean-up took a lot longer. I learned from this that this is something I will need help, if only in form of moral support, to make again because doing it on my own is nothing short of reckless use of spoons. Friends who live near me take note!)
AND NOW WE START.
I want the chocolates to have decoration on top, in form of milk chocolate patterns! this is partially because I WAS BEING REALLY RECKLESS WITH MY SPOONS IN ORDER TO SHOW OFF TO THE INTERNET but mainly because with the separate recipes I really wanted a way to tell apart the redcurrant-jelly-chocolates and the amaretto-vanilla-etc. chocolates afterwards, especially given one of them would contain alcohol. Ergo, we start by melting some milk chocolate. I did half a bar here which was WAY TOO MUCH as we will see in a bit.
Tip for chopping I stole from the book: chop diagonally. It makes it easier to get the pieces small enough, I think. I generally try to get the pieces a bit smaller than 1cm cubes or so *estimates wildly*.
Here I've put about ~two thirds to three quarters of the chopped chocolate into a bowl ready for the microwaving, leaving the rest on the chopping board.
"But Kaz," I hear you ask, mystified, "why aren't you melting all of it? What's the leftover chocolate for?"
Gather ye round, children, and I shall tell you about the great mystery known as tempering chocolate.
If you've ever melted chocolate and then let it set, you may have noticed that it ends up quite different from store-bought chocolate. In particular, it's softer, less glossy, and melts at a much lower temperature. The reason for this is that if you just let melted chocolate cool it isn't tempered and apparently some different structures develop etc. etc. there is a chemical explanation for this but I cannot be bothered right now. In order to get the nice hard finish, you need to temper the chocolate, which roughly means: melt it, let it cool down (this is generally achieved via mixing in chopped unmelted chocolate), then reheating it again very very briefly. The temperature ranges you need here are actually both very precise and dependent on the brand of chocolate you use; I actually bought a kitchen thermometer for this purpose but am not using it here because a) I never managed to get the tempering to work ANYWAY and b) there are not enough spoons in the world. Instead, I am doing a half-arsed version of "let's guesstimate all the times and stuff and hope it works." - melt three quarters of the chocolate in the microwave, stir in the remaining quarter, microwave at half power for around ten seconds, hope very hard it worked. Generally it doesn't (by some fluke, this time, I actually got it to work in the second step, this is not usual!) but one can try. Also, more usefully, stirring more chopped chocolate in means you cool down the chocolate quite a bit which makes it MUCH easier to work with (hardens faster and, in particular, if you're adding chocolate on top of stuff you've already worked with you don't end up remelting everything). Otherwise you'd probably end up sitting around waiting for it to cool anyway.
Melting the chocolate: stick it into the microwave at half power at one minute intervals, stirring after each minute. The stirring is actually pretty important here, don't skip it! I have not yet managed to burn chocolate like this but apparently it is possible and you will, I am told, know immediately from the smell.
You can also melt chocolate via the double boiler method on the hob - have a pan of boiling water, put a bowl into the pot so that it doesn't touch the water, put the chocolate in the bowl. The steam from the water will melt the chocolate and prevent it from burning (which is the danger if you melt it directly on the hob). The book says that a lot of people like this because it gives them better control over the temperature than the microwave for tempering purposes and that the author doesn't use it because he doesn't want water near chocolate as it means the chocolates don't keep as long. I use the microwave because a) I can't get the tempering to work consistently ANYWAY so why bother b) SPOONS. OKAY.
Here's the chocolate melted, after I did all the fiddly attempt-at-tempering stuff. Doesn't it look yummy. :)
And now for the actual decorating. In case you can't tell, the twenty-four moulds have small patterns squirted into them - eight have an attempt at a spiral, eight have an attempt at a zigzag thing and eight just have the bottom covered in chocolate.
I know there is specialty equipment available for squirting patterns like this. I don't have any! What works quite well instead is making a small cone out of paper (baking paper works really well here, I think) with a small gap at the bottom, spooning chocolate into that and using it. This time I tried using aluminium foil instead, which worked much worse and which is the reason I am using "attempt at X" instead of "X" up above, it looks much better if you use proper paper.
I was originally going to have zigzags, spirals, and plain white chocolates for my three versions of redcurrant-jelly, amaretto-vanilla-cinnamon and amaretto-vanilla (I'm not entirely sold on the cinnamon, so) but discovered I'd melted way too much milk chocolate at this stage. I could have eaten it, but I knew my stomach would be called upon to digest a lot of molten chocolate throughout this and didn't want to start too early. That's why those eight moulds ended up with about a teaspoon of molten chocolate each - not very pretty.
Unfortunately, I still had chocolate left over!
At this stage I was still pretty early on in the cooking stage and still had enough spoons to be creative. So I went "hmmmm...", noticed that I had a bunch of fresh apples lying around, and decided to experiment.
I took an apple, quartered it and took out the core. I then mixed some allspice in with the leftover chocolate and covered each quartered apple with it so that none of the flesh was visible, leaving the peel free. This used up all the leftover chocolate, was my dessert later that day and was absolutely delicious! :) I am going to have to experiment some with apples plus chocolate plus spices later...
ETA: At this point, we wait for the chocolate to become solid and cool and in the meantime wash some dishes - I need to use that microwave dish again for something else - drink tea, do INTERNETZ to recover, etc. so this is a good place to end the post for now.
And okay, this post is long enough so I will leave it there. Part II will come... eventually, or possibly never, depending on whether I can be bothered.
...it is possible admiring comments may affect this. >>