Creating a Horror Movie Filter in Photoshop!
If you have been watching horror movies reguarly for...well really the past few decades (starting most notably with Se7en starring Morgan Freeman and Brad Pitt) have had a decidedly more gritty, cool look than the technicolor thrillers of the seventies and eighties. This tutorial is to help achieve that look in Photoshop with an originally warm-toned image :)
I choose this cap of Criminal Minds because of the warm tones and happy faces, yet the very obvious "cop look" of Reid and Morgan with their guns. Credit for the texture goes to http://lostandtaken.com which offers many free high-res textures.
Step 1: Open your image in photoshop, of course!
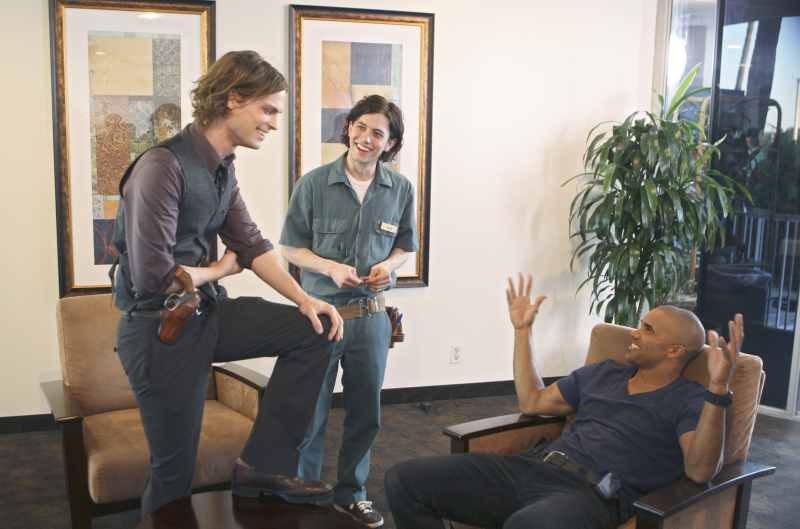
Step 2: Duplicate your base image and make sure it is at the top of the layers palette. Set the blend mode to Soft Light. This will bring a better amount of contrast to the image, which is important for the blown out look that many iconic modern horror films have.
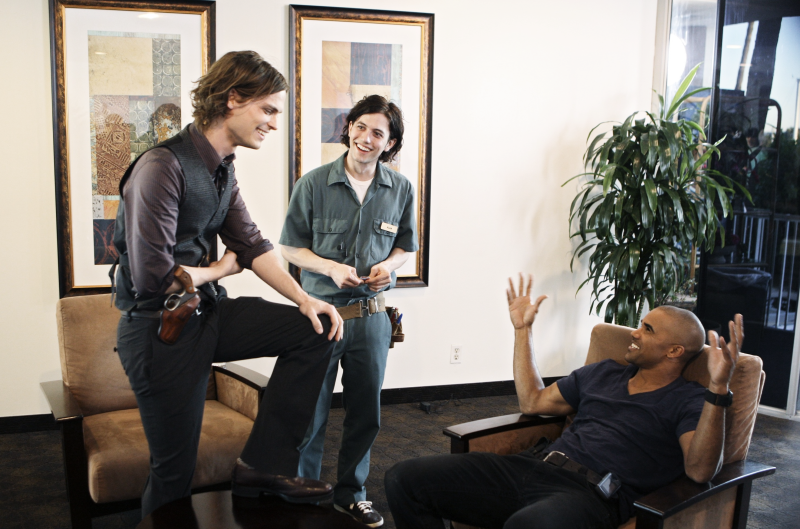
Step 3: You will become very familiar with adjustment layers here. Add a Photo Filter Adjustment Layer. Click the Color dialogue. For this you will want the color #663300. It will add a subtle, dark sepia tone to the image. Set the density to 75% to 90% to achieve the optimum look.
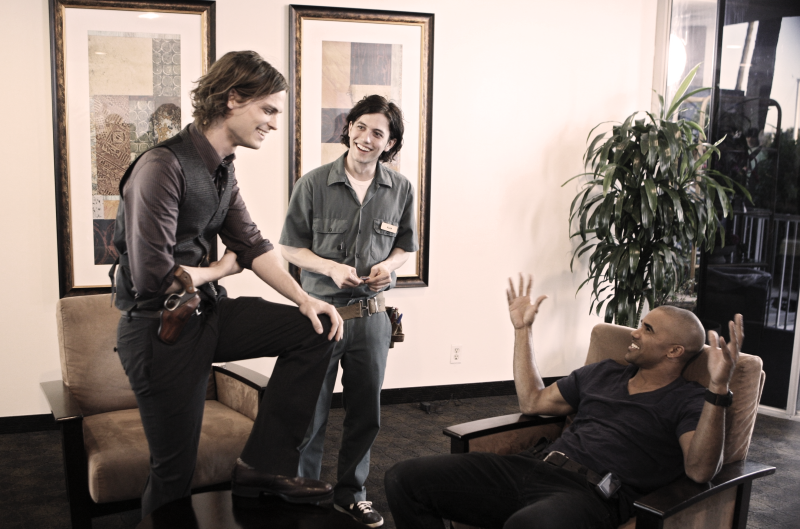
Step 4: Add another Photo Filter layer! This time you will be using one of the preset filters. Choose "Underwater" from the drop down menu :) This will give you the cool tones that you may recognize from films like The Ring and the first few Saw movies. The density of this should be 45%.
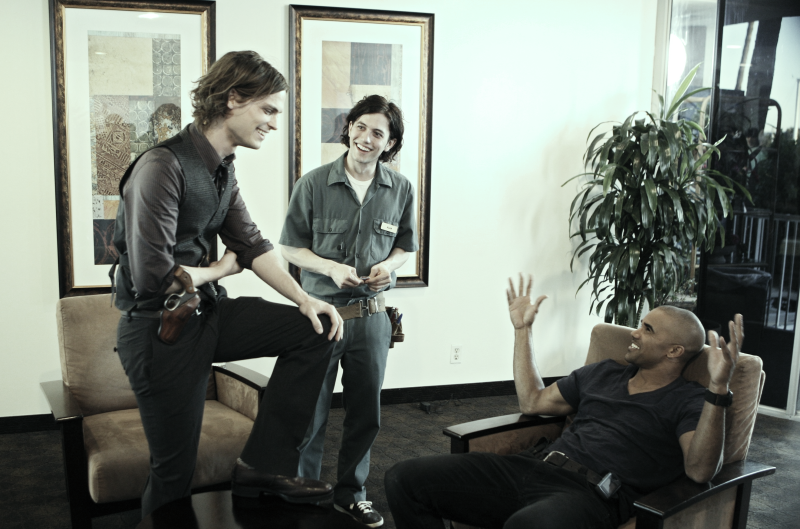
Step 5: On this layer, you will be using a texture! I used a portion of Texture eleven from here: http://lostandtaken.com/2009/01/11-old-grungy-film-textures.html However any of them will work, except for the first one. Adjust it's placement to your liking and then set the layer's Blend Mode to Soft Light! Adjust opacity as you see fit, but I personally like the grainy look that full opacity lends itself to on this image. If you use a different film texture and keep the border, you will most likely have to reduce the opacity.
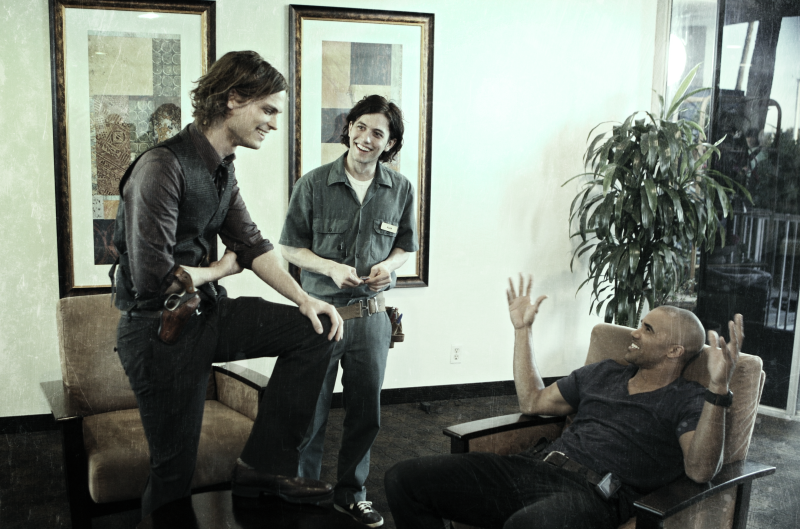
Step 6: the image is looking a bit too sickly in a few places, so add a Vibrance Adjustment Layer. Set the Vibrance to 100%, but knock the Saturation between 25%-45%. I personally used 40% for this image, as Reid began to have alien green skin otherwise.
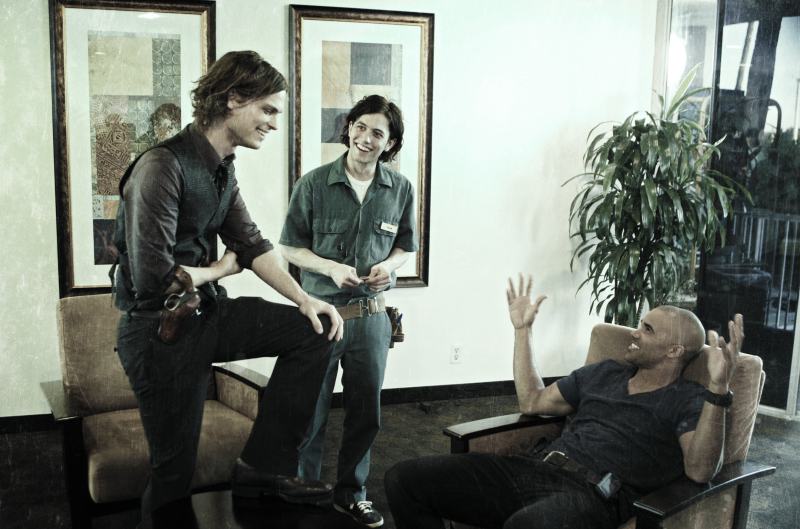
Step 7: Most of the contrast added by the Soft Light layer is faded, so add a Brightness/Contrast layer! The settings on this should be -25% Brightness and 25% Contrast!
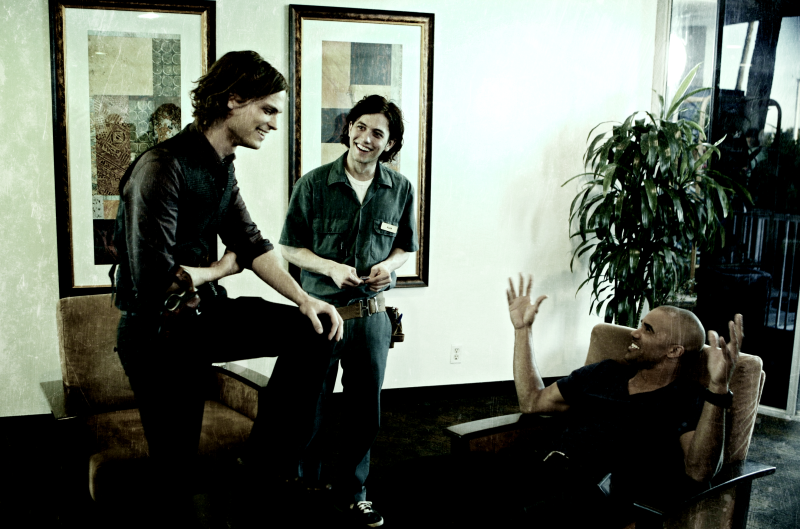
And that's it! With this tutorial you should be able to make any warm colored, regularly filtered photo look like a scene from a modern horror film!