Erase a background and colors!
From 
to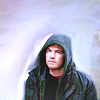
Done on Photoshop CS4
I have tried to explain as much as I can. If anything is unclear, wrong or if you don't understand my poor English, let me know!
You can use the icon as long as you credit; don't repost as your own, don't do the same icon! Never forget the settings fits this cap but may not fit yours.
Textures:
by rhcp_csi

Layer list
1. First of all, resize the picture.
2. Use a smudge tool, size 5, strength 53% percent to erase the baground. Don't forget to decrease the strength of the smudge tool, it will look prettier.
After a few (or more) minutes, it will look like this: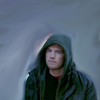
3. To increase the light a little bit, do a curve layer.
Output: 150
Input: 89
Let the opacity to 30% (simply because imo, curves have the bad habit to sharpen the pictures too much)
4. I wanted more colors (yellow) Use this texture by rhcp_csi and set it to multiply, 63% of opacity.
5. As you see, you need light!! Add a brightness/contrast layer.
Brightness: 48
Contrast: 18
6. It is soo blue! Let's add a little bit of red and yellow with a color balance layer.
Midtones: +48, +3, +3
Now it looks like this: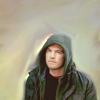
7. I wanted to add a little cloudy effect. I opened a new layer and use a white paintbush. I painted around him and then use the gaussian blur to create a cloud.
8. To decrease the cloudy effect without loosing it and give more texture to the backgound, I used this texture made by rhcp_csi. Seti it to color burn, 36% of opacity.
The result: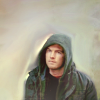
9. Duplicate the base and set it to soft light.
10. Boooo it's dark! Add a brightness/contrast layer.
Brightness: 25
Contrast: 3
Your icon so far: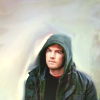
11. You can leave it like that but I wanted a cold atmosphere so I added blue with the channel mixer.
Blue: -5%, +7%, +120%
The result:
You're done!

to

Done on Photoshop CS4
I have tried to explain as much as I can. If anything is unclear, wrong or if you don't understand my poor English, let me know!
You can use the icon as long as you credit; don't repost as your own, don't do the same icon! Never forget the settings fits this cap but may not fit yours.
Textures:
by rhcp_csi


Layer list
1. First of all, resize the picture.
2. Use a smudge tool, size 5, strength 53% percent to erase the baground. Don't forget to decrease the strength of the smudge tool, it will look prettier.
After a few (or more) minutes, it will look like this:

3. To increase the light a little bit, do a curve layer.
Output: 150
Input: 89
Let the opacity to 30% (simply because imo, curves have the bad habit to sharpen the pictures too much)
4. I wanted more colors (yellow) Use this texture by rhcp_csi and set it to multiply, 63% of opacity.
5. As you see, you need light!! Add a brightness/contrast layer.
Brightness: 48
Contrast: 18
6. It is soo blue! Let's add a little bit of red and yellow with a color balance layer.
Midtones: +48, +3, +3
Now it looks like this:

7. I wanted to add a little cloudy effect. I opened a new layer and use a white paintbush. I painted around him and then use the gaussian blur to create a cloud.
8. To decrease the cloudy effect without loosing it and give more texture to the backgound, I used this texture made by rhcp_csi. Seti it to color burn, 36% of opacity.
The result:

9. Duplicate the base and set it to soft light.
10. Boooo it's dark! Add a brightness/contrast layer.
Brightness: 25
Contrast: 3
Your icon so far:

11. You can leave it like that but I wanted a cold atmosphere so I added blue with the channel mixer.
Blue: -5%, +7%, +120%
The result:

You're done!