Colors colors and colors again !
From 
to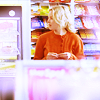
Done on Photoshop CS4
I have tried to explain as much as I can. If anything is unclear, wrong or if you don't understand my poor English, let me know!
You can use the icon as long as you credit; don't repost as your own, don't do the same icon! Never forget the settings fits this cap but may not fit yours.
Textures :
by rhcp_csi

Layer list
1. First of all, resize the picture.
2. To add more light, duplicate the base and screen it.
3. As you can see, it needs more contrast! Do a selective color layer that you put to soft light, 100% of opacity.
Reds: -23%, 0%, +8%, -11%
Whites: 0%, 0%, +15%, +11%
Neutrals: 0%, +3%, 0%, -4%
4. It's very blue right? I like red and yellow (a kinda too much maybe) so I decided to do a color balaance layer.
Midtones: +51%, -34%, -100%
It looks like this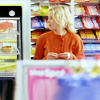
5. At this point, I wanted to hide the background arouns her. So I open a new layer and use a paintbrush, size 5 in white. I painted a bit around her. Then I use the gaussian blur to blur the white.
6. I wanted to hide a little bit more so I duplicate the previous layer.
Now it looks like this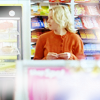
7. I wanted more red and yellow. Again, create a color balance layer.
Midtones: +29%, 0%, -13%
8. Because I found the contrasts were a bit too strong. I used this texture made by rhcp_csi and set it too screen, 29% of opacity.
9. To decrease the yellow tone a bit but without loosing the red and yellow colors, I did a channel mixer.
Blue: 18%, +12%, +133%
10. And then, I did another color balance layer to pimp the colors a bit.
Midtones: +50%, -2%, -19%
11. To decrease the blurry effect, duplicate the base and set it to soft light. Then, move the opacity as you wish!
Result:
You're done!

to

Done on Photoshop CS4
I have tried to explain as much as I can. If anything is unclear, wrong or if you don't understand my poor English, let me know!
You can use the icon as long as you credit; don't repost as your own, don't do the same icon! Never forget the settings fits this cap but may not fit yours.
Textures :
by rhcp_csi

Layer list
1. First of all, resize the picture.
2. To add more light, duplicate the base and screen it.
3. As you can see, it needs more contrast! Do a selective color layer that you put to soft light, 100% of opacity.
Reds: -23%, 0%, +8%, -11%
Whites: 0%, 0%, +15%, +11%
Neutrals: 0%, +3%, 0%, -4%
4. It's very blue right? I like red and yellow (a kinda too much maybe) so I decided to do a color balaance layer.
Midtones: +51%, -34%, -100%
It looks like this

5. At this point, I wanted to hide the background arouns her. So I open a new layer and use a paintbrush, size 5 in white. I painted a bit around her. Then I use the gaussian blur to blur the white.
6. I wanted to hide a little bit more so I duplicate the previous layer.
Now it looks like this

7. I wanted more red and yellow. Again, create a color balance layer.
Midtones: +29%, 0%, -13%
8. Because I found the contrasts were a bit too strong. I used this texture made by rhcp_csi and set it too screen, 29% of opacity.
9. To decrease the yellow tone a bit but without loosing the red and yellow colors, I did a channel mixer.
Blue: 18%, +12%, +133%
10. And then, I did another color balance layer to pimp the colors a bit.
Midtones: +50%, -2%, -19%
11. To decrease the blurry effect, duplicate the base and set it to soft light. Then, move the opacity as you wish!
Result:

You're done!