So many stuff for a 100*100 icon
From: 
to
Done on Photoshop CS4
I have tried to explain as much as I can. If anything is unclear, wrong or if you don't understand my crappy English, let me know!
You can use the icon as long as you credit; don't repost as your own, don't do the same icon! Never forget the settings fits this cap but may not fit yours.
My layer list.
1. First of all, resize the pic. Here I resize it with a height between 80 and 90px.
2. To fill the empty space, use the sumdge tool with a strength of 53%. It will give a soft tone to the background you're created. Use it from the back to the top. Be careful to respect the different colors and the line of the corner of the room just behind her. Erase the arm's guy too and the lamp.
This how it looks like:
3. To enlight the pic, copy the base and screen it.
4. I wanted to make the color pop a little bit. So create a selective color layer.
Reds: -68%, +26%, +76%, -12%
Yellows: +100%, +17%, -51%, -20%
Whites: +100%, 0%, -23%, -10%
Neutrals: +9%, -10%, -6%, +6%
As her face is a way too red and there's not enough color in the backgorund, put the opacity to 36%.
5. I wanted to do a green icon. So I created a color balance layer.
Midtones: -80, -13, -29
6. Now that the icon is green. It needs light. Create a brightness/contrast layer.
Brightness: 47
Contrast: 21
As always when I do a brightness/contrast layer, I always increase the contrasts to not have a soft white veil on the icon. It also gives depth to the icon.
The icon looks like this:
7. Then, it's time use the little clouds full of light. It will give a soft tone to the icon and increase the light in the darkest place. First, create a new layer. With the paintbrush, size 5, paint in white the bottom of the body. Then go to "Filter" -> Bur -> Gaussian blur.
The icon looks like this :
8. Duplicate the previous layer.
9. I want to add a little cloud on the right on the bottom right. For that, I create a new layer. Paint the right bottom and then use the gaussian blur again.
10. Because the clouds make the contrast disappear, I duplicate the base and set it at the top of the layers to soft light.
Now the icon looks like this :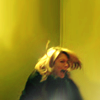
11. Now, it needs light in the top left cordner and on the top right. I respect the atmosphere of the icon so I will avoid to put light in the corner because the with the darkness, the icon looks better. So liek previously, new layer -> paint where you want clouds -> gaussian blur.
12. I want to pimp the color. For that, I use a curves layer to increase intensity of the colors.
Output: 173
Input: 112
Because it's a bit too much, I choose to let the opacity to 90%
12. Now, to give more light, I use a brightness/contrast layer. But, I will use only the contrast to increase the depth.
Brightness: 2
Contrast: 12
13. The icon looks too greenish/yellowish. I will add a channel mixer layer to change that and add red/blue tint.
Blues: -5%, +14%, +148%
The opacity is set to 44%
14. The icon looks blurry with all the light and the clouds. So I duplicate the base and set it to soft light in the top of the layer. To not loose the cloudy effects and the colors, I set the opacity to 31%
15. To increase the darkness of the contrast and so give depth, I use an exposure layer.
Exposure: 0,02
Gamma: 0,91
The result:
You're done!

to

Done on Photoshop CS4
I have tried to explain as much as I can. If anything is unclear, wrong or if you don't understand my crappy English, let me know!
You can use the icon as long as you credit; don't repost as your own, don't do the same icon! Never forget the settings fits this cap but may not fit yours.
My layer list.
1. First of all, resize the pic. Here I resize it with a height between 80 and 90px.
2. To fill the empty space, use the sumdge tool with a strength of 53%. It will give a soft tone to the background you're created. Use it from the back to the top. Be careful to respect the different colors and the line of the corner of the room just behind her. Erase the arm's guy too and the lamp.
This how it looks like:

3. To enlight the pic, copy the base and screen it.
4. I wanted to make the color pop a little bit. So create a selective color layer.
Reds: -68%, +26%, +76%, -12%
Yellows: +100%, +17%, -51%, -20%
Whites: +100%, 0%, -23%, -10%
Neutrals: +9%, -10%, -6%, +6%
As her face is a way too red and there's not enough color in the backgorund, put the opacity to 36%.
5. I wanted to do a green icon. So I created a color balance layer.
Midtones: -80, -13, -29
6. Now that the icon is green. It needs light. Create a brightness/contrast layer.
Brightness: 47
Contrast: 21
As always when I do a brightness/contrast layer, I always increase the contrasts to not have a soft white veil on the icon. It also gives depth to the icon.
The icon looks like this:

7. Then, it's time use the little clouds full of light. It will give a soft tone to the icon and increase the light in the darkest place. First, create a new layer. With the paintbrush, size 5, paint in white the bottom of the body. Then go to "Filter" -> Bur -> Gaussian blur.
The icon looks like this :

8. Duplicate the previous layer.
9. I want to add a little cloud on the right on the bottom right. For that, I create a new layer. Paint the right bottom and then use the gaussian blur again.
10. Because the clouds make the contrast disappear, I duplicate the base and set it at the top of the layers to soft light.
Now the icon looks like this :

11. Now, it needs light in the top left cordner and on the top right. I respect the atmosphere of the icon so I will avoid to put light in the corner because the with the darkness, the icon looks better. So liek previously, new layer -> paint where you want clouds -> gaussian blur.
12. I want to pimp the color. For that, I use a curves layer to increase intensity of the colors.
Output: 173
Input: 112
Because it's a bit too much, I choose to let the opacity to 90%
12. Now, to give more light, I use a brightness/contrast layer. But, I will use only the contrast to increase the depth.
Brightness: 2
Contrast: 12
13. The icon looks too greenish/yellowish. I will add a channel mixer layer to change that and add red/blue tint.
Blues: -5%, +14%, +148%
The opacity is set to 44%
14. The icon looks blurry with all the light and the clouds. So I duplicate the base and set it to soft light in the top of the layer. To not loose the cloudy effects and the colors, I set the opacity to 31%
15. To increase the darkness of the contrast and so give depth, I use an exposure layer.
Exposure: 0,02
Gamma: 0,91
The result:

You're done!