Making Bases 101 for PSP 9 (Part I)
This tutorial is split into three parts with each part using a different base making technique in five steps or less without the use of outside resources. I would have included all three icons in this part, but I can't remember some of my steps and am too lazy to switch computers to see what they are. So right now I'll just post my tutorial for sparkle eyes Wendy.

to
1. First I started with a screencap of Wendy, cropped it, then resized it to 100x100.

2. This image is too dark, so I adjusted the contrast settings.
ADJUST -> AUTOMATIC CONTRAST ENHANCEMENT and make the settings LIGHTER, NORMAL, and BOLD in the check boxes.

3. Much better, eh? But the lighting could be better. Duplicate your base layer.
LAYERS -> DUPLICATE
Then go to LAYERS -> PROPERITES and set your new layer to SOFT LIGHT 100. Merge everything.

4. Now this is where we give Wendy the twinkle eyes effect by sharpening the image.
ADJUST -> SHARPEN -> SHARPEN MORE

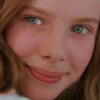
5. Her eyes and hair look good, but now her face is splotchy. On the side tool bar take the soften brush (it looks like a small grey circle). Put the settings on HARDNESS 100 and OPACITY 100. The size can very from anywhere between 3 and 9 pixels. I like to use a bigger size on her cheeks and a smaller size around her eyes. Go over Wendy's face, avoiding eyes, mouth, hair (and careful around the nose) until all the splotches are worked out. You should end up with this:

And that concludes Part I of my base tutorial. You can now add any kinds of textures, brushes, text, etc that you want. Afterall, a good icon always starts with a good base. ;)

to

1. First I started with a screencap of Wendy, cropped it, then resized it to 100x100.

2. This image is too dark, so I adjusted the contrast settings.
ADJUST -> AUTOMATIC CONTRAST ENHANCEMENT and make the settings LIGHTER, NORMAL, and BOLD in the check boxes.

3. Much better, eh? But the lighting could be better. Duplicate your base layer.
LAYERS -> DUPLICATE
Then go to LAYERS -> PROPERITES and set your new layer to SOFT LIGHT 100. Merge everything.

4. Now this is where we give Wendy the twinkle eyes effect by sharpening the image.
ADJUST -> SHARPEN -> SHARPEN MORE

5. Her eyes and hair look good, but now her face is splotchy. On the side tool bar take the soften brush (it looks like a small grey circle). Put the settings on HARDNESS 100 and OPACITY 100. The size can very from anywhere between 3 and 9 pixels. I like to use a bigger size on her cheeks and a smaller size around her eyes. Go over Wendy's face, avoiding eyes, mouth, hair (and careful around the nose) until all the splotches are worked out. You should end up with this:

And that concludes Part I of my base tutorial. You can now add any kinds of textures, brushes, text, etc that you want. Afterall, a good icon always starts with a good base. ;)