Making Bases 101 For PSP 9 (Parts II & III)
Okay! I got all my tutorial steps in order.

to
1. Start with this prettyful base of Zhang Ziyi.

2. Duplicate this base image twice. Set the middle layer to MULTIPLY 100.
LAYERS -> PROPERTIES -> MULTIPLY
Set the very top layer to SCREEN 100.
LAYERS -> PROPERTIES -> SCREEN
Merge everything.

3. She's looking a wee bit yellowish so we need to adjust the saturation levels.
ADJUST -> AUTOMATIC SATURATION ENHANCEMENT
Set the options to NORMAL and WEAK.

4. Now the image can be sharpened a bit. To do this, click the blue cube thing on your top toolbar. A box of UNSHARP MASK settings will come up. Set the options at RADIUS 10.00, STRENGTH 20, and CLIPPING 60.

5. To remove the shiny splotches from her face, just use the soften brush from the side menu. Put the settings at HARDNESS 100 and OPACITY 100 and make the size at around 5 pixes. Go over her face avoiding her eyes, mouth, and much of her nose. Mainly just go over her cheeks and neck.


to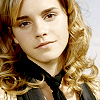
1. Start with this 100x100 image of Emma Watson.

To get it resized without looking funky, I didn't use the IMAGE -> RESIZE option because it makes most images look too choppy and blurry. Instead, I use the middle scroll button on my mouse to zoom out the image to something that looks around 100x100. You can also use the magnifying glass on the side menu to zoom out. Press the PRT SCR button on your keyboard, go to EDIT -> PASTE AS NEW IMAGE, and then crop out the image you need. Next, I go to IMAGE -> IMAGE SIZE and crop off the extra pixels (if any). If you don't do this, you're image will look like this:

Not good at all!
2. Now back to the good looking base... We're going to play around with the levels.
LAYERS -> NEW ADJUSTMENT LAYER -> LEVELS
A box will pop up. Depending on your image, you'll need to play around with these scrollers. For this particular base I put the settings at INPUT LEVELS 40 : 1.5 : 255. Merge everything.

3. Emma's a bit too yellow, so the image needs to be desaturated.
IMAGE -> AUTOMATIC SATURATION ENHANCEMENT
Check the options NORMAL and NORMAL.

4. The image looks pretty good this way, but I wanted it to have more contrast.
IMAGE -> AUTOMATIC CONTRAST ENHANCEMENT
I put the settings on DARKER, NORMAL, and BOLD.

5. Finally, sharpen the image.
ADJUST -> SHARPEN -> SHARPEN

All done!

to

1. Start with this prettyful base of Zhang Ziyi.

2. Duplicate this base image twice. Set the middle layer to MULTIPLY 100.
LAYERS -> PROPERTIES -> MULTIPLY
Set the very top layer to SCREEN 100.
LAYERS -> PROPERTIES -> SCREEN
Merge everything.

3. She's looking a wee bit yellowish so we need to adjust the saturation levels.
ADJUST -> AUTOMATIC SATURATION ENHANCEMENT
Set the options to NORMAL and WEAK.

4. Now the image can be sharpened a bit. To do this, click the blue cube thing on your top toolbar. A box of UNSHARP MASK settings will come up. Set the options at RADIUS 10.00, STRENGTH 20, and CLIPPING 60.

5. To remove the shiny splotches from her face, just use the soften brush from the side menu. Put the settings at HARDNESS 100 and OPACITY 100 and make the size at around 5 pixes. Go over her face avoiding her eyes, mouth, and much of her nose. Mainly just go over her cheeks and neck.


to

1. Start with this 100x100 image of Emma Watson.

To get it resized without looking funky, I didn't use the IMAGE -> RESIZE option because it makes most images look too choppy and blurry. Instead, I use the middle scroll button on my mouse to zoom out the image to something that looks around 100x100. You can also use the magnifying glass on the side menu to zoom out. Press the PRT SCR button on your keyboard, go to EDIT -> PASTE AS NEW IMAGE, and then crop out the image you need. Next, I go to IMAGE -> IMAGE SIZE and crop off the extra pixels (if any). If you don't do this, you're image will look like this:

Not good at all!
2. Now back to the good looking base... We're going to play around with the levels.
LAYERS -> NEW ADJUSTMENT LAYER -> LEVELS
A box will pop up. Depending on your image, you'll need to play around with these scrollers. For this particular base I put the settings at INPUT LEVELS 40 : 1.5 : 255. Merge everything.

3. Emma's a bit too yellow, so the image needs to be desaturated.
IMAGE -> AUTOMATIC SATURATION ENHANCEMENT
Check the options NORMAL and NORMAL.

4. The image looks pretty good this way, but I wanted it to have more contrast.
IMAGE -> AUTOMATIC CONTRAST ENHANCEMENT
I put the settings on DARKER, NORMAL, and BOLD.

5. Finally, sharpen the image.
ADJUST -> SHARPEN -> SHARPEN

All done!