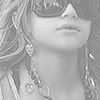
Tutorial 5 // Mary Kate Olsen
Subject: Mary Kate Olsen
Program: Photoshop (SC2) (will work with 7 and up)

>>>
This tutorial is different there are 2 stages... preparing the picture and then making it into an avatar
Stage 1 Preparing the Photo

--Sharpen the image 2 times
With the Blur tool go over the skin to make it smooth to your likeing.

--Go over the face and darken (Burn Tool) the chin line, neck and the inner and bottom lip line
Then lighten (Dodge Tool) under the glasses and under the bottom lip

--Smooth everything over with the Smudge Tool -- Make sure not to go crazy with it, just do it lightly and hardly touch the lips
Stage 2 Making the Avatar

Layer 1: Leave the Edited picture as it. If you choose not to Prepare the image you should sharpen twice and smooth over skin


Layer 2: Duplicate layer 1 and grayscale it ( ctrl + Shift + U) and set Opacity to 50%

Layer 3: Duplicate layer 1 and set to Soft Light


Layer 4: Set Gradient to Soft Light


Layer 5: Set Gradient to Soft Light


Layer 6: Make a new layer and set it to Soft Light then draw on it with black and white highlighting and shadowing parts of the face. Then Grab the Smudge Tool and go over it smoothing it all out set the layer to 60% Opacity


Layer 7: Set (#05093d) to Exclusion

Layer 8: Duplicate Layer 2 and set it to Soft Light

TA DA
TIPS: to this particular picture I did not add a brush because her jewerly is very busy but to other pictures I recomend setting a fun border or a brush ( Usually set as Soft Light with ether a Drop Shaddow or Outter Glow)
Program: Photoshop (SC2) (will work with 7 and up)

>>>

This tutorial is different there are 2 stages... preparing the picture and then making it into an avatar
Stage 1 Preparing the Photo

--Sharpen the image 2 times
With the Blur tool go over the skin to make it smooth to your likeing.

--Go over the face and darken (Burn Tool) the chin line, neck and the inner and bottom lip line
Then lighten (Dodge Tool) under the glasses and under the bottom lip

--Smooth everything over with the Smudge Tool -- Make sure not to go crazy with it, just do it lightly and hardly touch the lips
Stage 2 Making the Avatar

Layer 1: Leave the Edited picture as it. If you choose not to Prepare the image you should sharpen twice and smooth over skin


Layer 2: Duplicate layer 1 and grayscale it ( ctrl + Shift + U) and set Opacity to 50%

Layer 3: Duplicate layer 1 and set to Soft Light


Layer 4: Set Gradient to Soft Light


Layer 5: Set Gradient to Soft Light


Layer 6: Make a new layer and set it to Soft Light then draw on it with black and white highlighting and shadowing parts of the face. Then Grab the Smudge Tool and go over it smoothing it all out set the layer to 60% Opacity


Layer 7: Set (#05093d) to Exclusion

Layer 8: Duplicate Layer 2 and set it to Soft Light

TA DA
TIPS: to this particular picture I did not add a brush because her jewerly is very busy but to other pictures I recomend setting a fun border or a brush ( Usually set as Soft Light with ether a Drop Shaddow or Outter Glow)