Cropping Tutorial
I have recieved alot of compliments on how I crop my pictures for my icons. So I figured I would put together a little tutorial, and give you guys some examples of good and bad crops. However when I made these I was in Pirates Obsession mode and well its hard to make anything from that movie look bad but it still gets the point across.
THINGS TO REMEMBER ABOUT CROPPING
EXAMPLES


DISCLAIMER
Please keep in mind these are my opinions, and things I have learned over the years. Like I said I have recieved numerous compliments about my cropping and been asked alot of questions wich is why I made this. Hopefully this will be helpful to some people. Keep in mind even somethings I marked as bad can be made into good, these are just generalized examples.
If you have any questions please feel free to ask.
THINGS TO REMEMBER ABOUT CROPPING
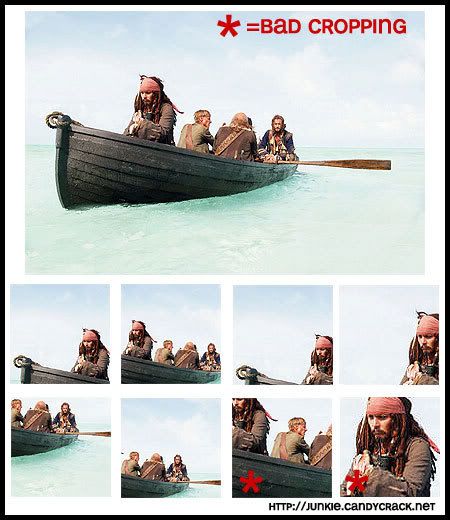
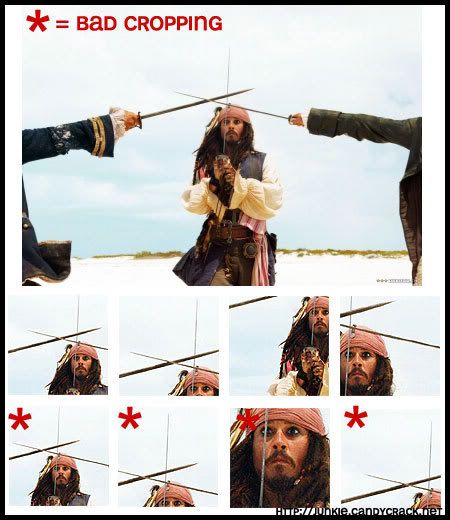
- Centering images makes for a boring icon. An image that is a bit offset will always look better then a image that is dead on.
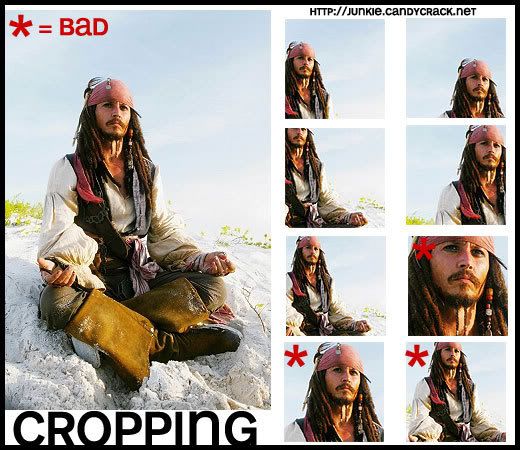
- Cropping to wear the face takes up the whole image is another bad crop. When your face takes up your whole image it makes the image plain since you cannot do much else with the icon.
- When cropping people and objects dont make half the person and half the object. (EX. Jack In The Boat 3rd row bottom)
- Don't crop out too much, sometimes people make things so offset you can't see anything except a section of hair and a shoulder.
- Do try to keep things offset, sometimes cetering can work however more then likely it won't look good.
- Make a few different crops before deciding on one. You can also take one picture and use all these different crops to make numerous icons that all look unique.
- Look for unique angles and interesting poses, those stange poses make for killer icons.
- Close ups are possible and can look good. However keep in mind then when its a close up chances are text, brushes and other effects will obscure your subject.
EXAMPLES


DISCLAIMER
Please keep in mind these are my opinions, and things I have learned over the years. Like I said I have recieved numerous compliments about my cropping and been asked alot of questions wich is why I made this. Hopefully this will be helpful to some people. Keep in mind even somethings I marked as bad can be made into good, these are just generalized examples.
If you have any questions please feel free to ask.