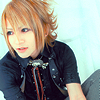
Tutorial #03: Ueda Tatsuya
New tutorial!
From
to
Made in PSP XI
READ THIS FIRST:
This tutorial is one that is very dependant on the picture you use. Many of the steps will be optional, so don't be afraid to mess around with the settings of anything. Also, if you need help, just ask. =)
1. Okay. So start with your base. Prepare the picture however you usually do. Crop to whatever size you want.
2. Duplicate the base and set to screen at 40%. You may need to up the opacity, depending on your picture.
These next two steps are OPTIONAL, and you will not need them unless your picture is really yellow (like mine).
3. Add a new color balance layer. (Layers > New adjustment layer > color balance) Put in the following settings:
Midtones: 11, 32, 46
Shadows: -33, 14, 25
Highlights: 10, -12, 13
4. Add another color balance layer. Put in the following settings:
Midtones: 7, 23, 55
Shadows: -24, -7, 19
Highlights: 13, 24, 17
5. Add a new channel mixer layer. (Layers > New adjustment layer > channel mixer) Input the following settings:
Red
Red: 148%
Green: -60%
Blue: 0
Constant: 0
Green
Red: 8%
Green: 78%
Blue: 28%
Constant: -6%
Blue
Red: -3%
Green: 19%
Blue: 85%
Constant: 0
5. Add one more channel mixer layer. Input the following settings:
Red
Red: 100%
Green: 0
Blue: 0
Constant: 0
Green
Red: 0
Green: 100%
Blue: 6%
Constant: 0
Blue
Red: 0
Green: 0
Blue: 100%
Constant: 0
4. If the picture needs it, then add a new curves layer. (Layers > New adjustment layer > curves) Use these settings:
RGB
First node: 142, 162
Second node: 108, 140
leave the rest alone.
5. Add a new color balance layer.
Midtones: -15, 8, 23
leave the rest alone.
6. Add a new brightness/contrast layer. But only if the picture needs it. (Layers > New adjustment layer > brightness/contrast)
Contrast: -5
The next step is OPTIONAL, and completely depends on how you want your icon to look.
7. Add one last channel mixer layer at 60% opacity.
Red
Red: 158%
Green: -64%
Blue: 0
Constant: 0
Green
Red: 0
Green: 96%
Blue: 0
Constant: 0
Blue
Red: -10%
Green: 10%
Blue: 100%
Constant: 0
Some of the settings for this layer (the red and green one) I took from another tutorial, but I can't remember which one. If it was yours, then please notify me so I can credit you. =)
And you're done!
Here's the finished result:

I hope you liked it! I'd love to see what you've made.
Icons made with this technique, with varying settings:


From

to

Made in PSP XI
READ THIS FIRST:
This tutorial is one that is very dependant on the picture you use. Many of the steps will be optional, so don't be afraid to mess around with the settings of anything. Also, if you need help, just ask. =)
1. Okay. So start with your base. Prepare the picture however you usually do. Crop to whatever size you want.
2. Duplicate the base and set to screen at 40%. You may need to up the opacity, depending on your picture.
These next two steps are OPTIONAL, and you will not need them unless your picture is really yellow (like mine).
3. Add a new color balance layer. (Layers > New adjustment layer > color balance) Put in the following settings:
Midtones: 11, 32, 46
Shadows: -33, 14, 25
Highlights: 10, -12, 13
4. Add another color balance layer. Put in the following settings:
Midtones: 7, 23, 55
Shadows: -24, -7, 19
Highlights: 13, 24, 17
5. Add a new channel mixer layer. (Layers > New adjustment layer > channel mixer) Input the following settings:
Red
Red: 148%
Green: -60%
Blue: 0
Constant: 0
Green
Red: 8%
Green: 78%
Blue: 28%
Constant: -6%
Blue
Red: -3%
Green: 19%
Blue: 85%
Constant: 0
5. Add one more channel mixer layer. Input the following settings:
Red
Red: 100%
Green: 0
Blue: 0
Constant: 0
Green
Red: 0
Green: 100%
Blue: 6%
Constant: 0
Blue
Red: 0
Green: 0
Blue: 100%
Constant: 0
4. If the picture needs it, then add a new curves layer. (Layers > New adjustment layer > curves) Use these settings:
RGB
First node: 142, 162
Second node: 108, 140
leave the rest alone.
5. Add a new color balance layer.
Midtones: -15, 8, 23
leave the rest alone.
6. Add a new brightness/contrast layer. But only if the picture needs it. (Layers > New adjustment layer > brightness/contrast)
Contrast: -5
The next step is OPTIONAL, and completely depends on how you want your icon to look.
7. Add one last channel mixer layer at 60% opacity.
Red
Red: 158%
Green: -64%
Blue: 0
Constant: 0
Green
Red: 0
Green: 96%
Blue: 0
Constant: 0
Blue
Red: -10%
Green: 10%
Blue: 100%
Constant: 0
Some of the settings for this layer (the red and green one) I took from another tutorial, but I can't remember which one. If it was yours, then please notify me so I can credit you. =)
And you're done!
Here's the finished result:

I hope you liked it! I'd love to see what you've made.
Icons made with this technique, with varying settings:


