Icon Tutorial No. 33: Kamui2
This tutorial was requested by
feuillant . Easy peasy icon for pretty coloring.
Level: Easy
Program: Adobe Photoshop 7.0
Go from this to this:
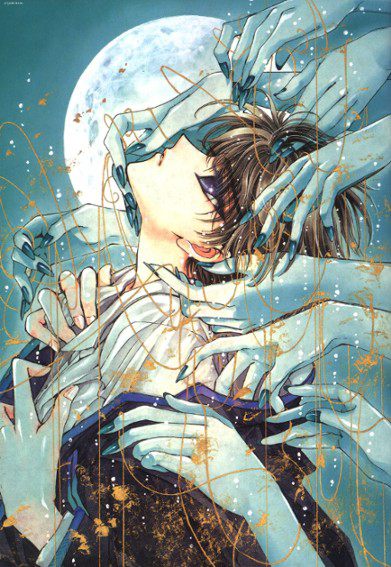
01. Crop this picture of Kamui at 96x96.
You should see something like this:
02. Duplicate the layer (CTRL A>>CTRL C>>CTRL V) and sharpen it (FILTER>>SHARPEN>>SHARPEN). I changed the opacity of the sharpened layer to 75% opacity. Merge your layers (CTRL+SHIFT+E).
You should see something like this:
03. Copy and paste another layer of the base (CTRL A>>CTRL C>>CTRL V) and set this layer to Multiply to make it darker. I changed it to 40%. Merge all the layers again (CTRL+SHIFT+E).
You should see something like this:
04. Copy&paste your edited base (CTRL A>>CTRL C>>CTRL V) and then go to FILTER>>BLUR>>GAUSSIAN BLUR. Change the radius to 3 point. Then set this layer to OVERLAY at 100%.
You should see something like this:
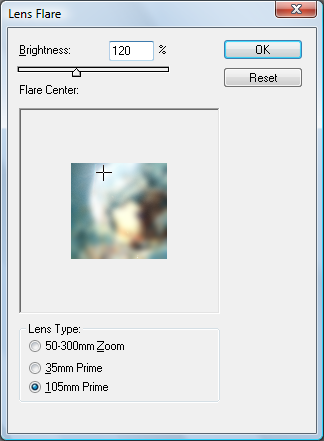
05. While still selecting the Gaussian Blur layer, go to FILTER>>RENDER>>LENS FLARE. Move the Lens Flare to the edge of the moon and select 105 mm Prime. Change Brightness to 130%. (It should look like this.) Click OK.
You should see something like this:
06. Merge all the layers (CTRL+SHIFT+E) and open a new 100x100 canvas. Copy your project onto the blank canvas (CTRL A>>CTRL C>>CTRL V) and then use this corner border brush by me in #155362. Save, and finish!
Your finished product should look something like this:
---
Was this tutorial helpful? Confusing? Too hard? Feedback would be wonderful!
Like what you see? FRIEND this community to stay updated on fresh tutorials, textures, icons, brushes, and more!
feuillant . Easy peasy icon for pretty coloring.
Level: Easy
Program: Adobe Photoshop 7.0
Go from this to this:
01. Crop this picture of Kamui at 96x96.
You should see something like this:
02. Duplicate the layer (CTRL A>>CTRL C>>CTRL V) and sharpen it (FILTER>>SHARPEN>>SHARPEN). I changed the opacity of the sharpened layer to 75% opacity. Merge your layers (CTRL+SHIFT+E).
You should see something like this:
03. Copy and paste another layer of the base (CTRL A>>CTRL C>>CTRL V) and set this layer to Multiply to make it darker. I changed it to 40%. Merge all the layers again (CTRL+SHIFT+E).
You should see something like this:
04. Copy&paste your edited base (CTRL A>>CTRL C>>CTRL V) and then go to FILTER>>BLUR>>GAUSSIAN BLUR. Change the radius to 3 point. Then set this layer to OVERLAY at 100%.
You should see something like this:
05. While still selecting the Gaussian Blur layer, go to FILTER>>RENDER>>LENS FLARE. Move the Lens Flare to the edge of the moon and select 105 mm Prime. Change Brightness to 130%. (It should look like this.) Click OK.
You should see something like this:
06. Merge all the layers (CTRL+SHIFT+E) and open a new 100x100 canvas. Copy your project onto the blank canvas (CTRL A>>CTRL C>>CTRL V) and then use this corner border brush by me in #155362. Save, and finish!
Your finished product should look something like this:
---
Was this tutorial helpful? Confusing? Too hard? Feedback would be wonderful!
Like what you see? FRIEND this community to stay updated on fresh tutorials, textures, icons, brushes, and more!