Icon Tutorial No. 32: Kamui
This tutorial was requested by
feuillant, who will probably cry when she sees how easy this was to make. This icon won Second at
anime_abc/Week Z.
Level: Easy
Program: Adobe Photoshop 7.0
Go from this to this:
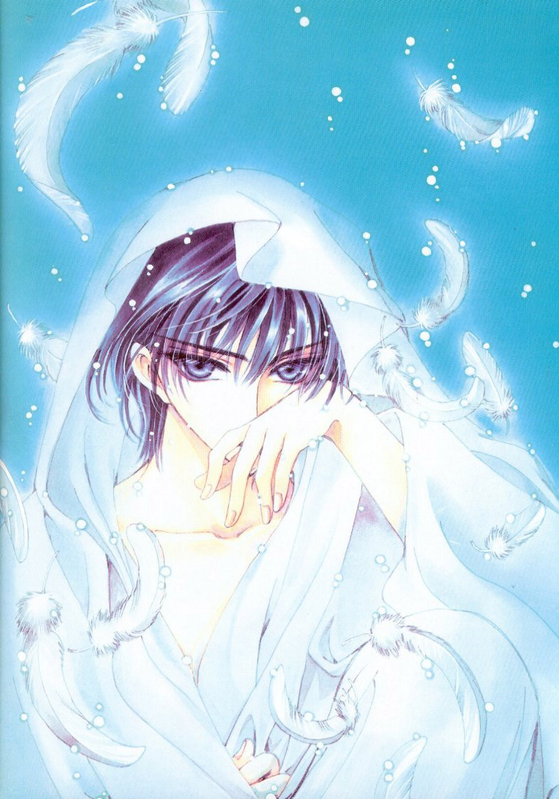
01. Take this image of Kamui and crop it at 96x96 pixels.
You should see something like this:
02. Duplicate the level (CTRL A>>CTRL C>>CTRL V) and sharpen it (FILTER>>SHARPEN>>SHARPEN). I set this layer at 80% opacity, but you should adjust as necessary.
You should see something like this:
03. Open up this light texture by myrasis and paste it onto our canvas (CTRL A>>CTRL C>>CTRL V). Set this layer at SCREEN 100%. Erase any light dots marring Kamui's face.
You should see something like this:
04. Text time: I used Mutlu, Smooth, 18 pt in #797A9B and typed in 'Z', then moved it over to the side. Then I used Carpenter, Strong, 6pt in #797A9B and typed in 'e n i t h', then changed the blending options so there was outer glow and moved it next to the z.
You should see something like this:
05. Create a new layer and use this tiny text brush by me in #797A9B right under 'e n i t h'.
You should see something like this:
06. Merge all the layers (CTRL+SHIFT+E) and open a new 100x100 canvas. Copy our project over (CTRL A>>CTRL C>>CTRL V). Use this corner border brush by me in #797A9B. Save, and you're done!
Your finished product looks something like this:
---
Was this tutorial helpful? Confusing? Too hard? Feedback would be wonderful!
Like what you see? FRIEND this community to stay updated on fresh tutorials, textures, icons, brushes, and more!
feuillant, who will probably cry when she sees how easy this was to make. This icon won Second at
anime_abc/Week Z.
Level: Easy
Program: Adobe Photoshop 7.0
Go from this to this:
01. Take this image of Kamui and crop it at 96x96 pixels.
You should see something like this:
02. Duplicate the level (CTRL A>>CTRL C>>CTRL V) and sharpen it (FILTER>>SHARPEN>>SHARPEN). I set this layer at 80% opacity, but you should adjust as necessary.
You should see something like this:
03. Open up this light texture by myrasis and paste it onto our canvas (CTRL A>>CTRL C>>CTRL V). Set this layer at SCREEN 100%. Erase any light dots marring Kamui's face.
You should see something like this:
04. Text time: I used Mutlu, Smooth, 18 pt in #797A9B and typed in 'Z', then moved it over to the side. Then I used Carpenter, Strong, 6pt in #797A9B and typed in 'e n i t h', then changed the blending options so there was outer glow and moved it next to the z.
You should see something like this:
05. Create a new layer and use this tiny text brush by me in #797A9B right under 'e n i t h'.
You should see something like this:
06. Merge all the layers (CTRL+SHIFT+E) and open a new 100x100 canvas. Copy our project over (CTRL A>>CTRL C>>CTRL V). Use this corner border brush by me in #797A9B. Save, and you're done!
Your finished product looks something like this:
---
Was this tutorial helpful? Confusing? Too hard? Feedback would be wonderful!
Like what you see? FRIEND this community to stay updated on fresh tutorials, textures, icons, brushes, and more!