Icon Tutorial No. 20: Yuuko3
Requested by
onigirixx, this icon won Second Place Week 14 of
xxxholic_still(2 Words). Simple tutorial for those of you who wish to learn how to make monotone icons.
Level: Easy
Program: Adobe Photoshop 7.0
Go from this to this:
This tutorial works well on any picture, so go crazy! Choose a basic color that's DARK (no pinks, yellows, light browns).
1. Start with this picture of Yuuko and crop it at 100x100 so that her face is the focus and the butterfly tattoo on her chest is visible.
You should have something like this: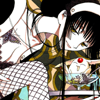
2. Duplicate the layer (CTRL A>>CTRL C>>CTRL V) and sharpen it by going to FILTER>>SHARPEN>>SHARPEN. Change the opacity of this layer to 40%.
You should have something like this: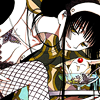
3. Create a new layer and fill it with #432200. Change this layer to COLOR at 100% opacity.
You should have something like this: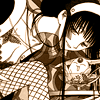
4. Duplicate the last layer (CTRL A>>CTRL C>>CTRL V), but change this layer to SCREEN at 100%.
You should have something like this:
5. Select the Rectangle Tool and create a rectangle in #432200 stretching from left to right of the icon. Change this to 85% opacity.
You should have something like this:
6. Put on your text: 1) type 'L' in Multu, pt. 30, #FFFFFF. Change blending options so there's a one point stroke in #432200 and 75% Outer Glow. 2) type 'i t t l e m a i d' in Castellar, pt 7, #FFFFFF. Change blendind options so there's a one point stroke in #432200 at 85% opacity. Move it so it is overlapping the L.
You should have something like this:
7. Create a new layer and use this brush by
cardcapturin #FFFFFF. Make sure that none of the text is overlapping it, and viola! You have your icon!
Your finished product should look like this:
_________
Was this tutorial helpful? Confusing? Too hard? Feedback would be wonderful!
[x] Like what you see? FRIEND
wicked_avis to stay updated on fresh tutorials, textures, brushes, and icons!
onigirixx, this icon won Second Place Week 14 of
xxxholic_still(2 Words). Simple tutorial for those of you who wish to learn how to make monotone icons.
Level: Easy
Program: Adobe Photoshop 7.0
Go from this to this:

This tutorial works well on any picture, so go crazy! Choose a basic color that's DARK (no pinks, yellows, light browns).
1. Start with this picture of Yuuko and crop it at 100x100 so that her face is the focus and the butterfly tattoo on her chest is visible.
You should have something like this:

2. Duplicate the layer (CTRL A>>CTRL C>>CTRL V) and sharpen it by going to FILTER>>SHARPEN>>SHARPEN. Change the opacity of this layer to 40%.
You should have something like this:

3. Create a new layer and fill it with #432200. Change this layer to COLOR at 100% opacity.
You should have something like this:

4. Duplicate the last layer (CTRL A>>CTRL C>>CTRL V), but change this layer to SCREEN at 100%.
You should have something like this:

5. Select the Rectangle Tool and create a rectangle in #432200 stretching from left to right of the icon. Change this to 85% opacity.
You should have something like this:

6. Put on your text: 1) type 'L' in Multu, pt. 30, #FFFFFF. Change blending options so there's a one point stroke in #432200 and 75% Outer Glow. 2) type 'i t t l e m a i d' in Castellar, pt 7, #FFFFFF. Change blendind options so there's a one point stroke in #432200 at 85% opacity. Move it so it is overlapping the L.
You should have something like this:

7. Create a new layer and use this brush by
cardcapturin #FFFFFF. Make sure that none of the text is overlapping it, and viola! You have your icon!
Your finished product should look like this:

_________
Was this tutorial helpful? Confusing? Too hard? Feedback would be wonderful!
[x] Like what you see? FRIEND

wicked_avis to stay updated on fresh tutorials, textures, brushes, and icons!