Tutorial - 001 - Saga
Tutorial time!! =]
Because kashibisho said she wanted me to make one. Why the hell not, summer's here, I've got nothing better to do =]
Today, we are going from this:
to this:
1. Crop the image to a 100 x 100 pixel canvas and position it the way you want.

2. Duplicate that layer, sharpen twice, and put it on Soft Light 100%.

3. Create a new layer and fill with #07032e and put it on Exclusion 100%.


4. Then make a duplicate of the sharpened layer and drag it on top of the Exclusion layer.

5. Using this texture, drag it to the top and set it to Multiply 100%.
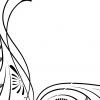

6. Use this texture, set it to Soft Light and turn down the opacity to 65%.


7. Then this texture on Soft Light at 53%
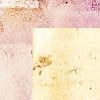

8. Another texture on Soft Light at 51%.


9. Then this light texture on Screen 100%.
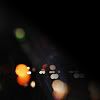

10. Then insert a curves layer (Layer >> New Adjustment Layer >> Curves) and adjust it kind of like this.
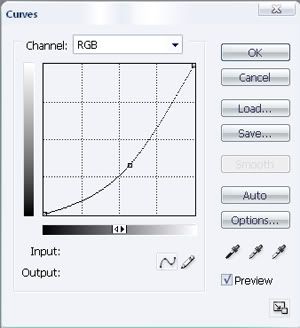

11. Then use this texture and set it on Screen 100%.


12. Then use this texture (from Aethereality) and set it to Color Dodge at 17%.

13. And the text! I used Carpenter ICG at 24 pxl and 11 pxl.

And you're done! ^_^
Credits to whoever posted these textures on LJ/DA! Cookies to you =] and of course, Athereality.
Because kashibisho said she wanted me to make one. Why the hell not, summer's here, I've got nothing better to do =]
Today, we are going from this:

to this:

1. Crop the image to a 100 x 100 pixel canvas and position it the way you want.

2. Duplicate that layer, sharpen twice, and put it on Soft Light 100%.

3. Create a new layer and fill with #07032e and put it on Exclusion 100%.


4. Then make a duplicate of the sharpened layer and drag it on top of the Exclusion layer.

5. Using this texture, drag it to the top and set it to Multiply 100%.


6. Use this texture, set it to Soft Light and turn down the opacity to 65%.


7. Then this texture on Soft Light at 53%


8. Another texture on Soft Light at 51%.


9. Then this light texture on Screen 100%.


10. Then insert a curves layer (Layer >> New Adjustment Layer >> Curves) and adjust it kind of like this.


11. Then use this texture and set it on Screen 100%.


12. Then use this texture (from Aethereality) and set it to Color Dodge at 17%.


13. And the text! I used Carpenter ICG at 24 pxl and 11 pxl.

And you're done! ^_^
Credits to whoever posted these textures on LJ/DA! Cookies to you =] and of course, Athereality.