006 - tutorial
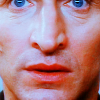
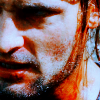
The icon was made in psp7 and uses curves and chanel mixer.
the icon was part of THIS batch anf this tutorial was requested by
shalowater
>>
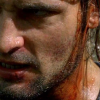
prepare your base
firstly duplicate it and set the layer to softlight at 100%
however! some images may not need this step and others may need the oppacity lowerd.
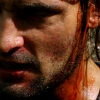
make a new curves layer.
new point
RBG: input: 75, output: 130

make a new layer and fill this with a light grey.
I used #C0C0C0 set this layer to multiply at 100%

make a channel mixer layer, setting:
Red: 131, -68, 0
Blue: -40, 103, 100

now make a copy of all the current layers, copy merged and paste it ontop set it to soft light 100%

finally duplicate the previous layer and set it on screen 100%
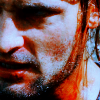
(this layer is optional, I used it on this icon but didn't on others)
duplicate the curves layer, bring it to the top and adjust the opacity (mine is on 40%)

hope the tutorial works for you!
comments are loved :D


the icon was part of THIS batch anf this tutorial was requested by
shalowater

>>

prepare your base
firstly duplicate it and set the layer to softlight at 100%
however! some images may not need this step and others may need the oppacity lowerd.

make a new curves layer.
new point
RBG: input: 75, output: 130

make a new layer and fill this with a light grey.
I used #C0C0C0 set this layer to multiply at 100%

make a channel mixer layer, setting:
Red: 131, -68, 0
Blue: -40, 103, 100

now make a copy of all the current layers, copy merged and paste it ontop set it to soft light 100%

finally duplicate the previous layer and set it on screen 100%

(this layer is optional, I used it on this icon but didn't on others)
duplicate the curves layer, bring it to the top and adjust the opacity (mine is on 40%)

hope the tutorial works for you!
comments are loved :D
