_wizu
in
vainglorei
Tutorial #03
Done as a request for m1ch1ru Hope it's not too jumbled around xD;
And I apolgize for any photoshop veterns reading this, I try to make my tutorials as newbie friendly as possible, so it is a little wordy =/
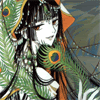
Going from this:
to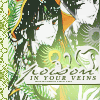
#01: Duplicate the base layer by going to layer --> duplicate layer and set the layer mode to screen at 77%.

#02: Next I created a new layer and filled it with a gradient by crumblingwalls and set it to multiply at 35%.
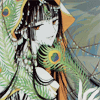
#03: Duplicate the base layer again and drag it to the top. This time set the mode to soft light at 100%.
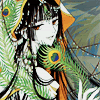
#04: I made another layer and used another gradient by crumblingwalls and set it to lighten at 100%.
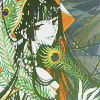
#05: Next, I duplicated the base again and dragged it to the top. I desaturated it by going to image --> adjustmants --> desaturate. Next I went to filter --> blur --> gaussian blur and used .8 radius. Set the layer to soft light at 72%.
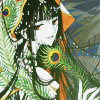
#06: I duplicated the base again and dragged it to the top. Set it to soft light at 31%.

#07: Use the polygonal laso tool to select the portion of the image that doesn't contain Yuuko. With that still slected go to edit --> clear on each layer.
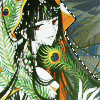
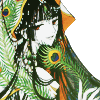
#08: Use the ctrl+alt+print scrn buttons on your keyboard to screencap your entire screen. Then paste it into the very bottom layer of your pallete. Use the move tool to move it around till it's positioned with Yuuko visible. Then desaturate it.

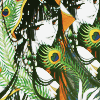
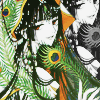
#09: Then I used a light texture (I don't know who from) and pasted it on top, set to screen at 100%. I also repositioned it slightly with the move tool so it wasn't in Yuuko's face quite so much.

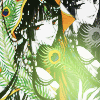
#10: I used a brush from _joni using the color #F0F0ED. I decided I didn't want the border or tiny text on the brush so I got rid of it with the eraser tool. I also decided I didn't want the little cut out design on the brush, so I filled it in. Then I added a shadow to the brush by right clicking on it in the layer's pallete and selecting blending options. I checked the box by dropshadow and used the settings: blend mode: normal opacity: 100% distance: 1 spread: 100 size: 0 using the color #54642A. Add your text next. If you're curious, I used Times New Roman, and Saeclumn for fonts.
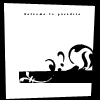
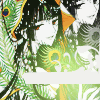


#11: Add a another gradient by crumblingwalls set to lighten at 100% beneath your brush layer. Make sure your colors are set to black and white, then make a new layer on top of the gradient. Go to filter --> render --> clouds and set it to soft light at 100%. The clouds are rendered at random, so just play with it till something looks good.


#12: Right click on the base and select blending options. Checkmark outer glow and change the color to #ffffff.
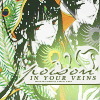
#13: Just paste on top this texture from gender and use the rectangular marquee tool to select what isn't wanted. Then go to edit --> cut and you're finished :)

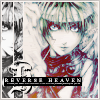
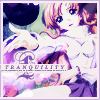
Other icons using this method:
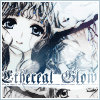
And I apolgize for any photoshop veterns reading this, I try to make my tutorials as newbie friendly as possible, so it is a little wordy =/
Going from this:
to
#01: Duplicate the base layer by going to layer --> duplicate layer and set the layer mode to screen at 77%.
#02: Next I created a new layer and filled it with a gradient by crumblingwalls and set it to multiply at 35%.
#03: Duplicate the base layer again and drag it to the top. This time set the mode to soft light at 100%.
#04: I made another layer and used another gradient by crumblingwalls and set it to lighten at 100%.
#05: Next, I duplicated the base again and dragged it to the top. I desaturated it by going to image --> adjustmants --> desaturate. Next I went to filter --> blur --> gaussian blur and used .8 radius. Set the layer to soft light at 72%.
#06: I duplicated the base again and dragged it to the top. Set it to soft light at 31%.
#07: Use the polygonal laso tool to select the portion of the image that doesn't contain Yuuko. With that still slected go to edit --> clear on each layer.
#08: Use the ctrl+alt+print scrn buttons on your keyboard to screencap your entire screen. Then paste it into the very bottom layer of your pallete. Use the move tool to move it around till it's positioned with Yuuko visible. Then desaturate it.
#09: Then I used a light texture (I don't know who from) and pasted it on top, set to screen at 100%. I also repositioned it slightly with the move tool so it wasn't in Yuuko's face quite so much.
#10: I used a brush from _joni using the color #F0F0ED. I decided I didn't want the border or tiny text on the brush so I got rid of it with the eraser tool. I also decided I didn't want the little cut out design on the brush, so I filled it in. Then I added a shadow to the brush by right clicking on it in the layer's pallete and selecting blending options. I checked the box by dropshadow and used the settings: blend mode: normal opacity: 100% distance: 1 spread: 100 size: 0 using the color #54642A. Add your text next. If you're curious, I used Times New Roman, and Saeclumn for fonts.
#11: Add a another gradient by crumblingwalls set to lighten at 100% beneath your brush layer. Make sure your colors are set to black and white, then make a new layer on top of the gradient. Go to filter --> render --> clouds and set it to soft light at 100%. The clouds are rendered at random, so just play with it till something looks good.
#12: Right click on the base and select blending options. Checkmark outer glow and change the color to #ffffff.
#13: Just paste on top this texture from gender and use the rectangular marquee tool to select what isn't wanted. Then go to edit --> cut and you're finished :)
Other icons using this method: