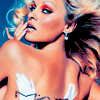
(no subject)
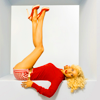
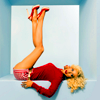
We're going from 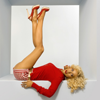
to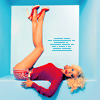
using Photoshop CS.
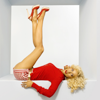
001. Open your picture. Crop/resize it.
002. Duplicate your base. Blend Mode: Screen. Opacity: 45%.
>>
003. Go to Layer >> Adjustment Layer >> Hue/Saturation.
003.1 -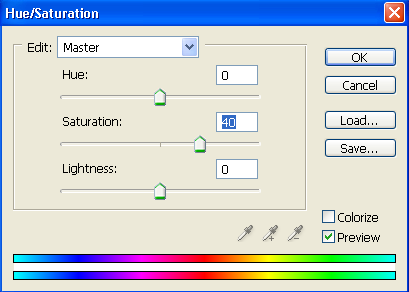
>>
004. Paste this layer (
). Blend Mode: Soft Light. Opacity: 20%.
>>
005. Paste this layer (
). Blend Mode: Color Burn. Opacity: 50%.
>>
006. Go to Layer >> New Adjustment Layer >> Selective Colors.
006.1 -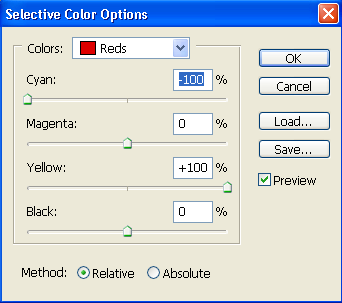
006.2 -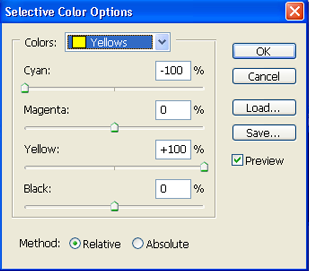
006.3 -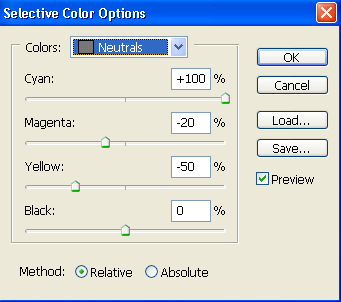
>>
007. Go to Layer >> New Adjustment Layer >> Selective Colors.
007.1 -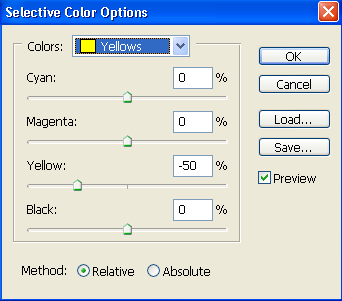
007.2 -
>>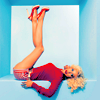
008. Add textures/brushes/text if you want to.
>>
Other Icons made with the same tecnique:


to
using Photoshop CS.
001. Open your picture. Crop/resize it.
002. Duplicate your base. Blend Mode: Screen. Opacity: 45%.
>>
003. Go to Layer >> Adjustment Layer >> Hue/Saturation.
003.1 -
>>
004. Paste this layer (
). Blend Mode: Soft Light. Opacity: 20%.
>>
005. Paste this layer (
). Blend Mode: Color Burn. Opacity: 50%.
>>
006. Go to Layer >> New Adjustment Layer >> Selective Colors.
006.1 -
006.2 -
006.3 -
>>
007. Go to Layer >> New Adjustment Layer >> Selective Colors.
007.1 -
007.2 -
>>
008. Add textures/brushes/text if you want to.
>>
Other Icons made with the same tecnique: