❝ 0092 ❞ → tutorials
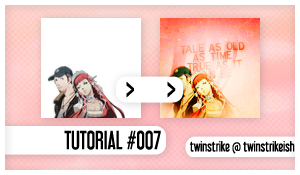
█ Program: Adobe Photoshop CS3
█ Type: Coloring/Composition
█ Difficult: Medium-Hard
█ PSD: No
█ Requested by: stharridan
█ TUTORIAL #007
STEP #001
( here )
( here )
Portrait rips by minrathous
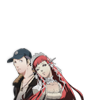
First let's prepare the base. Both images has transparent backgrounds so it'll make things easier here. But if your image has a background extract it with the Polygonal Lasso Tool or if you have a precise Tablet, use the Eraser. Put both subjects together and resize. To make things easier merge both subjects layers. Select both layers and go to Layer - Merge Layers.
STEP #002

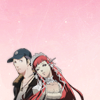
Add this texture by me in a layer under Step #001 merged layer.
STEP #003

Still working under Step #001 layer but above Step #002 layer; add this texture by innocent_lexys and rotate it. Now go to Image - Adjustments - Hue/Saturation. Check "Colorize" and change the Hue to 300-340 and Saturation to 60-80. Set this Layer to Multiply.
STEP #004

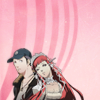
Now add a text still under Step #001 layer. Alignment - Center, Color - ee7a8c and Font - Roadway.

STEP #005

Still working on the Text Layer go to Layer - Layer Style - Drop Shadow. Pick Black for the Shadow Color. Set the Blend Mode to Multiply and Opacity 30%. Angle - 120º Distance - 1px, Spread - 0% and Size - 4px.

STEP #006

Now rotate your Text Layer and Set the Opacity to 61%

STEP #007

Now let's work above Step #001 layer. Add this texture again above Step #001 layer. Set it to Lighten and erase the parts covering the subjects and the text.

STEP #008

New Fill Layer - Gradient Fill
Pick a White - to - Black gradient. Style - Radial, Angle - 90º. Set this Layer to Soft Light, Opacity 81%.

STEP #009

New Adjustment Layer - Color Balance
Shadows - +13, +13, +3
Midtones - +31, +5, +8
Highlights - -3, +13, +2

STEP #010

Add a New Layer and Fill it with Black. Set it to Soft Light and erase the bottom half of it.

STEP #011

New Adjustment Layer - Channel Mixer
Red +100, 0, 0
Green 0, +100, 0
Blue -14, 0, +104

STEP #012

New Adjustment Layer - Curves
Add two new points:
1 - Output: 78 Input: 59
2 - Output: 220 Input: 115

STEP #013

New Adjustment Layer - Hue/Saturation
Masters
Saturation +42
Set the Opacity of this Layer to 61%

STEP #014

New Adjustment Layer - Brightness/Contrast
Brightness: +27
Contrast: +42
Set the Opacity of this Layer to 46%

STEP #015

New Adjustment Layer - Vibrance
Vibrance: +77

STEP #016

New Adjustment Layer - Selective Color
Reds C -43 M +5 Y -4 K +28
Yellows C -51 M -8 Y 0 K +33
Cyans C +38 M -42 Y 0 K -24
Whites C +75 M 0 Y -54 K +21
Neutrals C +33 M 0 Y +25 K +11
Blacks C -11 M 0 Y +13 K +48
Set the Opacity of this Layer to 75%

STEP #017

New Adjustment Layer - Channel Mixer
Red +110, +10, -6
Green -6, +106, -6
Blue +5, -7, +91
Set the Opacity of this Layer to 44%

OTHERS
EXAMPLES.


█ Program: Adobe Photoshop CS3
█ Type: Coloring/Composition
█ Difficult: Medium-Hard
█ PSD: No
█ Requested by: stharridan
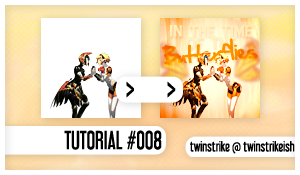
█ TUTORIAL #008
STEP #001
( here )
To prepare your base: Extract the background, crop and resize the image.
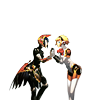
STEP #002

As in Tutorial #007 let's start working under the subject layer. Add this texture by innocent_lexys in a layer under Step #001 layer.

STEP #003

Now above Step #002 layer and still working under Step #001 layer add this texture again by innocent_lexys; Now go to Image - Adjustments - Hue/Saturation. Check "Colorize" and change the Hue to 25-40 and Saturation to 40-50. Set this Layer to Multiply.

STEP #004

Add a text still under Step #001 layer. Alignment - Center, Color - f7d9c2 and Font - Roadway. Still working on the Text Layer go to Layer - Layer Style - Drop Shadow. Pick Black for the Shadow Color. Set the Blend Mode to Multiply and Opacity 30%. Angle - 120º Distance - 1px, Spread - 0% and Size - 4px.

STEP #005

Add a new text still under Step #001 layer nd above Step #004 layer. Alignment - Center, Color - e16708 and Font - Hand of Sean. Still working on the Text Layer go to Layer - Layer Style - Drop Shadow. Pick Black for the Shadow Color. Set the Blend Mode to Multiply and Opacity 30%. Angle - 120º Distance - 1px, Spread - 0% and Size - 4px.

OPTIONAL STEP

I'll put this as a optional step. Above the texts layers but still working under the subjects layer Add a Butterfly Wing stock. I can't remember exactly which one I used because I random searched for butterflies in Google. After adding the wings go to Filter - Blur - Blur More. Set the Opacity of this layer to 44%.

STEP #006

Now to start the work above Step #001 layer. Add this texture by innocent_lexys and set it to Soft Light. Don't forget it's above all layers 'till now.

STEP #007

New Adjustment Layer - Channel Mixer
Red +102, -12, +10
Green 0, +100, 0
Blue -39, +75, +60
Set the Opacity of this layer to 75%

STEP #008

New Adjustment Layer - Selective Color
Neutrals C -3 M 0 Y +20 K 0

STEP #009

New Adjustment Layer - Channel Mixer
Red +105, -1, 0
Green 0, +97, 0
Blue -15, 0, +105

STEP #010

New Adjustment Layer - Selective Color
Reds C -77 M +34 Y +55 K -15
Yellows C -100 M +51 Y +100 K -29
Cyans C +30 M -27 Y -18 K 0
Blues C +100 M +100 Y +75 K +84
Magentas C +30 M +60 Y -42 K -7
Whites C 0 M 0 Y +40 K +2
Set the Opacity of this Layer to 60%

STEP #011

New Adjustment Layer - Color Balance
Shadows - +12, +11, +6
Midtones - -9, +9, +11
Highlights - +82, +8, +51
Set the Opacity of this Layer to 39%

STEP #012

New Adjustment Layer - Color Balance
Shadows - +13, +11, +6
Midtones - +27, +3, +11
Highlights - -10, +8, +2

STEP #013

New Adjustment Layer - Color Balance
Shadows - +20, 0, +5
Midtones - 0, 0, +23
Highlights - 0, 0, +31
Set the Opacity of this Layer to 50%

STEP #014

New Adjustment Layer - Selective Color
Reds C -31 M 0 Y +17 K 0
Yellows C 0 M 0 Y +11 K 0
Cyans C +100 M -100 Y -100 K 0
Blues C +95 M -100 Y -100 K +100
Neutrals C +20 M 0 Y -8 K 0
Set the Opacity of this Layer to 60%

STEP #015

New Adjustment Layer - Channel Mixer
Red +115, -1, -1
Green 0, +100, 0
Blue 0, -7, +115
Set the Opacity of this Layer to 55%

OTHERS
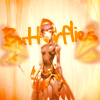
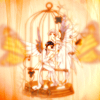
EXAMPLES.



NOTES
█ You can request a tutorial here in my permanent request post.
█ If you try this tutorial please show me the results. I'd love to see it.
█ COMMENTS AND CREDITS ARE LOVE; twinstrike or twinstrikeish
█ RESOURCES ( HERE );
█ REQUESTS? ( HERE );
█ AFFILIATE? ( HERE );
█ UPDATES? LIKE?; ( WATCH ME );