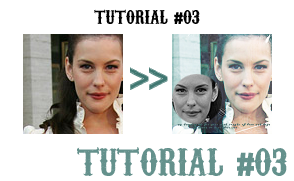
Icon Tutorial # 03

0. Prepare your base by sharpening, blurring, blah blah blah.
1. Duplicate your base twice. Set the middle one to SCREEN 100% and the top one to LIGHTEN 100%. Desaturate the top layer.

>>

2. Create a new layer and fill with # 84dafa. Set this to COLOUR BURN 100%.

>>

3. Take this brush by
sinecure and apply, using white.

>>

4. Take this tiny text brush by
wonderland__. I used # 496c6c cos it's a colour from the background, but you can choose one from your own.

>>

5. This is the 'fun' part; I'll put it in sub-steps:
-Duplicate the desaturated layer and paste it onto a new image.
-Sharpen once.
-Go to Image>Rotate>Flip Horizontally
-Resize the picture to anywhere between 80x80 to 70x70 [I used 80x80, but ti's different for each image].
-Using the Elliptical Marquee Tool, select a part of the image you want to copy and Ctrl+C.
-Go back to your icon and paste [Ctrl+V].
-Move it around until you find a place you like it.

>>

And that's it!
Other icons made by using the same technique:
